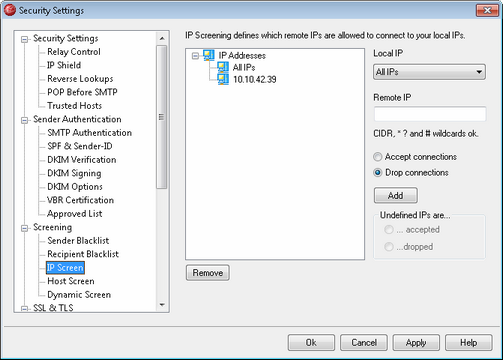
The IP Screen is located at: Security » Security Settings » Screening. The IP Screen is used to define which remote IP addresses will be allowed to connect to your local IP addresses. You may specify a list of IP addresses and configure the server to allow only connections from those on the list, or you can configure it to abort any connection attempt from an IP address on the list. The remote IP addresses you place on the IP Screen can be associated with either all of you local IP addresses or for individual IPs. CIDR notation and the wildcards *, #, and ? are allowed.
For example:
*.*.*.* Matches to any IP address
#.#.#.# Matches to any IP address
192.*.*.* Matches to any IP that begins with 192
192.168.*.239 Matches to IP addresses from 192.168.0.239 to 192.168.255.239
192.168.0.1?? Matches to IP addresses from 192.168.0.100 to 192.168.0.199
Local IP
Choose from the drop-down list either "All IP's" or the local IP to which you wish to apply the screen.
Remote IP
Enter the remote IP address that you wish to add to the list, associated with the Local IP designated above.
Accept connections
Selecting this option means that the specified remote IP addresses will be allowed to connect to the associated local IP address.
Drop connections
Selecting this option means that the specified remote IP addresses will NOT be allowed to connect to the associated local IP address. The connection will be refused or dropped.
Add
When you have finished entering the information in the options above, click this button to add the entry to the list.
Remove
Select an entry and then click this button to remove it from the list.
Undefined IPs are...
...accepted
When this option is chosen, connections from any IP addresses not specifically defined on the IP Screen will be accepted.
...dropped
When this option is chosen, connections from any IP addresses not specifically defined on the IP Screen will be dropped, or refused.
|
The IP Screen will never block trusted IPs or local IPs. |