We’ll employ most of the techniques we’ve learned so far to produce the presenter application, which uses the spoken help system (a semi-Windows-style interface), and we’ll use a fair amount of code from the builder application to activate the hot spots. (Note: This program is intended for Windows 95 only.)
The presenter is an SDI-style system. The interface has a non-Windows standard look and feel, and if you knew the target screen resolution, you could ensure that your interface fills the screen, fully immersing the user in your application.
Start up When the application starts, it displays a splash screen, which contains a common dialog box so that the user can select a database to work with.
(If this were a commercial application, I’d expect some sort of logon screen that would allow the user to connect to and log onto the database.)
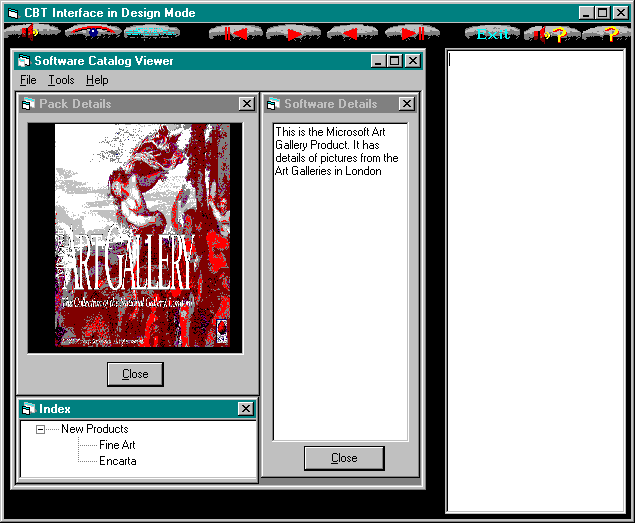
If a database is not selected, the application terminates. This is controlled from a startup Sub_Main procedure in PresCode.Bas. This BAS file contains all of the functions and procedures that handle hot spots, as well as the public variables and Windows API declarations for the application. If the user selects a database, the form frmInterface is loaded. The presenter application at run time is shown in Figure 11-11.
Figure 11-11 The presenter application at run time
The presentation form The FormLoad event for the presenter is pretty simple. It initializes the environment and opens the selected database. The user can then select the project to open from the current database.
Even though the buttons are totally nonstandard, if you hold the cursor over one, the standard ToolTip will pop up, and to help further, a spoken help system is built in. The ToolTips and all of the mouse handling for the toolbar are achieved through the use of an image array, even though the buttons are not rectangular.
I’m using the MouseDown event for this control array to play a click sound and then move the image down by two pixels. This gives the illusion of the button being depressed and is a very resource-friendly method because only one set of bitmaps is loaded for the toolbar.
Private Sub imgTools_MouseDown(Index As Integer, _
    Button As Integer, Shift As Integer, _
    X As Single, Y As Single)
' Play the button click sound...
    Call ActionRun(-1, "X")
'...and move the button down to indicate a click.

    imgTools(Index).Top = imgTools(Index).Top + 2

End Sub
This event plays a click sound by calling a procedure named ActionRun. This is the multimedia player for this application. We’ll look at it in more detail later. For now, we’ll look at the functionality behind each of the buttons. This code resides in a Select Case statement in the imgTools Click event:
Select Case Index
. . .
Case 0: The current sound clip This is the code to play the current sound clip. This is achieved by calling ActionRun with a hot spot ID of -1 to indicate that no hot spot action is required, and a multimedia action of W to play the current WAV file.
. . .
If bPuSpeak Then ' The spoken help system is active.
    Call ActionRun(PLAY_SOUND, "K")
    Exit Sub
End If
' Play the current sound.
Call ActionRun(-1, "W")
The initial If statement in this section of code is repeated in all the case sections. It handles the playing of a spoken help clip by passing the ID set up in the resource file as the hot spot ID and setting the action to K to play the associated spoken help clip. The IDs are set up as constants in the same way as those in the spoken help application and are held in SpeakConst.bas.
Case 1: The current video clip The principle for the current video clip is identical to the one for the current sound clip. As promised earlier, the video is played in its own window, positioned in the center of the screen. The application can be extended to differentiate between video clips, and you can position the viewports for the video clips and then build the rest of the interface around these windows. This technique integrates the video into your interface and is used in quite a few multimedia titles.
. . .
ActionRun -1, "V"
. . .
Case 2: Toggle the text view This button code toggles the text view on and off by expanding and contracting the interface form. Once again, when you know the target resolution, you should be better able to integrate the text into your interface than by using view/hide, load/unload, or toggle on/off, depending on the style that you prefer. With larger screens and higher resolution capabilities, screen real estate is not such an issue, but it can still be a problem that needs considering.
Case 3: Load a project This is the code that loads a project from the currently open database by displaying a Project Open dialog box. In fact, it’s the same Project Open dialog box we used in the builder application. When the user has selected a project from the dialog box, the rest of the interface is initialized. The first section of SQL gets the project details and sets the current sound and video clips to those set up for the project.
At the moment, this is the only way to play the sound and video clips associated with the project. What I’d do in a commercial application is to play either the sound or the video clip at startup, depending on a flag setting in the database. This could then be used as an introduction to your system. The toolbar could then be extended to allow the user to replay the clips at any time. The last thing that this section of code does is to call a procedure named FirstForm, which basically loads the first form in the project. We’ll look at this procedure later on.
Case 4: Next screen This code goes to the next screen in the project, based on the form ID set up in the Calls field for the form. It calls a procedure named NextForm, which is similar to FirstForm.
Case 5: Previous form This code takes us to the previous form in the project, based on the form ID set up in the Called By field. In a manner similar to those already described, it calls a procedure named PrevForm to load the previous form details.
Case 6: Last form This code jumps to the last form in the forms recordset. Provided that you’ve set up all of the calls and Called By fields in the recordset, you’ll find that you can still go to the next and previous forms because the jumps are dependent on the data in the database, rather than on the position of the records in the recordset. This can prove to be a useful technique when you want to process records in an order other than one based on a records position in a recordset or cursor.
Case 7: Exit There’s not really a lot to this one. It exits the application by unloading the form.
Case 8: Spoken help This code activates the spoken help system. This works in exactly the same manner as the spoken help system we saw at the start of this chapter. Again, for a commercial system, I’d probably create a special video window and use a mix of spoken and video help for the user.
Case 9: Windows help This is the area where you’d code the links to your Windows help system, although none has been coded for the demonstration application. In a commercial version of the application, you may face a bit of a dilemma here: Do you load help for the application that you are demonstrating or help for the CBT system? I’ll leave you to decide for yourself.
The other events If you look at the code for the application on the CD, you’ll see that the Click events for all of the controls on the interface have been coded. This handles the playing of the spoken help system except for picVideo, which hides picVideo and shows picImage. This is done to hide the bitmap that’s loaded in a hot spot action.
The form handling procedures All of the procedures for loading the forms are similar, so we’ll look at the most complex, FirstForm:
Private Sub FirstForm()
' Loads the first form in a project, and sets up the form details.
Dim sSQL As String

    ' Set up the Form recordset.
    ' All forms in the project.
    sSQL = ""
    sSQL = sSQL & " SELECT * "
    sSQL = sSQL & " FROM"
    sSQL = sSQL & " Form"
    sSQL = sSQL & " WHERE"
    sSQL = sSQL & "     Form.ProjID = '" & sPuCurrProject & "'"
    sSQL = sSQL & " AND Form.Version = '" & sPuCurrVers & "'"

    Set rsPuCurrForm = dbPuProj.OpenRecordset(sSQL, _
        dbOpenSnapshot)
    ' Set to the first form.
    rsPuCurrForm.MoveFirst

    ' Get the image details and load into the picture box.
    sPuImageFile = App.Path & "\AppFig\" & _
        rsPuCurrForm!Screenshot
    picImage.Picture = LoadPicture(sPuImageFile)

    ' Now load all of the hot spots for the current form.
    Call ImageSetUp

    ' Load the default text.
    Call TextLoad

End Sub
The initial section creates a recordset of all of the forms in the project. This is the recordset that’s used by the other form procedures to determine the next, previous, and last forms to get the requested form in the link. Having found the required record (in this case, the first in the recordset), the image is loaded into picImage, the hot spots are set up by calling ImageSetUp, and the associated text is loaded by calling TextLoad.
ImageSetUp This procedure is similar to the Form_Load event code for frmImage in the builder application, so we won’t go through the code here. It builds a hot spot recordset to get the hot spots for the form and then goes through the hot spot points building the polygons in memory. Because this is the presenter application, the brush icon that we saw in the builder is not used to show where the hot spots are. Instead, when the user is over a hot spot, the mouse pointer changes to the pointing finger shape we first saw in the irregular hot spot project.
TextLoad This procedure sets up the form text recordset and loads the text from the first record into the Rich Text Format (RTF) text box.
Private Sub TextLoad()
' Load the text from the newly loaded form.
Dim rsText As Recordset ' FormText recordset
Dim sSQL As String
    . . .
    'SQL to load the text
    . . .
    Set rsText = dbPuProj.OpenRecordset(sSQL, dbOpenSnapshot)
    ' Set to the first form.
    rsText.MoveFirst

    rtfDesc.Text = rsText!formtext

End Sub
As previously mentioned, there is no means of loading any but the text from the first record from within the demonstration application. In a commercial application, there would be facilities to load the different sections of text either by clicking a hot spot or perhaps by using a TreeView control built into the interface. Once again, how this is handled will depend on the target environment and the type of user interface that you opt for.
PresCode.Bas The rest of the code for the presenter resides in PresCode.Bas. The majority of the procedures are copied from the projects that we’ve developed so far, so we’ll look only at new or significant code here. In fact, the only procedure that bears close scrutiny is ActionRun. This is used to handle all of the multimedia clips and all of the hot spot actions. (Apologies for the long listing, but this is the core of the presenter.)
Public Sub ActionRun(ByVal HotSpotID As Integer, _
    Optional ByVal Action As Variant)
' This procedure runs the multimedia details requested. If
' Action is specified, the action is on the current
' details or a request for spoken help; otherwise, the action
' associated with the hot spot is run.
' Valid Actions are:-
    ' W - Play current sound clip.
    ' V - Play current video.
    ' K - Spoken help clip.
    ' H - Hot spot action.
    ' X - Play click sound for button press.

Dim lReturn     As Long ' The return details from the MCI
Dim sMCIReturn  As String * 128 ' MCI return string
Dim sPlayAction As String * 1 ' Actual action required
Dim nPos        As Integer ' Index position of string
Dim nStart      As Integer ' Start position for the string
Dim sReturn     As String * 128 ' Return string from MCI
Dim nWidth      As Integer ' Width of video clip
Dim nHeight     As Integer ' Height of video clip
Dim nFileNo     As Integer ' File number
Dim sLine       As String ' Text line

Static bAviOpen As Boolean ' Is AVI playing?
Static bWavOpen As Boolean ' Is WAV playing?

    If HotSpotID = -1 Then Exit Sub ' Not on a hot spot

    If IsEmpty(Action) Or Action = "H" Then
        ' Now find the hot spot record.
        rsPuCurrHotSpot.FindFirst "HotSpotID = " & HotSpotID

        If IsNull(rsPuCurrHotSpot!Action) Then
            MsgBox "No details are set up for " & _
                "this object", vbInformation
            Exit Sub
        End If
        sPlayAction = rsPuCurrHotSpot!Action
    Else
        sPlayAction = Action
    End If

    ' Now undertake the required multimedia action. The following code
    ' selects the type of call to the MCI depending on the action
    ' retrieved or the action specified.

    Select Case sPlayAction

    ' WAV files
    Case "P", "W", "K", "X"
        ' If a WAV file is open...
        If bWavOpen Then
            ' Stop it, and close it.
            lReturn = WinmciSendString("Stop WaveFile", _
                "", 0, 0)
            lReturn = WinmciSendString("Close WaveFile", _
                "", 0, 0)
        End If

        ' Set the WAV file open flag to True.
        bWavOpen = True

        ' Open it.
        If sPlayAction = "X" Then ' Play click.
            lReturn = WinmciSendString("Open " & App.Path & _
                CLICK_SOUND & " alias WaveFile type WaveAudio", _
                "", 0, 0)
        ElseIf sPlayAction = "P" Then ' Hot spot play.
            lReturn = WinmciSendString("Open " & App.Path & _
                "\AppWav\" & rsPuCurrHotSpot!ActionFile & _
                " alias WaveFile type WaveAudio", "", 0, 0)
            ' Set it to the current clip.
            sPuCurrSound = App.Path & "\AppWav\" & _
                rsPuCurrHotSpot!ActionFile
        ElseIf sPlayAction = "W" Then ' Play current sound clip.
            lReturn = WinmciSendString("Open " & sPuCurrSound & _
                " alias WaveFile type WaveAudio", "", 0, 0)
        ElseIf sPlayAction = "K" Then ' Spoken help clip
            lReturn = WinmciSendString("Open " & App.Path & _
                LoadResString(HotSpotID) & _
                " alias WaveFile type WaveAudio", "", 0, 0)
            bPuSpeak = False ' Turn spoken help off.
            Screen.MousePointer = 0 ' Reset the mouse pointer.

        End If
        ' Play it (NoWAIT).
        lReturn = WinmciSendString("Play WaveFile", "", 0, 0)

    ' AVI files
    Case "R", "V"

    ' If an AVI file is open...
        If bAviOpen Then
            ' Stop it, and close it.
            lReturn = WinmciSendString("Stop AviFile", "", 0, 0)
            lReturn = WinmciSendString("Close AviFile", "", 0, 0)
        End If

        ' Set the AVI file open flag.
        bAviOpen = True

        ' Open it.
        If sPlayAction = "R" Then ' Hot spot play video.
            lReturn = WinmciSendString("Open " & App.Path & _
                "\AppAvi\" & rsPuCurrHotspot!ActionFile & _
                " alias AviFile type AviVideo", "", 0, 0)
            ' Set it to the current clip.
            sPuCurrVideo = App.Path & "\AppAvi\" & _
                rsPuCurrHotSpot!ActionFile
        Else
             lReturn = WinmciSendString("Open " & sPuCurrVideo & _
                 " alias AviFile type AviVideo", "", 0, 0)
        End If

        ' Set the picture box as the output window for the
        ' video clip.
        lReturn = WinmciSendString("Window AviFile handle " & _
                Str$(frmInterface.picVideo.hWnd), "", 0, 0)

        ' Now get the dimensions for the video clip. It returns
        ' a space-separated string of Left Top Width Height for
        ' the video clip.
        lReturn = WinmciSendString("Where AviFile destination", _
            ByVal sReturn, Len(sReturn) - 1, 0)

        nStart = InStr(sReturn, " ")  ' Left Position
        nPos = InStr(nStart + 1, sReturn, " ")  ' Top position
        nStart = InStr(nPos + 1, sReturn, " ") ' Start of width

        ' Now set up the two integers...
        nWidth = Val(Mid(sReturn, nPos, nStart - nPos))
        nHeight = Val(Mid(sReturn, nStart + 1))

        ' ...and alter the size of the picture box.
        frmInterface.picVideo.Width = nWidth
        frmInterface.picVideo.Height = nHeight
        frmInterface.picImage.Visible = False
        frmInterface.picVideo.Visible = True

        ' Finally play it, wait for it to finish, and then close.
        lReturn = WinmciSendString("Play AviFile wait ", "", 0, 0)
        lReturn = WinmciSendString("Close AviFile", "", 0, 0)

        ' Then reshow the image.
        frmInterface.picImage.Visible = True
        frmInterface.picVideo.Visible = False

    Case "S" ' BMP
        frmInterface.picVideo.Picture = LoadPicture(App.Path & _
            "\AppFig\" & rsPuCurrHotSpot!ActionFile)

        frmInterface.picImage.Visible = False
        frmInterface.picVideo.Visible = True

    Case "T" ' Text
        ' Open the file.
        nFileNo = FreeFile
        Open App.Path & "\Apptxt\" & _
            rsPuCurrHotSpot!ActionFile For Input As #nFileNo
        frmInterface.rtfDesc.Text = ""
        ' Read the records and load into RTF text box.
        Do While Not EOF(nFileNo)
            Line Input #nFileNo, sLine
            frmInterface.rtfDesc.Text = _
                frmInterface.rtfDesc.Text & sLine & vbCrLf
        Loop
        Close #nFileNo

    Case Else ' No action set up
        MsgBox "There is no associated action for " & _
            "hot spot number " & Val(HotspotID)

    End Select

End Sub
The valid actions that can be passed are W to play the current WAV file, V to play the current video clip, K to play the spoken help WAV file, H to trigger the hot spot action, and X to play a click sound for a button depression.
The first piece of code checks to see which action parameter was passed. In a commercial application, you could check to see that the parameter is valid. If the action is H, the hot spot record is accessed, and the hot spot action is determined. If an action has not been set up, a message is displayed to the user.
The select case to determine the type of file to play has been extended to handle the different types of file, but at the core we are still using the MCI command strings that we’ve seen in previous projects.
Case P, W, K, X: Playing WAV files Each of the four different actions results in a different way of opening a WAV file.
This demonstrates four different methods that can be used to link multimedia files to your applications. The alias for the filename now proves to be very useful because no matter which method is employed to open the WAV file, its name is aliased as WaveFile for all subsequent MCI actions. The last line in this section plays the open WAV file with a nowait setting so that the application does not wait for the WAV file to finish playing before resuming.
Case R, V: Playing AVI files Two actions are associated with playing an AVI file: R is the hot spot action and uses the details from the hot spot record, and V plays the current video clip using sCurrVideo. As promised, we are going to play the video in our own custom window, which is the picVideo picture box. The MCI command that we use is Window, followed by the filename, followed by an argument of the Windows handle for the window that we want to use. Having set the destination window, we need to set its dimensions because not all AVI clips are the same size. The MCI call to get the dimensions is a little different. We’ll need to use a return string for the second parameter and determine its size for the third. The actual MCI command string is Where, followed by the filename (or the alias), followed by an argument of destination. The return string will contain the left, top, width, and height details, each separated from the others by a space. The width and height details are extracted, and picVideo is set to the new dimensions before picVideo is brought into view and the video clip is played.
Case B: Showing bitmaps In some cases, an illustration may need to be displayed. This is a hot spot action only, and in the demo application, it also uses picVideo to display the image. This is the reason why the Click event of picVideo is coded to hide it and to show picImage. Once again, if you know the target environment, you can build a separate window into the interface to show illustrations and handle the displaying and hiding on the toolbar.