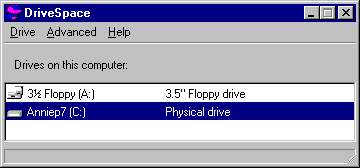
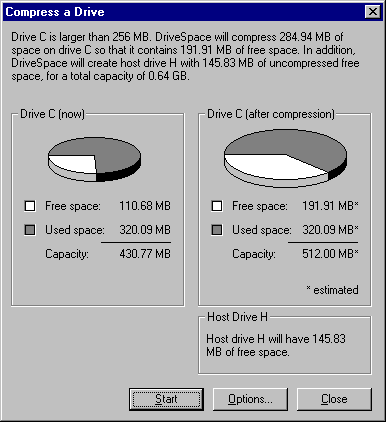
The Compress A Drive dialog box appears, listing the drive it is about to compress.
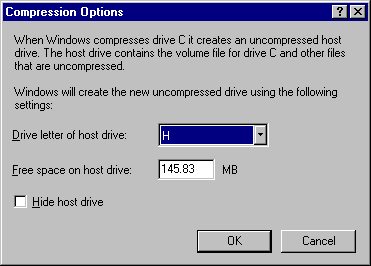
Note By default, DriveSpace hides the host drive if the amount of free space is less than 2 MB.
Using DriveSpace, you can compress and uncompress data on floppy disks, removable media, or hard disk drives. DriveSpace frees space on disks by compressing the data or space the disks contain. The first time you use DriveSpace to compress data or space on a drive, the disk will have 50 to 100 percent more free space than it did before.
You can use a compressed drive just as you did before compressing it. In addition, DriveSpace creates a new uncompressed drive, called the host drive, where it stores the CVF. If the host drive contains any free space in addition to the CVF, you can also use it to store files that must remain uncompressed.
Note
The version of DriveSpace included with Windows 95 can create a compressed drive of up to 512 MB. If your disk is very large, you might not be able to compress it as a single volume.
The version of DriveSpace available in Microsoft Plus! for Windows 95 can create a compressed drive of up to 2 GB, as described in "Microsoft Plus! Utilities for Disk Management" later in this chapter.
You can also create a new compressed drive from the free space on an uncompressed drive that is part of a nonremovable hard disk. After compression, you'll notice that the uncompressed drive contains less free space than it did before. This space is now being used by the new compressed drive, which is stored in a hidden file with a filename such as DBLSPACE.001.
Consider this scenario: suppose you have a 200 MB hard disk with 100 MB of data on it. Uncompressed, this disk has 100 MB of free space. You can increase the amount of disk space in either of two ways:
Although the option to compress a drive provides more usable space, the process takes longer than creating a new compressed drive because DriveSpace has to compress the data on the drive.
The Registry can reside on compressed drives that were created by "preload" compression software such as Stacker 4.0, DoubleSpace, DriveSpace, and AddStor® SuperStor™/DS.
The swap file can reside on a compressed drive if a protected-mode driver (that is, DRVSPACE.VXD) controls the compressed drive. DriveSpace marks the swap file as uncompressible and, to reduce the amount of fragmentation, places the swap file as the last file in the CVF. Placing the file there also allows the swap file to expand.
If you want to change the size of the drive and if DriveSpace or a defragmentation utility detects a swap file at the end of the sector heap, you will be prompted to restart the computer.
If your swap file is on a compressed drive created by a real-mode compression drive, you should move the swap file to another drive, such as the host drive. For information about changing the location of your swap file, see Chapter 17, "Performance Tuning."
Important Before you use DriveSpace to compress a drive, you should back up the files the drive contains.

The Compress A Drive dialog box appears, listing the drive it is about to compress.


Note By default, DriveSpace hides the host drive if the amount of free space is less than 2 MB.
DriveSpace checks the drive for disk errors, and then it compresses the drive. This process can take from several minutes to several hours, depending on the speed of the hard disk and processor and on the amount of data the hard disk contains. Because DriveSpace checks and rechecks the validity of the data as it compresses files, the process is very safe. In fact, if the compression process is interrupted accidentally (for example, by a power outage), DriveSpace will recover and continue without losing any data.
If any files are open on the drive, DriveSpace will prompt you to close them. For drives that always have files opened (such as the drive containing Windows 95 or the drive containing a swap file), DriveSpace will restart the computer and use a limited version of Windows in place of Windows 95 while it compresses the drive. To do this, a directory named FAILSAVE.DRV is created that contains the system files required for this operation. After compression, your computer will restart again, this time with Windows 95. When the compression is completed, DriveSpace shows how much free space is available on the drive.
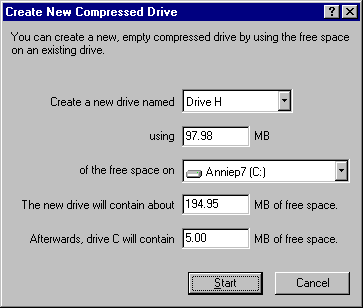
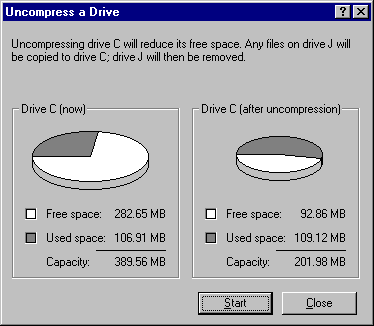
If there isn't enough space on the host drive to contain the uncompressed files, DriveSpace displays a warning. Otherwise, DriveSpace prompts you to back up files and shows the status of the process as it progresses.
Note If you try to change the size of a drive that was mounted with a real-mode DriveSpace or DoubleSpace driver, you will be prompted to restart the computer so that the drive can be remounted under Windows 95. This will also occur for other operations using the real-mode DriveSpace driver.
You can use DriveSpace to increase the storage capacity of floppy disks. After compressing a floppy disk, you can use it to store data or to transfer data from one computer to another; both computers must be using Windows 95 DriveSpace or MS-DOS 6.x DoubleSpace.
After DriveSpace finishes compressing the floppy disk, the floppy disk contains more free space than it did before. You can use the floppy disk just as you did before compressing it.
Also, the computer has a new drive letter. This new drive letter represents the compressed floppy disk's host drive, which contains the floppy disk's CVF. Although both the new drive letter and the original drive letter refer to the same physical floppy disk drive, you can use only the original to access the disk drive.
In general, you use a compressed removable disk just as you do an uncompressed floppy disk. By default, DriveSpace automatically mounts a compressed floppy disk when you try to use that disk. This makes it possible to use the disk as if it were an uncompressed floppy disk.
Note Before it is mounted, a compressed floppy disk appears full. If you have disabled automounting, change to the floppy disk drive, and then type dir. The system usually lists only one file: a text file named READTHIS.TXT that briefly explains how to mount the floppy disk. The dir command usually reports that the floppy disk contains no free space because all the space is used by the CVF. The CVF is a file, usually named DBLSPACE.000, with hidden, read-only, and system attributes.
If automounting is disabled, you can still use compressed floppy disks, but you must mount them yourself.
A message appears when the disk has been mounted.
The compressed floppy disk remains mounted and the files on it remain available until you change floppy disks or restart the computer.
On an uncompressed drive, free space indicates how much additional data you can store on that drive. For example, if a drive has 2 MB of free space, you can expect to fit 2 MB of data on it. However, the free space on a compressed drive is only an estimate of how much data you can fit on that drive.
When you store a file on a compressed drive, DriveSpace compresses the file so that it takes up as little space as possible. Some files can be compressed more than others; for example, a bitmap file can be compressed much more than a program file. DriveSpace cannot detect the compressibility of files you haven't stored yet, so it only estimates a compressed drive's free space.
DriveSpace estimates a drive's free space by using the estimated compression ratio, which you can set to specify the compressibility of the files you plan to store. For example, if the estimated compression ratio is 3 to 1, DriveSpace calculates the drive's free space based on the assumption that each file to be stored can be compressed to one-third its original size.
Usually, the best compression estimate to use is the actual compression ratio for the files already stored on the drive. Sometimes you might want to reset the estimated compression ratio of each drive to match that drive's actual compression ratio.
You might want to change the estimated compression ratio if it differs greatly from the actual compressibility of the files to be stored. For example, if you plan to store extremely compressible files, such as bitmap files, you might want to specify a higher estimated compression ratio.
Changing a drive's estimated compression ratio does not affect how much DriveSpace actually compresses the files on that drive; it changes only the way DriveSpace estimates the free space on the compressed drive.
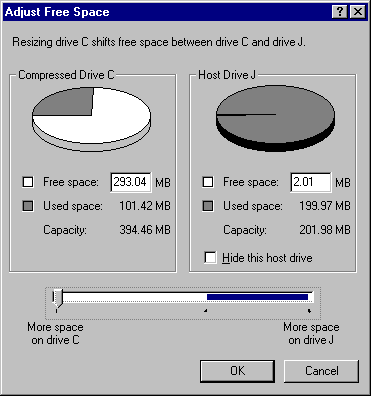
You can also adjust the amount of free space for a compressed drive or its host drive. This is equivalent to changing the size of the compressed drive and its CVF. When you increase free space on a compressed drive, you decrease it on its host, and vice versa.
Tip
If the free space is highly fragmented, the usable free space might be less than what DriveSpace estimates. In some cases, you might not be able to store files on that drive, even though there appears to be plenty of space. To avoid this problem, run Disk Defragmenter regularly on compressed drives.