Naming an edit box "ChartDataRange" makes code is much more readable compared to Excel's default control names, which look something like "EditBox12". Assign custom names to controls by selecting the control in the dialog editor, then clicking in the range name drop-down. Type in any friendly name, as long as it adheres to VBA syntax rules. After typing the name, be sure to press return to get Excel to assign it to the control.
A caution is in order here. After changing the name of a dialog box control, be sure to use quotes around the name when referring to it through a collection object. Excel will accept a name without the quotesbut Excel uses an un-quoted name as a reference to a variable! If the variable is unassigned, Excel will think it is item zero of the collection. In this situation some very frustrating errors can happen, such as "EditBoxes method of DialogSheet class failed."
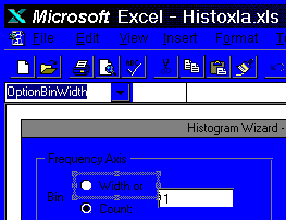
Range Name Drop-Down, also used for entering control names.
Figure 3. Using the Range Name Drop-Down to define maintainable control names
Here's an example. To display a range address in an edit box called RangeEdit:
Do this:
DialogSheets("Wiz1").EditBoxes("RangeEdit").Caption = DataRange.Address
' or...
Dim REdit As String
REdit = "RangeEdit"
DialogSheets("Wiz1").EditBoxes(REdit).Caption = DataRange.Address
But don't do this:
'Assuming RangeEdit is not a declared variable, this won't work!
DialogSheets("Wiz1").EditBoxes(RangeEdit).Caption = DataRange.Address
Expressions also accept control names placed inside square brackets:
DialogSheets("Wiz1").[RangeEdit].Caption = DataRange.Address
Spaces are permitted in control names to make them more readable.