by Stuart Vessels
Spelling errors and typos can damage the professional integrity of any report. Although Excel's spell-checker allows you to quickly find and fix most spelling errors, it doesn't find typos, such as a field title that's entered in a case different from other field titles, or a common name, such as john or smith, that's entered in lowercase letters.
Unfortunately, Excel doesn't have a command that converts all text strings in a range to the same case (like Word does). Making the changes yourself can take a lot of time and can leave the door open for embarrassing typos.
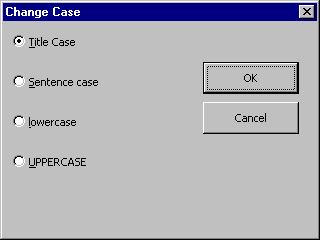
You can save time and trouble by creating your own case-manipulation feature: the custom dialog box shown in Figure A. To change the case of a range of text strings using this feature, simply select that range; press a keyboard combination, such as [Ctrl]y, to display your custom dialog box; and choose the case you want to use by clicking one of the radio buttons. Click OK, and the VBA procedure assigned to this dialog box will convert the case of the text strings in the selected range to the one you specified.

This custom dialog box lets you change the case of a range of text strings.
To build the dialog box shown in Figure A, begin by opening the workbook you want to contain it; we'll use a workbook named Macros.xls. (You can download our sample files from www.cobb.com/adj; click on the Source Code hyperlink and download oct97.zip.) This workbook will have to be open in order for you to use the custom dialog box while another workbook is active.
Now, open the Visual Basic Editor by pressing [Alt][F11]. Choose Insert | User Form; the Editor will open an empty form titled UserForm1. Our Change Case dialog box contains four radio buttons, an OK button, and a Cancel button. To create the radio buttons, click and drag the OptionButton control in the Toolbox onto the empty form; repeat this process three more times. Then, click and drag two CommandButton controls onto the form. The form now looks like the one shown in Figure B; each control displays its default name as its caption.
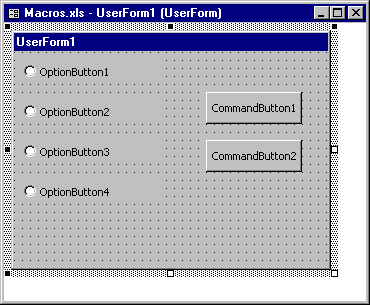
Drag the appropriate controls from the toolbox to the user form.
Table A lists the property values you need to assign to the user form and its six controls. After you do so, resize and move the controls as necessary to make the form look the way you want. If the minimum interval on the form's grid is too small or too large, you can change it by choosing Tools | Options..., clicking the General tab, and specifying new grid unit values in the Width and Height text boxes.
Table A: User form properties
| Control | Name | Property | Setting |
| UserForm1 | ChangeCaseDialogBox | Caption | Change Case |
| OptionButton1 | OptionTitle | Accelerator Caption TabIndex Value |
T Title Case 2 True |
| OptionButton2 | OptionSentence | Accelerator Caption TabIndex |
S Sentence case 3 |
| OptionButton3 | OptionLower | Accelerator Caption TabIndex |
l lowercase 4 |
| OptionButton4 | OptionUpper | Accelerator Caption TabIndex |
u UPPERCASE 5 |
| CommandButton1 | ButtonOK | Caption Default TabIndex |
OK True 0 |
| CommandButton2 | ButtonCancel | Cancel Caption TabIndex |
True Cancel 1 |
Now you're ready to create the click event procedures that will make the OK and Cancel buttons work. You create the VBA code in the user form's module (as opposed to an independent module). Double-click on the form's OK button to open its Click event code window and enter the code shown in Listing A.
Listing A: The OK button's Click event
Private Sub ButtonOK_Click()Application.ScreenUpdating = False'Title CaseIf OptionTitle ThenFor Each Cell In SelectionIf Not Application.IsNonText(Cell.Value) _ThenCell.Value = _StrConv(Cell.Value, vbProperCase)End IfNext CellEnd If'Sentence caseIf OptionSentence ThenFor Each Cell In SelectionIf Not Application.IsNonText(Cell.Value) _ThenEntry = LCase(Cell.Value)FirstChar = UCase(Left(Cell.Value, 1))Cell.Value = FirstChar & Mid(Entry, 2, _Len(Entry) - 1)End IfNext CellEnd If'lowercaseIf OptionLower ThenFor Each Cell In SelectionIf Not Application.IsNonText(Cell.Value) _ThenCell.Value = LCase(Cell.Value)End IfNext CellEnd If'UPPERCASEIf OptionUpper ThenFor Each Cell In SelectionIf Not Application.IsNonText(Cell.Value) _ThenCell.Value = UCase(Cell.Value)End IfNext CellEnd IfUnload ChangeCaseDialogBoxEnd Sub.
Then, return to the form, double-click on the Cancel button, and enter the following line of code in its Click event:
Unload ChangeCaseDialogBoxNow that your dialog box is in working condition, you'll create a simple procedure to display it. You must create this procedure in an independent module, so first choose Insert | Module. Enter the following lines of code:
Sub ChangeCaseOfText()
'Display Change Case dialog box
ChangeCaseDialogBox.Show
End Sub
In the Properties window, assign the module the name ChangeCaseOfText.
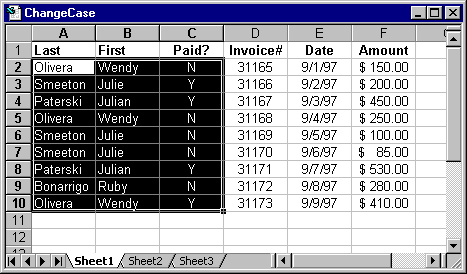
You're now ready to test your dialog box. Switch back to Excel and select a range of text whose case you want to manipulate. For example, Figure C shows a workbook named ChangeCase.xls; we've selected cells A2:C10. To run the procedure that displays the Change Case dialog box, choose Tools | Macro | Macros... or press [Alt][F8]. The Macro dialog box will appear, as shown in Figure D.
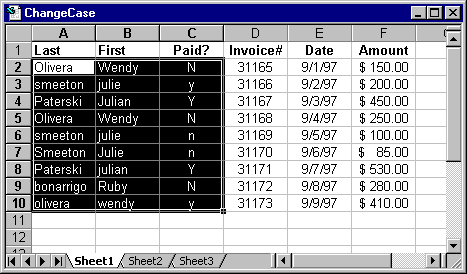
We want to adjust the case of the text strings in this range of cells.
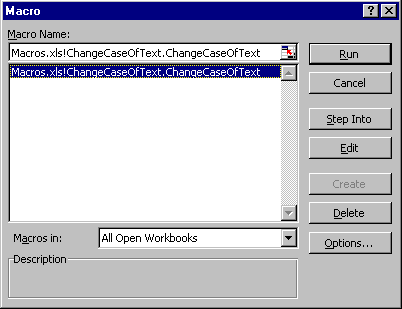
You can run the macro by double-clicking on its name in this dialog box.
Double-click on the macro name, and Excel will display your custom dialog box. Choose a letter case by clicking the corresponding radio button; for example, we selected the Title Case button. Then, click OK. The VBA code will change the case of the text strings in the selected range, as shown in Figure E, and close the dialog box.
The macro made several changes in our worksheet's selected cells.