 To grant user privilege
When you grant privileges to a Windows NT group, you are granting access to SQL Server to each member of that group. You can grant either user privilege or system administrator privilege.
 To grant user privilege

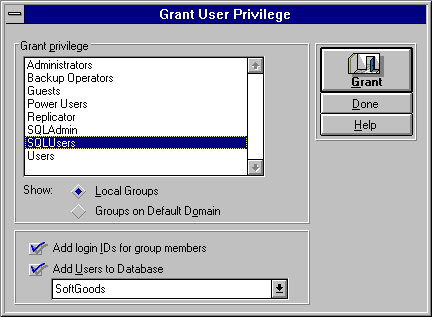
The Grant User Privilege dialog box appears.

To see all local groups on the Windows NT-based computer, choose Local Groups. To see all groups on the default domain, select Groups on Default Domain.
The Add login IDs for individual group members box is selected. This specifies that you want to create SQL Server login IDs for each user in the group.
SQL Security Manager will try to create a SQL Server group in the database that matches the Windows NT group name and will include all of the new database users in that group.
It is recommended that you assign users to a default database other than master, to discourage users from creating database objects in master. If you do not assign users to a default database, master becomes their default database.
 To grant system administrator privilege

The Grant System Administrator Privilege dialog box appears.
To see all local groups on the Windows NT-based computer, choose Local Groups.
To see all groups on the default domain, select Groups in Default Domain.
Note that when you grant system administrator privilege, the Add Login IDs and Add Users to Database boxes are dimmed. This is because when you grant to a group system administrator privilege to SQL Server, the users in the group are automatically mapped to the SA login ID, and master is the default database.
Note If you grant permission to the Domain Users group on the default domain, you will see as domain members all the Windows NT computer accounts (ending in a $), in addition to all the user accounts defined on the domain.
Since computer accounts do not need SQL Server login permissions, it is a better idea to create a separate group on the domain containing only the valid user accounts, and then grant permission to this group.