The Circle method draws a variety of circular and elliptical (oval) shapes. In addition, Circle draws arcs (segments of circles) and pie-shaped wedges. You can produce many kinds of curved lines using variations of the Circle method.
To draw a circle, Visual Basic needs the location of a circle’s center and the length of its radius. The syntax for a perfect circle is:
[object.]Circle [Step](x, y), radius[, color]
The brackets indicate that both object and the Step keyword are optional. If you don’t specify object, the current form is assumed. The x and y arguments are the coordinates of the center, and radius is the radius of the circle. For example, this statement draws a circle with a center at (1200, 1000) and radius of 750:
Circle (1200, 1000), 750
The exact effect of this statement depends on the size and coordinate system of the form. Because the size of the form is unknown, you don’t know if the circle will be visible. Using the drawing area’s scale properties puts the center of the circle at the center of the form:
Circle ((ScaleWidth + ScaleLeft) / 2, (ScaleHeight + _
   ScaleTop) / 2), ScaleWidth / 4
For now, all you need to know about ScaleWidth and ScaleHeight is that they help position graphics in the center of a form.
For More Information "Changing an Object’s Coordinate System" earlier in this chapter discusses the ScaleWidth and ScaleHeight properties in detail.
Note The radius of the circle is always specified in terms of horizontal units. If your coordinate system uses the same horizontal and vertical units (which it does by default), you can ignore this fact. However, if you use a custom scale, horizontal and vertical units may correspond to different distances. In the preceding examples, the radius is specified in horizontal units, and the actual height of the circle is guaranteed to be equal to its actual width.
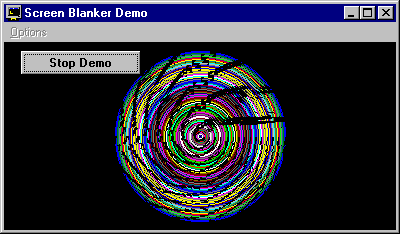
The Blanker application creates circles as part of the Rainbow Rug demo. This demo draws a series of dashed line circles around the center of the form. In time the circles resemble a woven circular rug. The CircleDemo procedure creates the circles in the Rainbow Rug demo with the following statements:
Sub CircleDemo ()
   Dim Radius
' Set Red to a random value.
   R = 255 * Rnd
' Set Green to a random value.
   G = 255 * Rnd
' Set Blue to a random value.
   B = 255 * Rnd
' Set x-coordinate in middle of form.
   XPos = ScaleWidth / 2
' Set y-coordinate in middle of form.
   YPos = ScaleHeight / 2
   ' Set radius between 0 & 50% of form height.
   Radius = ((YPos * 0.9) + 1) * Rnd
   ' Draw the circle using a random color.
   Circle (XPos, YPos), Radius, RGB(R, G, B)
End Sub
The results of the Rainbow Rug demo are shown in Figure 12.16.
Figure 12.16 The Rainbow Rug demo in the Blanker application

To draw arcs with the Circle method, you need to give angle arguments in radians to define the start and the end of the arc. The syntax for drawing an arc is:
[object.]Circle [Step](x, y), radius, [color], start, end[, aspect]
If the start or end argument is negative, Visual Basic draws a line connecting the center of the circle to the negative end point. For example, the following procedure draws a pie with a slice removed.
Private Sub Form_Click ()
   Const PI = 3.14159265
   Circle (3500, 1500), 1000, , –PI / 2, –PI / 3
End Sub
Note The formula for converting from degrees to radians is to multiply degrees by Pi/180.