A grid that is "split" allows the end user to have more than one view on the same data. For example, imagine that you have a large table that consists of ten fields. In this case, the recordset viewed in the DataGrid control will be ten columns wide, and unless your form is very wide, the user will not be able to see more than a few columns. Further, imagine that the user is only interested in the first and last columns (for example, a name in the first column, and phone number in the last). In order to view both columns side-by-side (without having to rearrange the order of the columns), the grid can be split.
At design time, you can create a split by right-clicking the grid, clicking Edit, right-clicking again, and then clicking Split. You can then edit the Split by right-clicking the control and clicking Properties to display the Property Pages dialog box. Use the Splits tab to customize the split. To remove a split, right-click the split and click Remove.
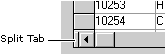
At run time, the end user can also split the grid manually (unless such an operation is disallowed) by clicking the tab located to the right of the grid control's lower left edge, as shown in the figure below:
By default, the DataGrid control contains one Split object. The code to prevent the end user from adding splits is:
DataGrid1.Splits(0).AllowSizing = False
The DataGrid control contains a collection of Split objects. In order to add splits programmatically, use the Add method, as shown below:
DataGrid1.Splits.Add 1
Note The Add method requires the index of the new split as an argument. To append a split, set the index argument to the Count property of the Splits collection.
Using the Split collection's Add method, you can programmatically add splits as you require them. Since adding more than two splits can make the grid hard to use, you may wish to limit the number of splits using the Count property of the collection.
If DataGrid1.Splits.Count < 3 Then ' Append a split.
   DataGrid1.Splits.Add DataGrid1.Splits.Count
End If
When you have more than one split, you may wish to control how the splits scroll. For example, in a grid with three splits, you may decide to synchronize only the first and third splits, while allowing the middle split to scroll independently. To synchronize any two (or more) splits, set the ScrollGroup property of each Split object to the same value.
' Synchronize the first and third Split objects.
With DataGrid1
   .Splits(0).ScrollGroup = 1
.Splits(1).ScrollGroup = 2
.Splits(2).ScrollGroup = 1
End With
You can further customize the appearance of the split by setting the Scrollbars property to display only one scrollbar for the synchronized group.
Using the WrapCellPointer, TabAcrossSplits, and TabAction properties you can determine how the grid will behave when the end user presses the tab or arrow keys.
Of these three properties, the TabAction property is at the highest level as it governs whether or not the WrapCellPointer and the TabAcrossSplits properties have any effect at all. The TabAction has three settings: Control Navigation, Column Navigation, and Grid Navigation. When the property is set to Control Navigation, pressing the tab key switches the focus to the next control in the TabIndex. This setting preempts WrapCellPointer and TabAcrossSplits.
The WrapCellPointer property determines how the tab and arrow keys behave within any single split. If the property is set to True, and the current cell is in the last column, when the end user presses the tab key the next row of the first column will become the current cell. However, if the current cell is in the last column of the last row, there will be nowhere to "wrap" to.
The TabAcrossSplits property determines how the tab and arrow keys behave when there are two or more splits on the grid. If the property is set to True, and the current cell is on the last column of any split but the last, pressing the tab or arrow key will cause the current cell to "jump" to the first column in next split. The current cell will remain in the same row.
Note If both the WrapCellPointer and TabAcrossSplits properties are set to True, the current cell will not wrap until it is on the last column of the last split. It will then wrap to the next row in the first column of the first split.
Every Split object has a Columns property that allows you to manipulate a collection of Column objects. By doing so, you can change the appearance of every Split object. For example, one split may contain two columns showing first and last name fields, while a second split could show telephone and address fields. To accomplish this, hide the other columns by setting the Visible property of each to False, as shown below.
' Enumerate through the Columns collection to test each Column
' object's DataField property. If the test fails, hide the column.
Dim i As Integer

' Hide all but the ProductName column.
For i = 0 To DataGrid1.Splits(0).Columns.Count - 1
   If DataGrid1.Splits(0).Columns(i).DataField <> "ProductName" Then
      DataGrid1.Splits(0).Columns(i).Visible = False
   End If
Next i

' Hide all but the UnitPrice column.
For i = 0 To DataGrid1.Splits(0).Columns.Count - 1
   If DataGrid1.Splits(1).Columns(i).DataField <> "UnitPrice" Then
      DataGrid1.Splits(1).Columns(i).Visible = False
   End If
Next I