When you lay out a page, you design it so that the user can easily scan the page for content, navigation, and orientation. Microsoft® Visual InterDev™ includes a new feature, layouts, which makes it easy to organize your pages into logical regions.
When a layout is applied to a page, the layout:
When you create a Web project, you can choose a default layout for the project.
To set a default layout when creating a Web project
Now, by default, all pages that you create in the Web project will use the default layout.
You can still use layouts if you choose not to use one when creating the project.
To apply or change the default layout of an existing Web project
If you later decide that you don't want to use a layout, you can remove it from the project without affecting the content.
To remove a layout from a Web project
At this point, the layout is no longer applied to the project, but the layout files still exist in the project. If you want to actually remove the files from the project, select the unwanted layout in your project's _Layouts folder and delete it.
You can apply a layout to a single page. If the project that contains the page already has a default layout, the page-level layout overrides the project default.
To apply or change the layout of a single page
If you later decide that you do not want a layout applied to a particular page, you can choose to apply no layout or return to the project default.
To remove a layout from a single page
-or-
Select the Apply option and then <none> from the list.
Preserve Current Layout instructs Visual InterDev to use the project's default layout, while <none> explicitly specifies that there is no layout applied to the page.
Note The Apply Theme and Layout command is disabled when you are working offline.
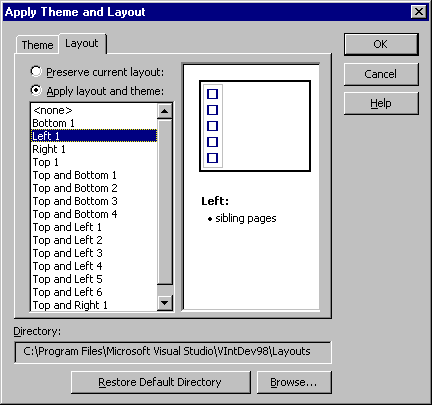
You can browse through the layouts in the Apply Theme and Layout dialog box. Images appear in the dialog box that are representative of the layouts themselves. This preview allows you to see how a layout looks before you apply it to a page or project.
To preview a layout

You can create your own custom layout to meet your own design needs. Layouts are located in the _Layouts directory of a project.
Note If you haven't yet applied a layout to a project or to one of the project files, then the _Layouts folder won't yet exist in your project.
Each Visual InterDev layout is comprised of three files. You can open the files in the editor in order to become more acquainted with their contents. The files serve the following purposes:
| File name | Purpose |
| name.inf | name is the name of the layout. name matches the name of the parent folder. This file contains information about the layout. |
| Layout.htm | This template contains the HTML that is inserted into a page when a layout is applied to the page. |
| Preview.htm | This file is called when the layout is selected in the Apply Theme and Layout dialog box. |
The easiest way to create a custom layout is to copy an existing one and then modify it.
To create a custom layout template
title= line, specify a new title. This is the string that appears in the list of layouts in the Apply Theme and Layout dialog box.Warning Do not modify the run-time text of the Layout design-time controls.
Now Visual InterDev will automatically include your custom layout in the list of available layouts when you display the Apply Theme and Layout dialog box.
For more information on Layouts, see "Layouts" in Site Consistency.