 To add a group
[This is preliminary documentation and subject to change.]
On Windows NT systems, WBEM users can be combined into groups. Groups have access privileges that are granted to all users who are members of the group. For example, if a user has read-only permissions, and belongs to a group with read-write permissions, then the user has read-write permissions.
Note Groups can only be created on Windows NT systems.
To add a group
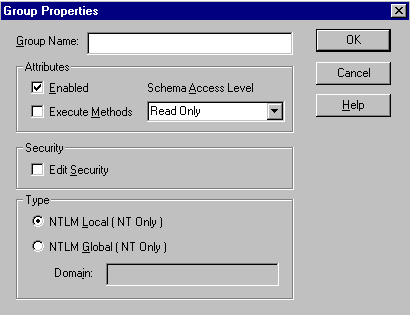
NTLM Local
Creates a local NT group (a group that can be used only in its own workstation or domain).
NTLM Global
Create a domain global group (a group that can be used in its own domain, member servers and workstations of the domain, and trusting domains). You must also specify the domain name.
—or—
Select Exit with changes from the User menu to save the changes and close the WBEM User Manager.
To close the WBEM User Manager without saving the changes, select Exit without changes from the User menu.
You can add members to the newly-created group by using the Windows NT User Manager.