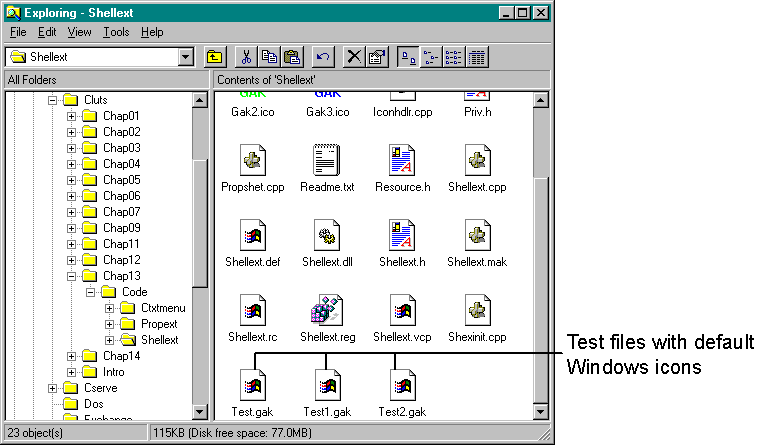
An icon handler allows you to customize the icon that is displayed for a particular type of file. If you create a file whose extension is not registered for a specific icon, the standard Windows icon is associated with the file by default. Figure 13-3 on the next page shows three test files with the default icons.
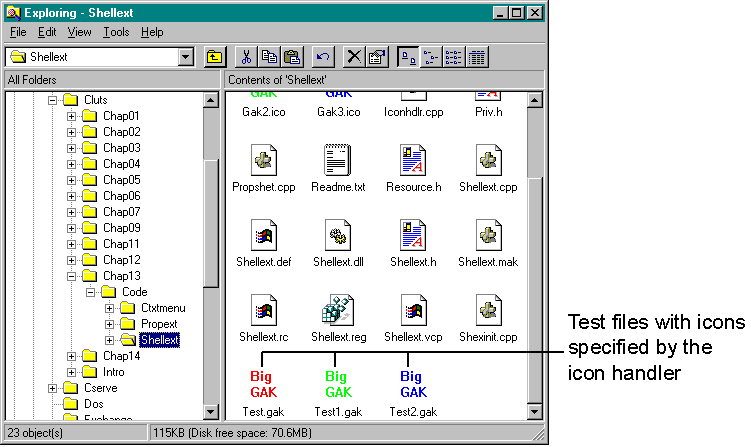
To install the icon handler created by the SHELLEXT sample, copy SHELLEXT.DLL to the \WINDOWS\SYSTEM folder and run SHELLEXT.REG. Then go to Windows Explorer, right-click one of the test files, choose Properties from the context menu, and select a GAK color. Finally, refresh Windows Explorer (by pressing the F5 key) to see the icons for the test files change to the ones that are specified in the handler, as shown in Figure 13-4 on the next page.
Figure 13-3.

Figure 13-4.

If you want to provide an icon for all files of a certain type, you don't need to write an icon handler. Instead, you can simply add the DefaultIcon key for your application to the Registry and set its value to the path of the executable or the DLL containing the icon and the index to the icon:
DefaultIcon = c:\Mydir\Myapp.exe,1
Under Windows 95, you can specify that each file instance of a certain type should have a different icon. To do this, specify %1 as the value for the DefaultIcon key, and then register the icon handler under the shellex\IconHandler key. An application can have only one IconHandler entry.
[HKEY_CLASSES_ROOT\NWCFile\shellex\IconHandler]
@="{<CLSID value>}"