Let's assume you've found a nifty ActiveX control that you want to use in your project. Your first step is to copy the control's DLL to your hard disk. You could put it anywhere, but it's easier to track your ActiveX controls if you put them in one place, such as in the system directory (typically \Windows\System for Microsoft Windows 95 or \Winnt\System32 for Microsoft Windows NT). Copy associated files such as help (HLP) or license (LIC) files to the same directory.
Your next step is to register the control in the Windows Registry. Actually, the ActiveX control registers itself when a client program calls a special exported function. The Windows utility Regsvr32 is a client that accepts the control name on the command line. Regsvr32 is suitable for installation scripts, but another program, RegComp, in the project REGCOMP on the companion CD-ROM for this book, lets you find your control by browsing the disk. Some controls have licensing requirements, which might involve extra entries to the Registry. (See Chapter 15, Chapter 17, Chapter 24, and Chapter 25 for information about how the Windows Registry works.) Licensed controls usually come with setup programs that take care of those details.
After you register your ActiveX control, you must install it in each project that uses it. That doesn't mean that the OCX file gets copied. It means that ClassWizard generates a copy of a C++ class that's specific to the control, and it means that the control shows up in the dialog editor control palette for that project.
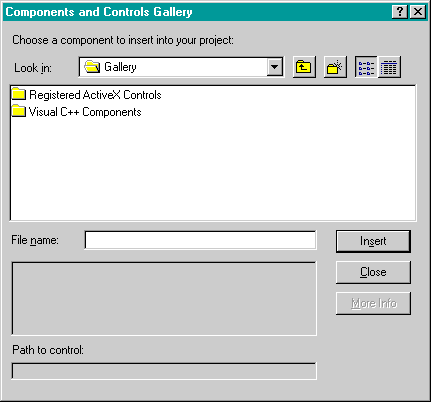
To install an ActiveX control in a project, choose Add To Project from the Project menu and then choose Components And Controls. Select Registered ActiveX Controls, as shown in the following illustration.

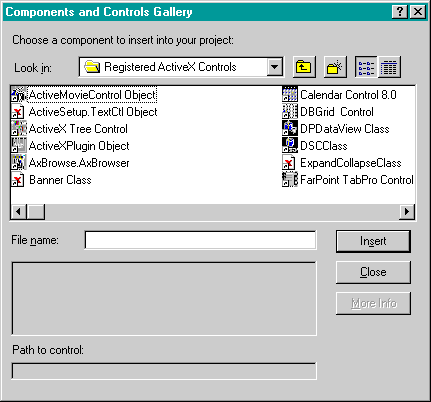
This gets you the list of all the ActiveX controls currently registered on your system. A typical list is shown here.
