


Autodesk 3ds Max Tutorials > Lighting and Rendering >
Rendering with mental ray: Sky Portal and
Exposure Control >
Adding Daylight Illumination
Start by adding daylight illumination to the lounge scene.
Set up the lesson:
The raw scene is set to render with mental ray.
 Activate
the Camera01 viewport, and then on the main toolbar, click Quick
Render.
Activate
the Camera01 viewport, and then on the main toolbar, click Quick
Render.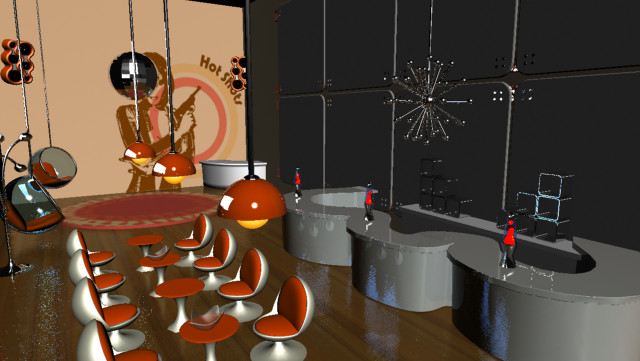
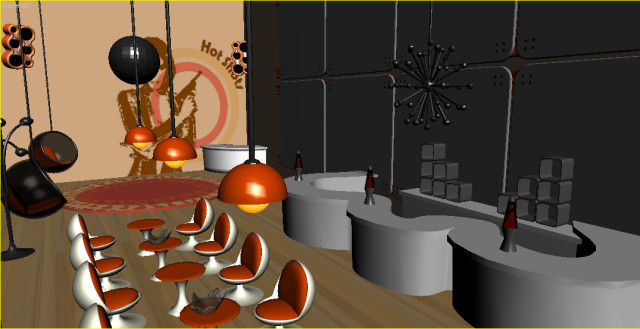
Default lights provide basic illumination and textures and materials have been applied, but the rendered interior appears flat and not very realistic. You need to add daylight to the scene. This will be generated by a daylight system comprising two mental ray photometric light sources:
These two light sources will be accompanied by the mr Physical Sky environment shader, which establishes the physical representation of the sun and sky.
Create the daylight system:

 On the
Create panel, turn on Systems.
On the
Create panel, turn on Systems. On the
Object Type rollout, click Daylight.
On the
Object Type rollout, click Daylight.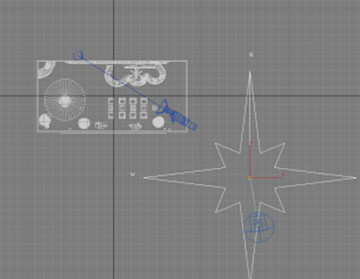
The scene appears very washed out because the illumination has not yet been calibrated to the mental ray renderer.
 Select
the Daylight object you just created, then go to the Modify panel.
Select
the Daylight object you just created, then go to the Modify panel.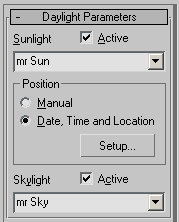
Set the time and location of the light source:
Now you will reposition the Daylight object, or “sun,” so that its position in the sky corresponds to the geographic location of the scene.
3ds Max displays the Motion panel.
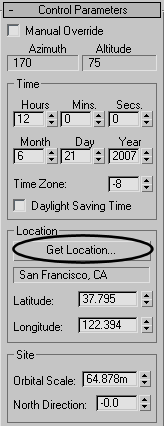
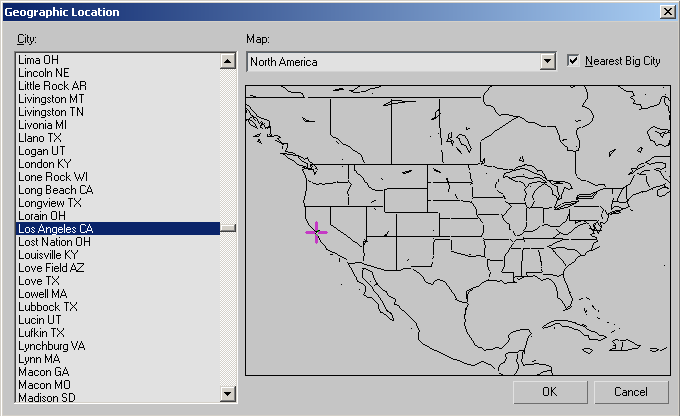
The compass rose and Daylight object are repositioned to scene coordinates that simulate the real-world latitude and longitude of Los Angeles, California.
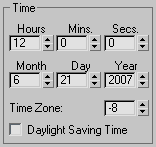
The Control Parameters > Time group contains controls that let you modify the date and time of day, which also affects the sun position. For now, leave these values at their default settings: noon on June 21st, the year’s midpoint.
The scene is now too dark; not enough photons are entering the scene to properly illuminate the interior.