Working with Animation Tracks

Working with Animation Tracks

Using the Limit Controller

Animating a Clock
Form
a Track Set
- Open Watch1.max from the \tutorials\curve_editor directory.
If you get a Units Mismatch warning, choose the option “Adopt the
File’s Unit Scale”.
- Right-click
in the viewport and from the Quad menu, choose Curve Editor.
- Open
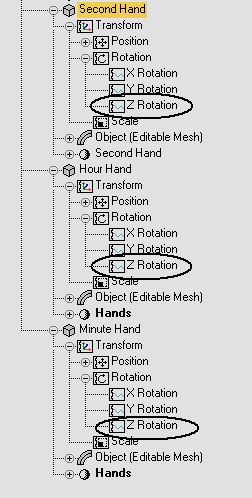
the hierarchy so that the rotation Z-axis tracks for each of the
hands can be seen.
- Press Ctrl and select each of the three
Z Rotation tracks.
- Create
a Track Set by entering Hands in the Track Sets field.
This Track
Set can be recalled to conveniently display the included tracks within
the Curve Editor.
- Close
Curve Editor.
Animate
the Second Hand
The second hand will be animated so that it
rotates one second per frame.
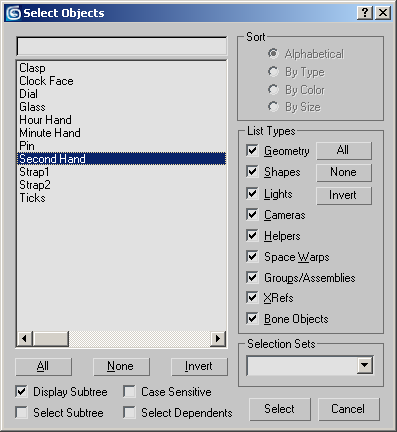
- Press H to open the Select by Name dialog.
- Highlight
the Second Hand in the list and click Select to select it.
- Right-click
and choose Curve Editor from the Quad menu.
- Right-click
in the pane displayed on the left to open the Quad menu.
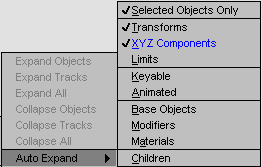
- Within
the Auto Expand sub menu, make sure the following options are active.
These options
display the X, Y, and Z components of the transform tracks.
- Highlight
the Second Hand’s the Z Rotation track.
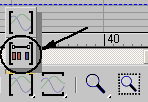
-
 Click
Add Keys.
 - Click
near frame 0 and again near frame 1 to add some keys. Don’t worry about
setting the values exactly at this point. You’ll adjust them in
a moment.
- Right-click
and choose Move Keys from the Quad menu. This cancels Add Keys mode.
- Click
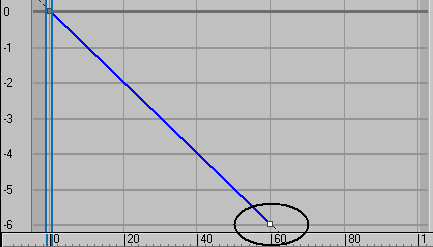
the first key and set its time and value to zero.
- Click
the second key and set its time to 1 and value to –6.
- Close
the Curve Editor.
Set
Key Tangent Type
- Open Watch2.max or continue with your
current file.
- Select
the Second Hand and open Curve Editor.
- Highlight
the Z Rotation track.
-
 Click
Zoom Horizontal Extents Keys.
Click
Zoom Horizontal Extents Keys.NoteIt
is contained within the Zoom Horizontal Extents flyout.
-
 Repeat
the Procedure with the Zoom Value Extents Range (vertical zoom).
Repeat
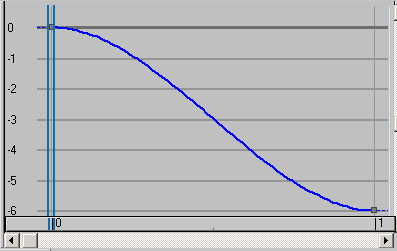
the Procedure with the Zoom Value Extents Range (vertical zoom).The Curve
editor zooms in to show only the range with keys, which in this case
is frame 0 and 1.
The curve
uses the default Auto tangent type. The tangent type should be set
to Step.
- Select
both keys using a window selection.
-
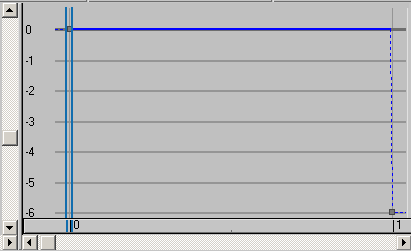
 Click
Set Tangents to Step on the Curve Editor’s toolbar. This retains
a key’s value until the next key frame.
Set
Parameter Curve Out-of-Range Type
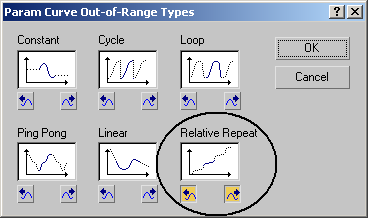
To make the second hand repeat its motion the
Out-of-Range type should be set to Relative Repeat.
-
 Click
Parameter Curve Out-of-Range Type.
 - Click
the Relative Repeat option.
- Click
OK to close the dialog.
- Close
the Curve Editor.
- Play
the animation.
The second hand repeats its motion throughout
the animation range.
Animate
the Minute Hand
The second hand moves in steps, jumping ahead
each second. The minute hand however should move continuously. This
can be accomplished with the linear key tangents.
- Set
the default tangent type to linear.
- Move
the time slider to frame 60.
- Open
the Select by Name dialog and select the minute hand.
-
 Click
Auto Key.
 -
 Click
the Rotation tool.
 - Enter
–6 in the Z transform field and press Enter.
- Turn
off Auto Key.
- Open
the Curve Editor
- Select
the Z Rotation track of the Minute Hand.
-
 Click
Parameter Curve Out-of-Range Type.
 - Set
the Parameter Curve out of Range type to Relative Repeat.
- Close
the Curve Editor.
Play the
animation.
The second and minute hands move correctly.
Next you’ll animate the hour hand.
Copy
Controllers
In this sequence you’ll animate the hour hand
by copying and adjusting the controller from the minute hand.
- Open Watch3.max or continue with your
current file.
- Right-click
in the viewport and select Curve Editor.
- Choose
Hands from the Track Set list.
- Highlight
the Z-Rotation track of the Minute Hand.
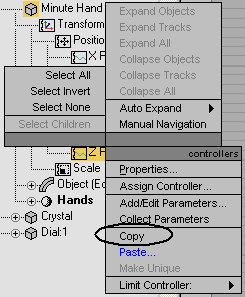
- Right-click
and choose Copy from the Quad Menu.
- Highlight
the Z Rotation track of the Hour Hand.
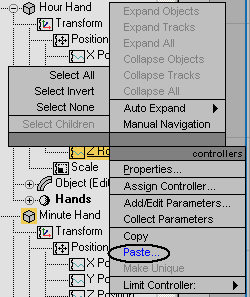
- Right-click
and choose Paste from the menu.
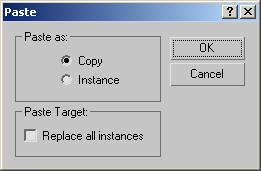
- Choose
Copy from the dialog.
- Make
sure the Z Rotation track of the Hour Hand is the only highlighted track.
- Select
the second key of the Hour Hands Z Rotation track.
- Adjust
the value at frame 60 from –6 to –0.5.
- Close
the Curve Editor.
Play the
animation.
Although the hour hand is animated you can’t
see it move until the animation time is extended.
Extend
the Animation Time
- Open
the time configuration dialog.
- Set
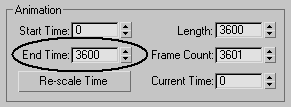
the end time to 3600.
- Click
OK to close the time configuration dialog.
- Drag
the time slider to view the animation. One hour elapses over the course
of the animation.
Summary
In this tutorial, you learned how to animate
the second, minute and hour hands of a clock. You also learned how
to create keyframes in a variety of ways and prepare a set of animation
tracks for later recall.

 Click
Add Keys.


 Click
Zoom Horizontal Extents Keys.
 Repeat
the Procedure with the Zoom Value Extents Range (vertical zoom).
 Click
Set Tangents to Step on the Curve Editor’s toolbar. This retains
a key’s value until the next key frame.
 Click
Parameter Curve Out-of-Range Type.
 Click
Auto Key.
 Click
the Rotation tool.
 Click
Parameter Curve Out-of-Range Type.