- Load tutorial_8.max from
your \tutorials\cloth folder.
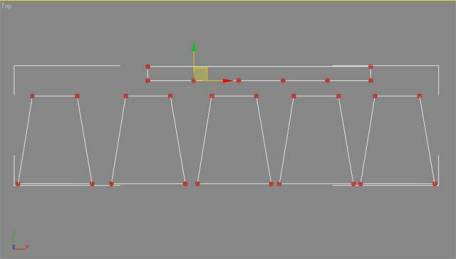
This scene contains a mannequin figure and a
pattern for a pleated skirt. This skirt has been broken into several
sections for a pleated look when it gets sewn together.
- Select
the Skirt object.
This pattern object contains five sections that
will have pleats between them. You'll connect the five sections
to the five segments on the bottom of the waistband portion of the
dress.
- Apply
the Garment Maker modifier to the Skirt object.
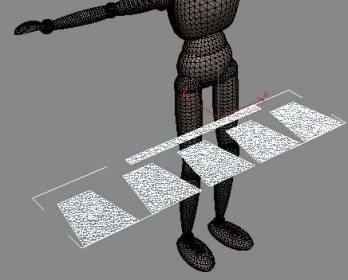
Next you'll position and rotate the pattern
into place at the Panels sub-object level of Garment Maker.
- Go
to Panels sub-object level and then position and rotate the waistband portion
of the pattern near the character's waist.
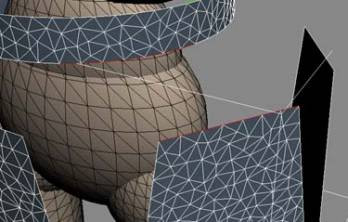
- In
the Panels rollout > Deformation group, choose Curved. Enter
a Curvature value of –1.7 around the X-axis.
This bends the waistband portion of the skirt
around the character's waist.
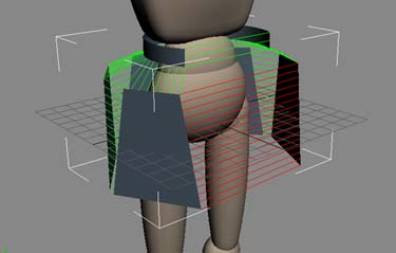
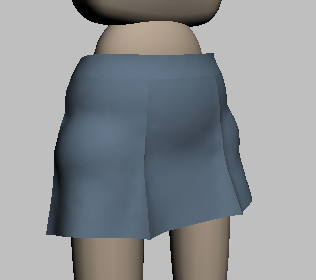
- Move
and rotate the skirt panels so they encircle the character, as shown below.
Take your time and rotate the view around the character to get a better
sense of where the panels are in relation to one another.
Once the panels are in place you can make seams
to attach each panel to the waistband.
- At
the Seams sub-object level of Garment Maker, select a segment on
the bottom edge on the waistband and the corresponding edge on the
top of a skirt panel.
- On
the Seams rollout click Create Seam.
- Attach
the remaining panels to the waistband with additional seams.
- Create
a seam for the back of the waistband to close it off.
Each adjacent pair of skirt panels need a seam
between them to keep them together and define a pleat.
- Select
the edges of the two back panels to create a seam between them and then
click Create Seam.
- With
this seam still selected, go to the Seams rollout and change Crease Angle
to 90.0 and Crease Strength to 25.0.
Setting Crease Angle to 90 makes the seam try
to achieve a 90-degree angle during simulation. The Crease Strength
setting defines how hard the seam will try to reach the set crease
angle. All of this happens during simulation when Use Sewing Springs
is off.
- Repeat
steps 11 and 12 with each pair of adjacent panels in the skirt.
- Exit
the sub-object level, then apply the Cloth modifier to the Skirt
object.
- On
the Object rollout, click Object Properties.
- In
the Object Properties dialog, highlight the Skirt entry
in the Objects In Simulation list, then choose the Cloth option
to designate the skirt as a cloth object.
- From
the Presets drop-down list, choose Cotton.
- Click
the Add Objects button and add Manny to the
simulation. Choose the Collision Object radio button to designate
the mannequin as a collision object. Click OK to exit the dialog.
Now it's time to simulate and see how the dress
looks.
- On
the Simulation Parameters rollout, turn Gravity off and make sure
Use Sewing Springs is on. On the Object rollout, click Simulate
Local (Damped) and let the sewing springs pull the skirt together
for a few seconds. Press the ESC key
to stop the simulation.
- On
the Simulation Parameters rollout, turn off Use Sewing Springs and turn
on Gravity.
- Run
the local simulation again to snap the seams together and to define the
pleats. When you are satisfied with how the skirt looks, press the ESC key to halt the simulation.