Final gather shoots rays into the scene. For each pixel (surface point on the geometry like walls) it shoots many rays into the scene. It measures the brightness of the rays to compute how much light gets to a given surface point.
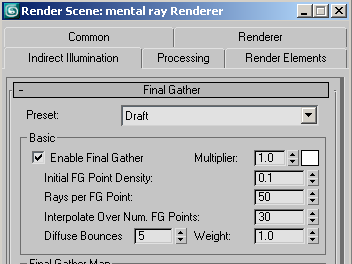
Set up final gather:
The scene is set to render with mental ray.
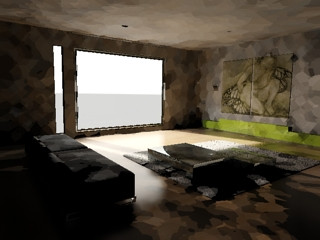
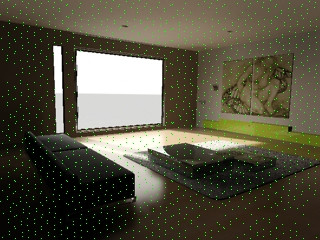
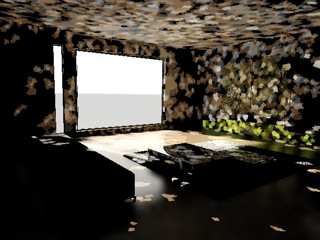
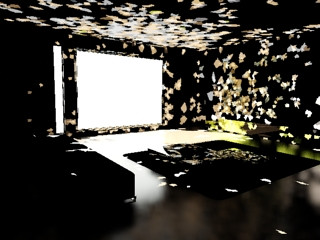
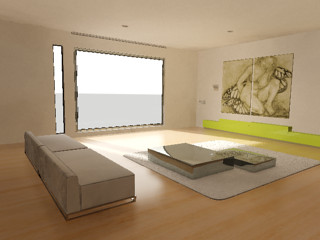
As shown in the previous section, the interior is very dark, with daylight coming in from the window.
Scene rendered

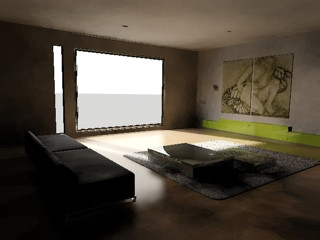
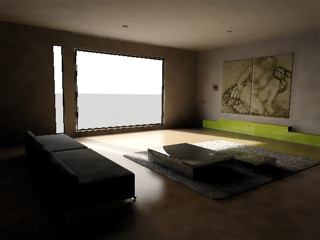
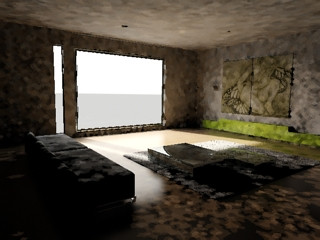
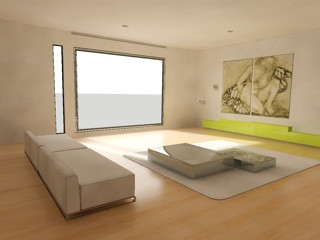
Activate FG
Final gather provides more realistic lighting, allowing the daylight to illuminate the darker portions of the scene.
Visualize final gather points:
To best understand and use final gather, it helps to have a notion of the underlying concepts. You'll start with final gather points.
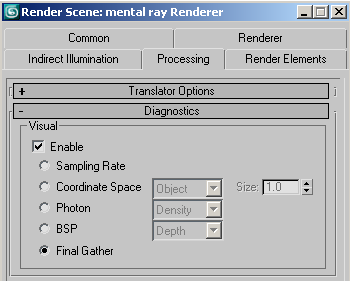
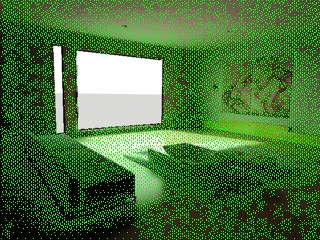
FG diagnostic enabled
Each final gather point is displayed as a green dot.

At each final gather point mental ray shoots a bundle of rays into the scene to check how much light is hitting the point. You control the number of rays with the Rays Per FG Point setting.
One of easiest-to-understand parameters is Interpolate Over Num FG Points. This determines how many FG points are used to compute the final result. By default the parameter value is 30, which causes 29 neighbors to be combined with each FG point.
The following illustration shows a zoomed area of the image. One pixel is marked with a red cross. The eight closest FG points are inside a red outline. If Interpolate Over Num FG Points is set to 8, mental ray would take these eight points to interpolate.
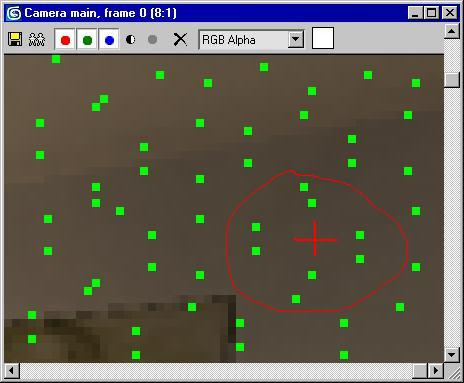
Eight points (green) interpolated to get color at red cross
The following images show the results of setting Interpolate Over Num FG Points to values between 1 and 200.
|
Interpolate Over Num FG Points=1 |
Interpolate Over Num FG Points=5 |
|
Interpolate Over Num FG Points=30 |
Interpolate Over Num FG Points=200 |
Feel free to try each of these to see the results on your screen.
At 1 the image is very noisy; at 5 it's a bit smoother but still noisy. At 30, the rendered image looks quite realistic, and at 200 the result is absolutely smooth. The great news is that increasing Interpolate Over Num FG Points costs very little performance: Setting it to 200 takes, at most, only a few minutes longer to render than at 1, even with large, complex scenes that take a long time to render.
So why not always use 200? Because interpolation removes local details. For example, the ceiling near the window looks very flat in the 200 image.
Interpolation is the best choice when you need a noiseless image but long rendering times aren't practical.
The next parameter we discuss is Initial FG Point Density. This is the density of the final gather points grid, which covers the entire image. Density species the grid spacing. The following images start with the Draft preset and vary only the density. Note that Noise Filtering is off (None).
Density varies from 0.01 at the top to 4.0 at the bottom. As the value increases, so does the number of green dots (final gather points) in the diagnostic images.
|
Initial FG Point Density=0.01 |
Initial FG Point Density=0.01 (diagnostic) |
|
Initial FG Point Density=0.1 |
Initial FG Point Density=0.1 (diagnostic) |
|
Initial FG Point Density=1.0 |
Initial FG Point Density=1.0 (diagnostic) |
|
Initial FG Point Density=4.0 |
Initial FG Point Density=4.0 (diagnostic) |
This image shows perfect details already, but it also introduces some noise. Increasing the interpolation is one way to resolve the noise. An alternative way is shown below.
Higher density shows more detail. Whenever you need more detail in a scene, increase the density.
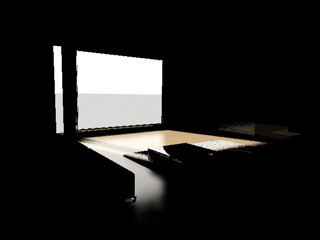
Each FG point shoots a bundle of rays into the scene. You can specify the number of rays with the Rays Per FG Point parameter. Using a low value is faster but can generate noise. A high value can reduce or eliminate noise, but takes longer to compute. To show how this influences rendering, start with the Low preset and then turn off interpolation by setting Interpolate Over Num. FG Points to 1.
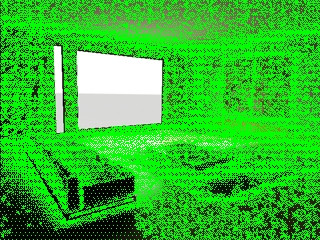
Set Rays Per FG Point to 1 and then render.
Here you see individual FG points, with each FG point shooting exactly one ray.
One ray per FG Point
|
Rays Per FG Point=4 |
Rays Per FG Point=50 |
|
Rays Per FG Point=500 |
Rays Per FG Point=10000 |
The image with 10,000 rays can take some time to render. The image is quite good without any interpolation. Adding a bit of interpolation can resolve any remaining noise.
When should you increase grid density, and when should you increase the number of rays per FG point? Why not have a single control? And when should you modify the number of rays per FG point?
More rays are required for scenes with a small bright window (high contrast inside the scene).
Fewer rays are required for a scene with even illumination, like a white office room with many light sources at night (no daylight).
Typical values are:
The scene for this tutorial has very high contrast, with close to 100,000 lux in the sun near the window. The rest of the scene receives no direct illumination, because there are no light sources inside the room.
Multibounce
The image still has dark corners. This is because we've been using final gather with no bouncing of light from one object to another. For example, illumination of a windowless hallway comes only from light bouncing several times: from window to wall to wall to hallway. In our scene, the area behind the sofa needs several bounces to “see" the sun.
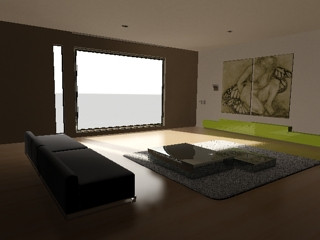
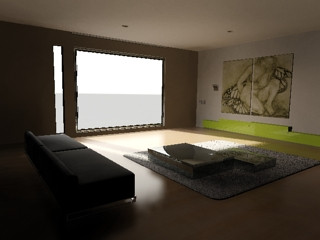
To solve this we increase the Diffuse Bounces value to 5:
More bounces will distribute light correctly in the scene. For average scenes, five bounces are sufficient. Extremely white scenes could require up to 10 bounces, while dark-textured interiors might not need more than three.
Increasing the number of bounces increases rendering time. Using five bounces needs roughly five times as long to render.
This produces a fairly bright image.
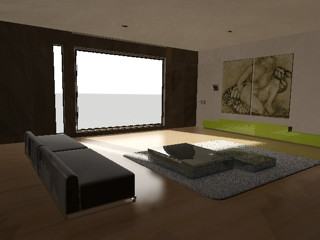
If that's too bright, adjust the Logarithmic Exposure Control > Brightness setting. The default value is 65.5, but in this scene it's set to 28.8.
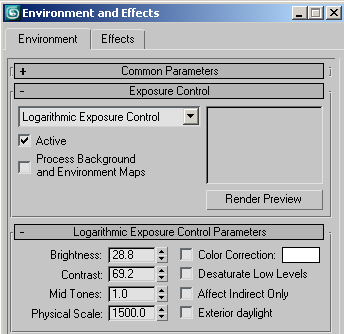
It's generally good practice to test total brightness with a draft rendering. Adjusting the exposure control is then easy.
Later you can add detail (density) and reduce noise by adjusting interpolation and increasing the number of rays per FG point.
The image looks quite good, but to improve quality further you can:
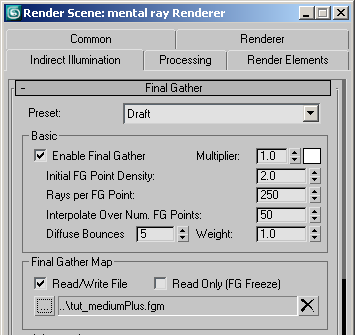


Initial FG Point Density=2.0; Rays per FG Point=250