


Lighting a Scene with Standard Lights
In general, photometric lights are preferred over standard lights, because they are physically accurate and behave more like real-world lights, which makes them easy and straightforward to set up. But you might encounter scenes that use 3ds Max standard lights. One situation in which standard lights are the better option, is when the scene geometry is not built to a real-world scale. This lesson demonstrates the use of standard lights.
Set up the scene:
The scene shows a bust on a pedestal, in a semicircular alcove.
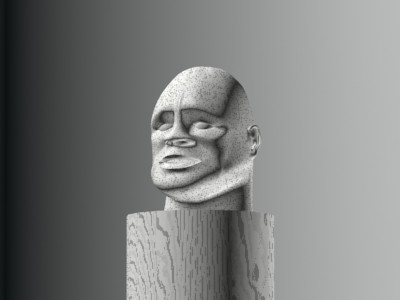
Bust with default illumination
Add a photometric light:

 On the
Create panel, turn on Lights. Choose Photometric from the drop-down
list, and then click Target Point to turn it on.
On the
Create panel, turn on Lights. Choose Photometric from the drop-down
list, and then click Target Point to turn it on.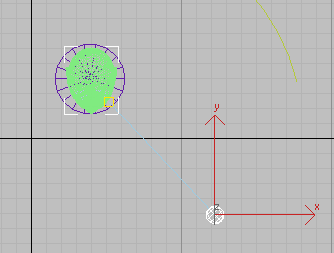
Photometric target point light aimed at the bust
 On the main toolbar, click Quick
Render.
On the main toolbar, click Quick
Render.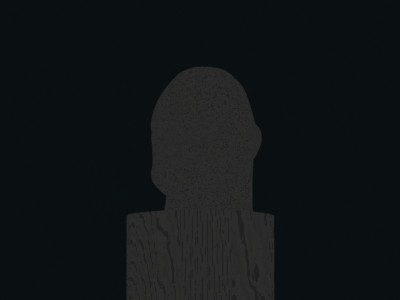
With a photometric light, the rendering is almost completely black.
What happened? The Camera01 viewport shows a well-lit, even brightly lit bust, but the rendered frame is nearly black.
Diagnose the problem:
When you encounter a problem with photometric lights, very often it has to do with the scale of the scene. This is indeed the case in this scene.
 Go to
the Utilities panel. Click Measure to turn it on, then in a viewport,
click the bust model.
Go to
the Utilities panel. Click Measure to turn it on, then in a viewport,
click the bust model.The measurements show that the bust is about 340 units wide by 433 units tall. As one “generic” 3ds Max unit corresponds to an inch, this means in real-world terms, the bust is 28 feet wide and 36 feet tall! It was modeled before 3ds Max had photometric lights, when scale was not an issue. But the default intensity of the Target Point light is nowhere near great enough to illuminate so monumental a sculpture. Rather than increase the value to floodlight intensity, it makes more sense to use standard lights, which don't depend on scale.
Add standard lights for key and fill:
On the
Create panel, use the drop-down list to change the type of lights
to Standard. Then click Target Spot to turn on this type of light.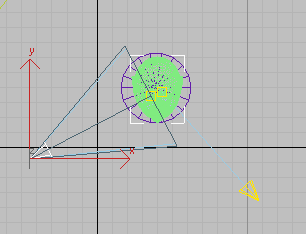
Two standard spotlights aimed at the bust: the key light is on the left, and the fill light on the right.
Click Quick Render.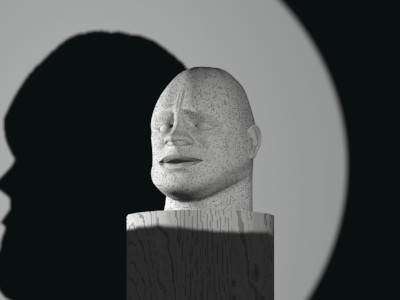
Bust rendered with standard spotlights and shadows
Now the rendering shows an illuminated bust. However, the shadows are very harsh, and the front of the supporting column is poorly lit.
Add additional fill lights:
In general, when you work with standard lights, you need to provide more fill than when you use photometric lights. (Standard lights aren't really suited for radiosity solutions.) In the case of this model, a couple of Omni lights will help improve the appearance of the rendering.
These new lights default to a Multiplier value of 0.4, the last value you assigned.

Two omni lights added to provide additional fill and make the shadows less harsh
Click Quick Render.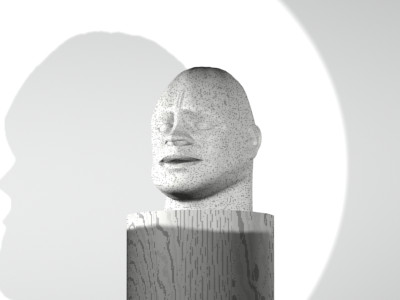
Additional fill lights make the shadows less harsh.
This is better, but the Omni light behind the bust is a bit too bright.
 Select
the Omni light behind the bust, and on the Modify panel, change
its Multiplier to 0.1.
Click Quick Render.
Select
the Omni light behind the bust, and on the Modify panel, change
its Multiplier to 0.1.
Click Quick Render.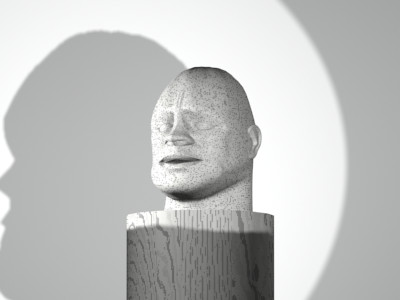
Reducing the level of the omni light behind the bust makes the rendering easier to read.
This version of the rendering is a little clearer, and looks more three-dimensional.
Save your work:
The file memorial_finished.max has a completed version of this scene.
These are the main points of this lesson: