Using the Edit Poly Modifier

Using the Edit Poly Modifier

Creating the Fingers

Building the Stool Body
In this lesson, you will add an Edit Poly modifier to
a primitive cube to construct the basic shape of a stool.
Create
the base object:
-
 On the
Create panel, choose Standard Primitives, and click Box.
On the
Create panel, choose Standard Primitives, and click Box. - In
the perspective viewport, click and drag to create a box.
-
 While
the box is still selected, click the Modify tab and rename the object Stool.
While
the box is still selected, click the Modify tab and rename the object Stool. - In
the Parameters rollout, set Length to 2 meters,width
to 3 meters and Height to 3.6.
You now have a box object that you will use
as a base for the Edit Poly modifier.
-
 On the
main toolbar, with the object still selected, click the Select And
Move tool.
On the
main toolbar, with the object still selected, click the Select And
Move tool. - In
the Coordinate Display area on the status bar, right-click each of
the spinners to the right of the X, Y, and Z numeric fields to reset
them to 0.0. This moves the object to the world origin.
Create
the stool main shape:
- Open
the file stool_01.max from the \tutorials\edit_poly folder
or continue from the previous section.
- With
the box object selected, on the Command Panel > Modify tab, choose
the Edit Poly modifier from the Modifier List.
- On
the Selection rollout, set the sub-object level to Polygon.
-
 Click
the Zoom Extents All button to get a better look at what you are
doing.
Click
the Zoom Extents All button to get a better look at what you are
doing. -
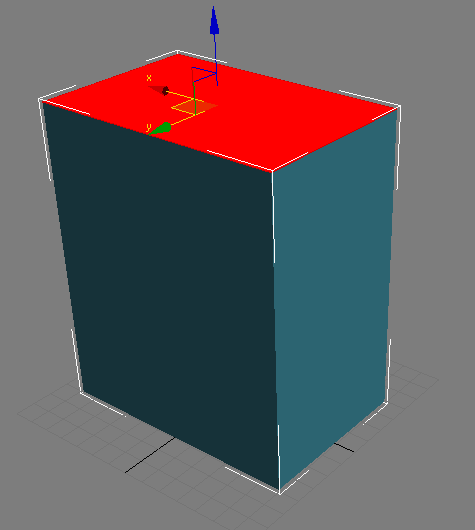
In the Perspective viewport, select the
top-facing polygon.
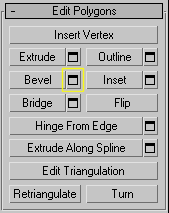
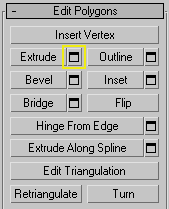
- On
the Modify tab > Edit Poly modifier > Edit Polygons rollout, click
the Bevel button to open the Bevel Polygons dialog.
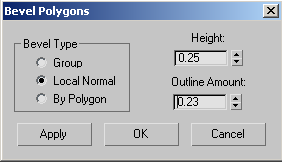
- On
the Bevel Polygons dialog, set Bevel Type to Local Normal. Set Height
to .25m, and Outline Amount to .23m.
Click OK to accept the edits.
- On
the Modify tab > Edit Poly modifier > Edit Polygons rollout, click
the Extrude button to open the Extrude Polygons dialog.
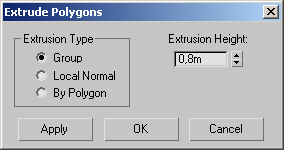
- On
the Extrude Polygons dialog, set Extrusion Height to Group and Extrusion
Height to 0.8m. Click OK to accept the edits.
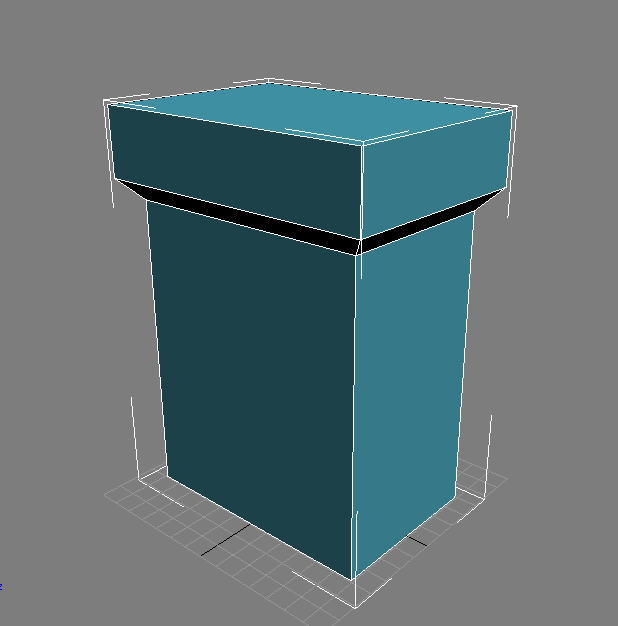
The stool base is now complete. In the next
lesson, you will add fingers to the base.