


Using the Edit Normal Modifier
The Edit Normal modifier in 3ds Max was developed with game developers in mind. Now that many game engines and graphics hardware use pixel and vertex shaders, demand has increased to give modelers the ability to adjust normals interactively when looking at the result of a pixel vertex shader.
Set up the lesson:
If you use the sample scene, some of the plane's components have been hidden for better performance. It's also been maximized to the Perspective viewport.
Adjust the normals on the wing:
 Open
the Modify panel and unroll the Modifier List.
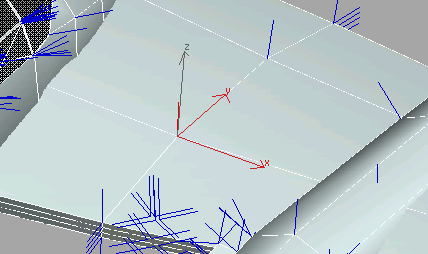
Open
the Modify panel and unroll the Modifier List.The normals are indicated by the blue lines that suddenly sprout from the model. The dark blue color tells you the normals are Unspecified and are calculated based on the smoothing groups of surrounding faces.

This normal is in the middle of the wing between the cockpit and sponson.
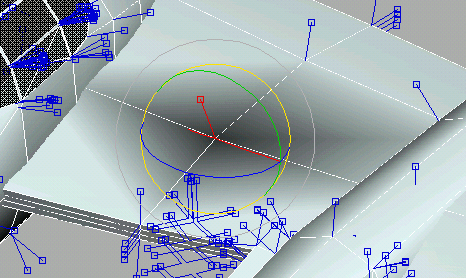
You can also see which normal you've picked by looking at the display at the bottom of the Parameters rollout.
 Rotate
the normal. Notice the effect different rotations have on the surface
of the airplane.
Rotate
the normal. Notice the effect different rotations have on the surface
of the airplane.The surrounding surfaces get lighter or darker depending on how you rotate the normal.
You have learned about several powerful features that will improve your modeling skills. The Editable Poly object is very versatile, and works with many modifiers to help you shape an object exactly as you like.