Modeling an Apple

Modeling an Apple

Improving the Shape of the Apple

Creating the Basic Apple Shape
First
you will create the basic apple shape from a sphere and modifiers.
Create
the apple:
- Choose
File > Open and open the file tut_apple_start.max from
the \tutorials\intro_to_modeling folder.
Highlight the file and click Open.
There is no geometry in this file; however,
it does contain a material you will need.
- On
the Create panel, under Standard Primitives > Object Type, click
Sphere.
The button turns yellow, indicating the Sphere
command is ready for you to make a sphere.
- In
the Top viewport, drag to create a sphere that has a Radius of 10.
- In
the Name and Color rollout, name the sphere apple.
-
 Click
Zoom Extents All to zoom all the viewports.
Click
Zoom Extents All to zoom all the viewports.
Change
the rendering background color:
You'll be able to see the apple better if you
render it against a white background.
- From
the Main menu, choose Rendering > Environment to display the
Environment and Effects dialog.
- In
the Common Parameters rollout > Background group, click the black
Color box to display the Color Selector dialog. Set Value to 255 and
click Close to accept the value and close the dialog.
- Close
the Environment and Effects dialog.
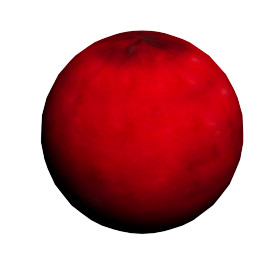
Apply
an apple material:
- Press M on the keyboard to open the Material
Editor.
- From
the Material Editor, drag the material shiny apple to
the apple sphere in any viewport.
- Close
the Material Editor.
-
 Right-click
in the Perspective viewport to activate it. On the toolbar, click
Quick Render, or press F9 to
render the viewport without clicking a button.
Right-click
in the Perspective viewport to activate it. On the toolbar, click
Quick Render, or press F9 to
render the viewport without clicking a button.
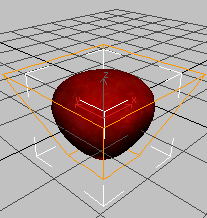
Taper
the apple:
Selecting what you want to work on is the first
step in modeling. Until you make a selection, all modifier choices
are unavailable. In this case, the apple should be selected; when
selected, its wireframe mesh is displayed in white.
Modifiers can be selected from the Modifier
List on the Modify Panel, or from the Modifiers Menu. Here you'll
use the menu option at the top of the interface.
- On
the 3ds Max menu bar, on the Modifiers menu, choose Parametric
Deformers > Taper to apply this modifier to the sphere of the apple.
- In
the Parameters rollout > Taper group, adjust the Amount parameter
and watch the effect in the viewports. You only need a small amount
of taper. Adjust the parameter to about 0.85.
- On
the Parameters rollout > Taper Axis group, set Primary to Z and
Effect to XY.