Improving the Shape of the Apple
The Taper modifier produced a rough reshaping of the apple’s original sphere. To achieve more realism, you will collapse the sphere into an editable mesh and use Soft Selection to adjust the transition between selected and unselected areas.
Shape the lower half of the apple:
What you see in the viewports is a tapered wireframe of the whole apple. For more detailed modeling, you need to select only part of the apple, such as the lower half. By collapsing the sphere to an editable mesh, you can make a soft sub-object selection.
The tapered sphere becomes an editable mesh.
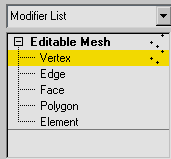
In the viewports, the vertices appear, highlighted in blue.
 Click
Zoom Extents All in the viewport navigation controls.
Click
Zoom Extents All in the viewport navigation controls.The apple is enlarged in three viewports.
This technique is called region-select. It’s the most common method for making sub-object selections.
Name the sub-object selection:
With hundreds of vertices or faces, sub-object selections are often hard to re-create exactly. So it’s a good idea to give these selections a name you can recognize later. Any selection (object or sub-object) can be named and retrieved in 3ds Max. As your modeling skills develop, you’ll begin to recognize the advantages of named selection sets.
This selection name is stored with the file.
You might have many named selections on a single object, but when you return to the Vertex level of the editable mesh you will see only bottom of apple in the list. At this level, you could make multiple selections and give them each a different name. You could then experiment with which selection works best for the modeling effect you want.
Use Soft Selection to blend changes to your mesh:
The Soft Selection setting helps the selected region blend with the rest of the object.
You can scroll any command panel by dragging the hand cursor that appears in blank areas of the panel. Click to open the rollout.
The vertices and edges are now displayed in a graduated color ramp.