The character model you are working with may be thought of as 18 individual pieces: 17 which are bones and an eighteenth, which is the skin that envelopes them. As far as reactor is concerned, the skin plays no part in the physical simulation of the scene; it is simply an aesthetic feature in that it presents a more realistic human look than the underlying bones. Only the bones themselves are simulated and they feedback new coordinate information to the skin so that it may properly deform to keep the bones wrapped up.
With this in mind the first thing you must do is give each of the bones a value for its mass.
Set physical properties for the bones:
 On the
toolbar, click Select By Name, or alternatively, press H.
On the
toolbar, click Select By Name, or alternatively, press H.You will now be presented with a complete list of all the objects in the scene.
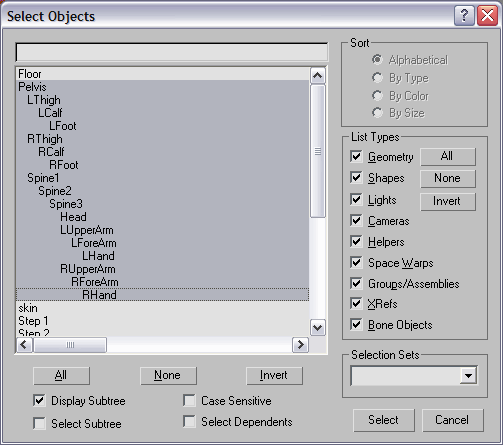
As you can see, all of the bones are named so that their position in the body is apparent; LCalf, RFoot, Head, etc.
 On the
Utilities panel, click reactor and open the Properties rollout.
On the
Utilities panel, click reactor and open the Properties rollout.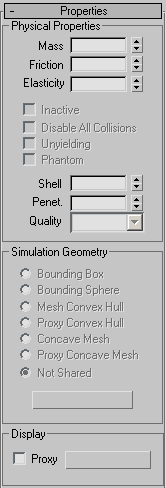
For this tutorial, accept the default values of 0.3 for Friction and Elasticity. However, feel free to tweak their values and see the results. Elasticity controls how bouncy the object appears to be; a greater value leads to a bouncier feel. Friction controls how easy it is to slide the object across a given surface in the scene; larger values lead to increased resistance.
Next, you will give the background objects (the steps of the staircase and the floor) a physical presence in the scene.
On the
Utilities panel > Properties rollout, set Mass to 0.0.This seems like a strange mass for these objects. However, reactor treats all objects with a mass of zero as fixed in place; under no circumstances are they allowed to move. Since you don't want the steps or the floor to suddenly drop into the void under the influence of gravity, you give them a mass of zero to tell reactor that they are immovable.
As you may have noticed, the default mass assigned by reactor to an object is zero (fixed), so this last step can be ignored, in general.
View gravity and other simulation parameters:
On the
Utilities panel, click reactor and open the Havok 1 World rollout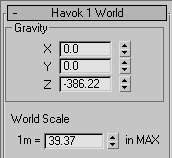
The three values in the World rollout > Gravity area control the gravity in your world (scene). The X, Y and Z components together form the direction vector that represents gravity. Since gravity usually points downward, only the Z component has a non-zero value, by default. But where does the rather strange looking value of -386.22 come from? The minus sign simply indicates that the gravity should be applied downwards, and the value is arrived at as follows: In the real word, gravity accelerates objects towards the earth at around 9.8 m/s every second. If you look down at the next value in the World rollout, you'll see that 1m is equal to 39.37 3ds Max units (inches), so if you roughly convert gravity from meters to 3ds Max units, you get the 386.22 3ds Max units you see above.
Notice that the values in the Havok 1 World rollout are updated accordingly:
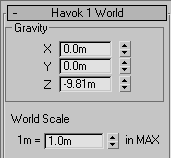
If you give values to the X and Y components of Gravity, you can create bizarre scenes where characters fly towards the walls or even the ceiling! In this lesson, you will be simulating a 'normal' environment, so there is no need to change it.
The final step before you can simulate your scene is to add your objects to a rigid body collection.
Add the objects to a rigid body collection:
 In the
Create panel, click Helpers and select reactor from the dropdown
list.
In the
Create panel, click Helpers and select reactor from the dropdown
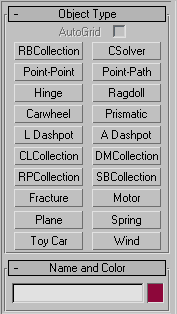
list. The Object Type rollout should now contain reactor object types.
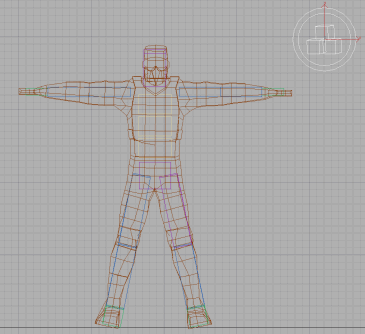
The position of the helper object is of no significance to the scene. You should see something similar to the following image in the viewport:
At the moment, there are no objects in the collection.
 On the
Modify panel > RB Collection Properties rollout, click Add.
On the
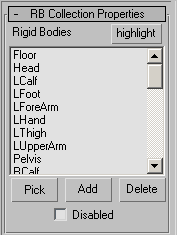
Modify panel > RB Collection Properties rollout, click Add.The RB Collection Properties list should now look something like this:
You're now ready to simulate the rag doll scene. Before you do, save your work as my_character01.max.
Preview the animation:
On the
Utilities panel, click reactor and expand the Preview & Animation
rollout, then click Preview in Window.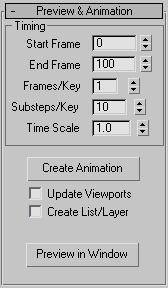
You are informed that several of the bodies are interpenetrating, however you may safely ignore this for the moment by clicking Continue. The reactor preview window pops up and you are be presented with the following scene:
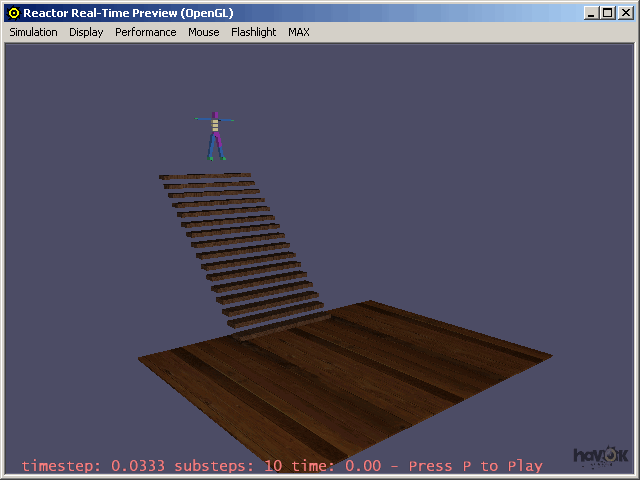
The bones are not yet connected, and thus, fall apart when they hit the stairs. In the next lesson, you will attach the limbs.


