The best way to understand Particle Flow is by using it. This tutorial will acquaint you with some of the basic methods of working with Particle Flow.
Skill level: Beginner
Time to complete: 30 minutes
In this tutorial, you will learn how to:
Create the Particle Flow system:
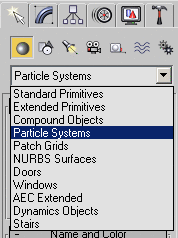
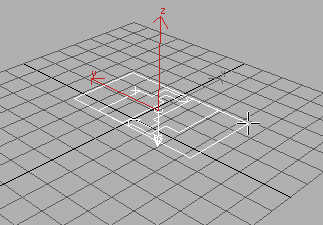
This is the Particle Flow icon, or source, named PF Source 01. By default, it acts as an emitter, but you can also use any other object as an emitter.
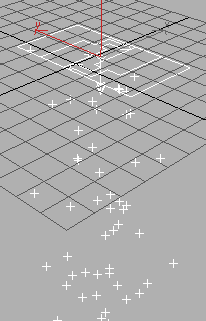
By default, the icon emits particles downward from its entire surface. In the viewport, the particles appear as ticks.

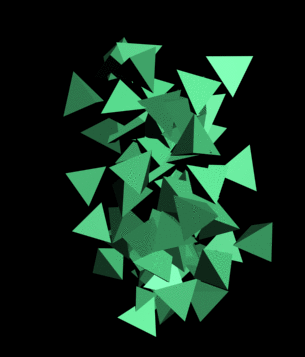
The rendered particles appear in a window. The default particle shape is a tetrahedron, a four-sided triangular solid. Its geometry is very simple, so the system can handle many particles quickly and efficiently, but it gives a good idea of how particles are behaving. Other basic shapes are a low-poly sphere and a cube; Particle Flow also lets you use any scene object as particle geometry.
Modify the particle system in Particle View:
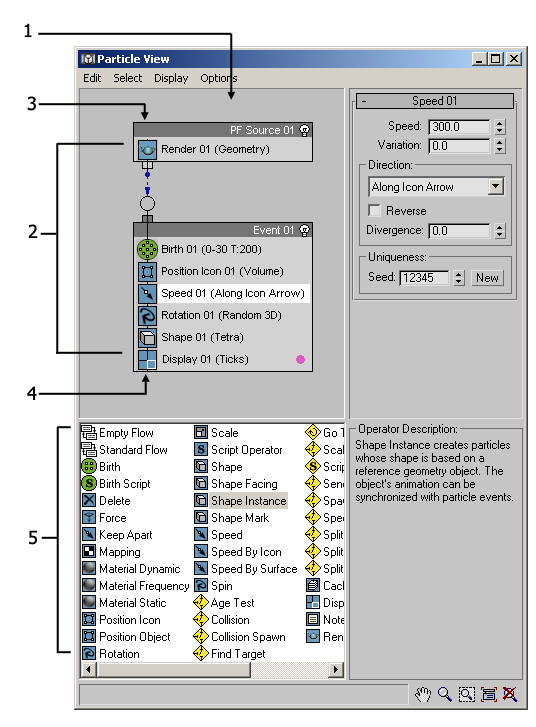
1. Event display
2. Particle diagram
3. Global event
4. Birth event
5. Depot
Particle View is where you manage and edit the particle system. The main window, known as the event display, contains the particle diagram, which describes the particle system. The default system starts with a global event, with the same name as the Particle Flow icon, followed by a birth event, containing a Birth operator and several others that define the system's initial properties. Each operator's name is followed by its most important setting or settings in parentheses. Above the event display is a menu bar, and below is the depot, containing all operators available for use in the particle system. For more information about this dialog, see Particle View.
Because this operator is in the global event, it affects the entire particle system. Any operator you place here does likewise. For example, you can define a global material here, or you can define different materials locally in each event. For best results, don't combine global and local operators of the same type in a single system; use one or the other.
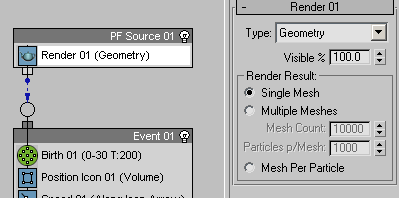
The settings for the Render operator appear in a rollout on the parameters panel, on the right side of the Particle View dialog. These include a drop-down list for how particles are to render, the percentage of particles that will render, and how to split up the particles into individual meshes.
Next, you'll change the particle display type.
The display type is set to Ticks, as noted in the operator name in the event.
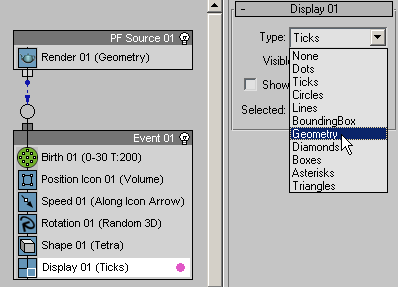
Now the particles appear as tetrahedrons in the viewports.
Wire two events together:
Next, you'll add a test and use it to wire the birth event to a new event.
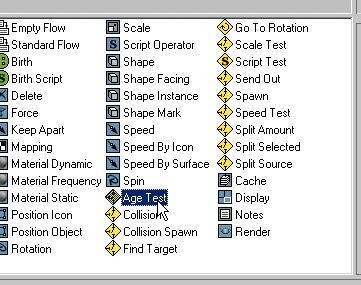
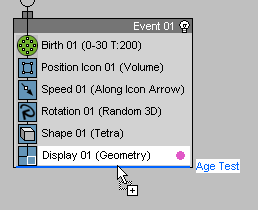
Before you release the mouse button, make sure you see a solid blue line in Event 01 under the Display operator. If the line is red and goes through an existing operator, the Age Test will replace that operator. If you drop the Age Test outside of Event 01 it will create a new event.
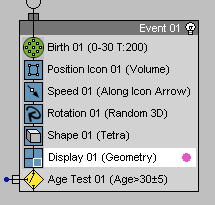
Age Test appears in the list, with its test output sticking out to the left. This is the part you use to connect the test to the next event.
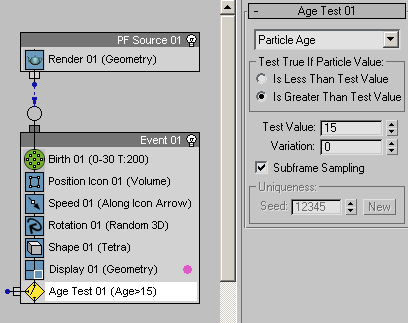
The test type is Particle Age, so this means that all particles that have existed for more than 15 frames will test True, and be passed on to the next event.
Next, you'll create a new event and wire it to the test.
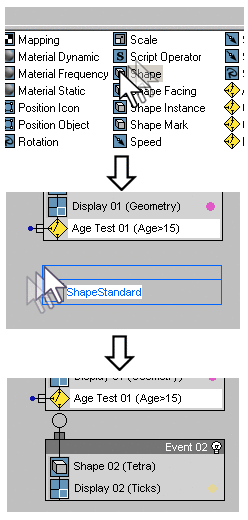
The Shape operator appears in a new event, named Event 02. Like Event 01, the event has a circular event input sticking out from the top. Also, Particle Flow automatically adds a local Display operator to the event so its particles will be visible in the viewports. You can disable the automatic creation of local Display operators by choosing Options menu > Default Display > Global.
The actual location of an event in the event display doesn't matter; the recommended placement is for the sake of convenience when wiring the events. It also helps to make sense of complex schematics if the events are arranged logically.
You can move an event by dragging its title bar.
Next, you'll perform the actual wiring of the Age Test to the new event.
The cursor image changes to an icon depicting three arrows pointing inward toward a circular connector.
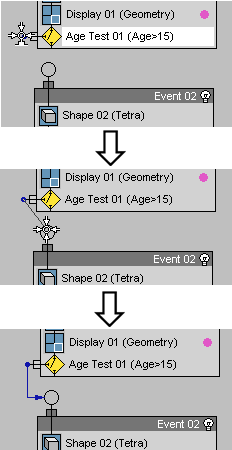
As you drag, the cursor image changes from a three-arrow icon to a circular connector by itself when it's over an empty space in the event display area, and then to a four-arrow icon when it's over the Event 02 input.
When you release the mouse button, a blue “wire” appears connecting the two events. This wire indicates that particles that meet the Age Test conditions will pass “through” this wire to Event 02, to be affected by its actions.
View the wiring results:
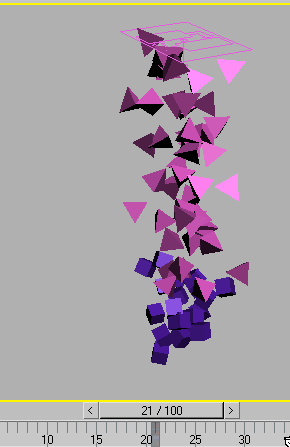
Starting at frame 16, the particles at the head of the stream change into cubes, indicating that they've entered Event 02. As time goes on, more and more particles pass the age of 15 and become eligible to go to the next event.
Try right-clicking actions and events and using Rename to give them custom names. Even with a custom name, an action's tooltip reveals its type.
Another facility of the right-click menu is to add comments to actions and events. Once you do so, a small red triangle indicates the comment's presence.
Congratulations! You now have a working knowledge of Particle Flow. If you'd like to try some more tutorials, please go to this page and download the 3ds Max 8 Tutorials Help (or PDF versions) and the Scene and Support Files.