


Autodesk 3ds Max Tutorials > Special Effects > Particle Animation Tutorials > Non-Event-Driven Particle Systems >
Creating Gushing Water
This lesson uses particles to simulate gushing water. The techniques are similar to those in the cigarette smoke lesson , but include some new methods. For example, in the cigarette smoke tutorial, the Super Spray particle system emitted particles from a single point in space. In this tutorial, a slightly different particle system, PArray, emits particles from an object surface.
Animation techniques used in this lesson:
Set up the scene:
All the files necessary for this tutorial are provided on the program disc in the \tutorials\simple_particle_effects directory. Before starting the tutorials, copy the \tutorials folder from the disc to your local program installation.
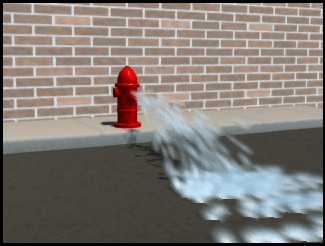
This is a simple street scene with a brick wall, sidewalk, street, and fire hydrant.
To simulate water, the particles should be emitted from the fire hydrant geometry. The PArray particle system can do this.
Make a particle system that will be emitted from the fire hydrant:

 On the
Create panel, make sure Geometry is active. Choose Particle Systems
from the drop-down list.
On the
Create panel, make sure Geometry is active. Choose Particle Systems
from the drop-down list.
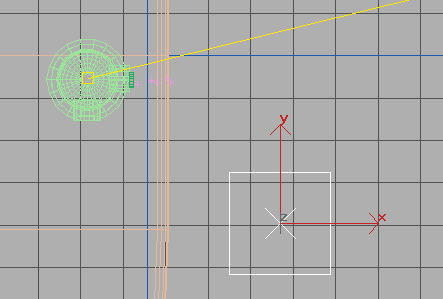
PArray in Right viewport
PArray in Camera01 viewport
The placement of the PArray system doesn't matter, except for your convenience in selecting it. If you drag the time slider or play the animation, you’ll notice that no particles are emitted. PArray requires you to specify an object from which the particles are emitted.
Choose the fire hydrant nozzle as the particle emitter:
 With
the PArray icon selected, go to the Modify panel.
With
the PArray icon selected, go to the Modify panel.Now if you drag the time slider, you’ll notice that particles shoot out in all directions. By default, PArray emits particles from the entire surface of the selected object, in the direction of the polygons’ normals. (If the normals were flipped, the particles would emit inward, toward the center of the hydrant.)
For this scene, the particles should emit only from the cap face at the end of the nozzle. To do this, create a sub-object selection.
Create a sub-object selection to restrict particle emission:
 Select Firehydrant-nozzle01, and
then go to the Modify panel.
Select Firehydrant-nozzle01, and
then go to the Modify panel. Open
the Mesh Select modifier's hierarchy, and choose Polygon as the
active sub-object level.
Open
the Mesh Select modifier's hierarchy, and choose Polygon as the
active sub-object level.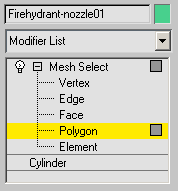
Select
the circular polygon at the end of the cylinder used to model the
nozzle.
Nozzle sub-object polygon selection in Right viewport
Nozzle sub-object polygon selection in Camera01 viewport
Now you have a sub-object selection that the PArray particle system can use.
Set the PArray to use the sub-object selection:
In a
viewport, select the PArray icon. On the
Modify panel, go to the Basic Parameters rollout, and in the Particle
Formation group, turn on Use Selected SubObjects.Now particles are emitted from only the end of the cylinder, as if it were an actual nozzle.
Adjust the particle generation parameters:
With
the PArray still selected and the Modify panel still active, go
to the Particle Generation rollout.Now 50 particles per frame are emitted. (Viewports preview only 10 percent of the particles by default, so this change will be more obvious when you render.)
This parameter controls how much the stream of particles spreads. At a Divergence of zero, particles are emitted in a straight line along the normals of the emitter object.
In other words, particles are emitted for as long as the animation lasts (100 frames).
Particles should live for the duration of the animation, too.
Using Space Warps to Control the Stream
To make the stream of particles behave more effectively like water, you use two space warps: a Gravity space warp to make the stream fall realistically, and a Deflector space warp to model the roadbed.
Add gravity to control the stream:
 On the
Create Panel, click Space Warps.
On the
Create Panel, click Space Warps.By default, Gravity is exerted along the negative Z axis (away from the viewer) in the viewport where you create it. So using the Top viewport to create Gravity makes it pull downward, as one usually expects.
Gravity in Top viewport
Gravity in Camera01 viewport
The default parameters for the Gravity space warp are satisfactory, so you don't need to adjust them. Gravity is pretty straightforward: simply a directional force with realistic acceleration.
Bind the gravity space warp to the particles:
 Click
Bind To Space Warp.
Click
Bind To Space Warp.The Gravity space warp highlights briefly to let you know that the operation is complete.
Particles emitted from the nozzle are now affected by gravity, and fall downwards. Unfortunately, at this point they also fall through the street. Renderable geometry does not deflect particles. To model the street, you’ll create a Deflector space warp to stop the particles when they reach ground level.
Add a deflector at street level:
On the
Create panel, click Space Warps if necessary. Change the active
space warp category to Deflectors, and then click Deflector.Creating the Deflector in the Top viewport ensures that it is created at ground level. Unlike some kinds of space warps, the size and location of the Deflector icon have an effect in the scene. The deflector controls the region where particles will be deflected. A deflector doesn't render, but its placement affects particle interaction.
Deflector in top viewport
Bind the deflector to the particles:
Turn
on Bind To Space Warp.The Deflector space warp highlights briefly to let you know that the operation is complete.
The PArray particles emit from the nozzle, fall downward due to Gravity, and then bounce off of the Deflector. At this point, the particles bounce too much. In reality, when an object bounces or reflects from an object, a certain amount of energy is lost. Also, the particles don't come to rest but keep moving as if the street object were a smooth sheet of glass. Both of these problems can be corrected by adjusting Deflector parameters.
Select
the Deflector space warp if necessary and go to the Modify panel.Now particles reflect from the Deflector with less velocity, and as they slide across its surface, the increased friction makes them come to rest eventually.
Modulating the Rate of Particle Emission
So far, the fire hydrant emits water in a steady stream. This doesn't look too realistic, because gushing water tends to pulse. To simulate this, you can animate the PArray system's Speed parameter. In this tutorial, you combine a Bezier Float controller with a Noise controller to apply some randomness to the Speed, creating a pulsating motion.
Assign controllers to the Speed parameter:
Select
the PArray particle system in the viewport.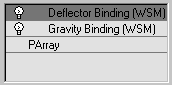
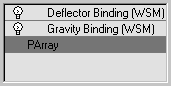
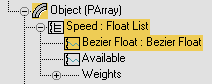
Before and after selecting the PArray level
Track View opens to show the various parameters for PArray.
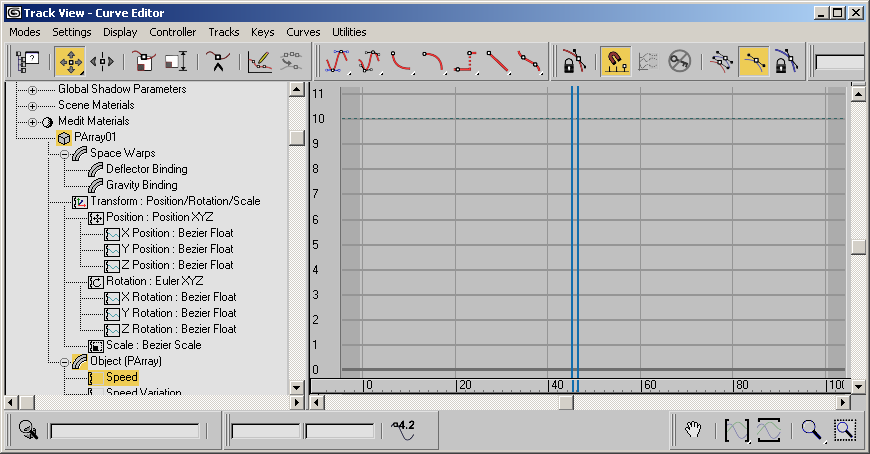
The Bezier Float controller inherits a value of 10 from the original Speed setting. You can actually keyframe this value, but in this animation there is no need to do so.
Float List is a List controller that combines controller values. If you expand the Speed hierarchy in Track View, a track labeled Available appears at the bottom of the Speed tracks. This is where you add new controllers to the list.
The Noise Controller dialog appears.
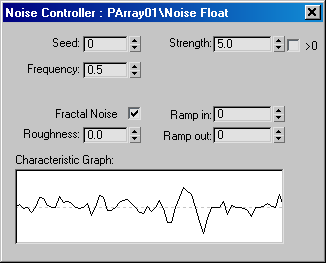
Adjust the Noise parameters:
The Noise controller can generate a randomly pulsating motion. The default settings for Noise don't accomplish this, so you need to adjust them.
Notice that there is still an Available track at the bottom of the Speed hierarchy. You can add as many controllers to the list as you want. This can be a powerful technique.
Combining the Noise controller with Bezier Float gives you more control over the variation. Specifically, the Noise value modifies the Bezier value. With a Bezier value of 10 and a Noise range of 10, the result of the Float List potentially will range between 10 and 20, at a mean of 15. (It actually ranges from less than 12 to approximately 18.)
Preview the animation:
 Activate
the Camera01 viewport, and then click Play.
Activate
the Camera01 viewport, and then click Play.Now particles are emitted with a more realistic pulsing motion, with spurts here and there.
The animation is now ready to render, except that the water particles need an appropriate material.
For gushing water, you want a material that appears like foamy water. This material is similar to the material you created for smoke. Facing particles with a soft radial gradient map causes rendered particles to blend together into a foamy stream that approximates the look of water.
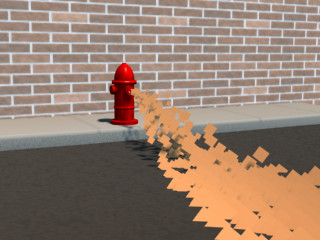
Set up particles to render as facing geometry:
Select
the PArray particle system and go to the Modify panel.If you render the scene right now you see that the particles are displayed as square facings. As with smoke, you need to soften their edges to make them appear more amorphous.
Create the material:
 Open
the Material Editor and select an unused sample slot.
Open
the Material Editor and select an unused sample slot.Apply maps to control the material's opacity:
 Click
Go To Parent to return to the parent material. In the Maps rollout,
click the Diffuse map button.
Click
Go To Parent to return to the parent material. In the Maps rollout,
click the Diffuse map button.Turn on face mapping to match the particle system:
Click
the Go To Parent button to return to the parent material. In the
Shader Basic Parameters rollout, turn on Face Map.If Face Map is turned off, the facing particles still retain their sharp edges. This is because, by default, particles read gradient maps over time, not at once as for other kinds of geometry.
Assign the material:
 Assign
this new material to the PArray particle system.
Assign
this new material to the PArray particle system.Now when you render the scene, the particles are blended together quite nicely.
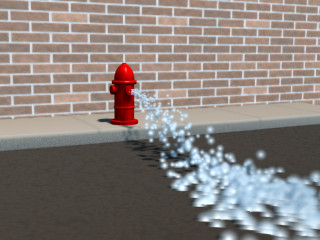
The particles still look a bit "blobby," for water. To improve this, you can use Image Motion Blur.
There are several ways to generate motion blur in 3ds Max . For the water from the hydrant, you use the method called Image Motion Blur.
Assign Image Motion Blur to the PArray:
Select
the PArray particle system, and then right-click it.
The scene is now complete.
You are now ready to activate the Camera01 viewport and render the entire animation. Even at low resolution, this can take about half an hour. Alternatively, you can play the file gushing_water.avi, provided on the program disc.