Animating a Walkthrough

Animating a Walkthrough

Working with Animation Tracks

Creating a Walkthrough
Set up the lesson:
- Open
the great_wall_start.max file
from the \tutorials\walkthrough
folder.
TipIf the Units Mismatch dialog displays, choose
Adopt The File's Unit Scale and then click OK.
Calculate
the required number of frames:
- Press H to open the Select Objects dialog,
and then double-click Camera Path.
-
 On the
Utility panel, click the Measure button.
On the
Utility panel, click the Measure button.This tool
reports the length of the camera path, which is about 900 feet.
NoteFor
a comfortable walking pace in architectural walkthroughs you'll need
about a second to travel every three feet of distance. For a jog
or a fast run, you can go as fast as nine feet per second. In NTSC
format, that translates into 30 frames for every nine feet of distance
traveled, or 3,000 frames for 900 feet.
-
 Click
the Time configuration button next to the Current Frame Field.
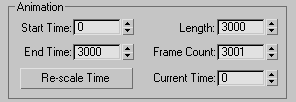
Click
the Time configuration button next to the Current Frame Field. - In
the Animation group on the Time Configuration dialog, change End Time
to 3000 to increase the number of
frames in the animation, and then click OK.
This provides
sufficient frames for the walkthrough animation.
The time
slider frame indicator now shows 3000 frames.
Create
a Free camera:
- Go
to the Create panel, click the Cameras button, and then click the
Free button.
- Click
anywhere in the Front viewport to create the camera.
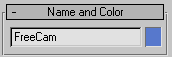
- On
the Name and Color rollout, rename the camera FreeCam.
Assign
a Path constraint to the camera:
- Make
sure the camera is selected, and then, from the Animation menu at the
top of the screen, choose Constraints > Path Constraint.
A rubber-band
appears between the camera and the mouse cursor.
- Press H to open the Pick Object dialog,
and then double-click Camera Path to select it.
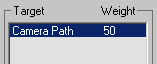
This places
the camera on the path and gives the Motion panel focus. The selected
path appears in the Target list of the Path Parameters rollout.
- In
the Path Parameters rollout > Path Options group, turn on the
Follow option.
- Set
the Follow Axis to Y.
- Right-click
the Perspective viewport to activate it, and then press C to view what the camera is looking
at.
-
 Click
Play Animation to view the animation.
Click
Play Animation to view the animation.The camera
travels along the path but the motion seems unnatural. At times
it aims too high and at other times too low. The software maintains the
camera aim tangential to the path. A Free Camera might be suitable for
a path constrained to a horizontal plane, but it isn’t ideal for
the undulating path in this scene. In the next section you’ll try
a Target Camera.
Create
a Target camera:
A Target camera follows a path in the same fashion
as a free camera. Instead of aiming tangential to the path it remains
directed towards its target, which can be animated independently.
- Stop
the animation if it is still playing and go to Frame 0.
- If
necessary, Select the FreeCam object you created in the previous
section.
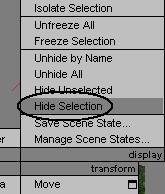
- Right-click
in the active viewport, and then, from the quad menu, choose Hide
Selection.
- From
the Cameras category of the Create panel, click the Target button.
- In
the Top viewport, click and drag to create the camera.
- On
the Name And Color rollout, rename the camera TargetCam.
- Assign
a Path constraint, as before, to cause the new camera to move along the
existing path.
- Activate
the FreeCam viewport.
- Press C to switch the display to the selected
camera’s point of view.
-
Click
Play to view the animation. The target remains stationary while
the camera moves along the path.
Animate
the camera target:
To create a walkthrough with a target camera,
you have to animate the target moving ahead of the camera and stop
occasionally on points of interest.
- Stop
the animation if it is still playing and go to frame 0.
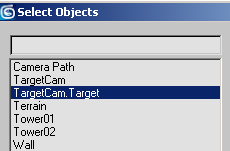
- Press H to open the Select By Name dialog.
- Double-click
TargetCam.Target.
-
 Click
and then right-click the Move tool.
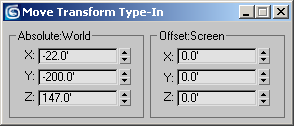
Click
and then right-click the Move tool. - At
frame 0, position the target at –22, -200,147.
This gives
an appropriate starting direction for the camera.
-
 Click
Auto Key.
Click
Auto Key. - Move
the time slider to frame 194.
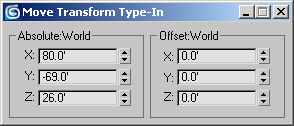
- Position
the target at 80,-69,26.
This position
corresponds to the first tower along the wall, which is a suitable
point of interest.
- Press Shift and drag the key you just
created to approximately frame 815. This duplicates the key, holding
the tower as the target while the camera approaches it.
- Move
the time slider to frame 1050.
- Position
the target at 44,11,42.
- Move
the time slider to frame 1272.
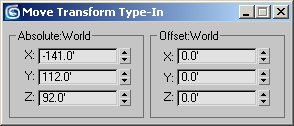
- Position
the Target at -141,112,92.
This positions
the target near the second tower.
- Press Shift and drag the key you just
created to frame 1820.
This holds
the target at the second tower while the camera approaches it.
- Move
the time slider to frame 1964.
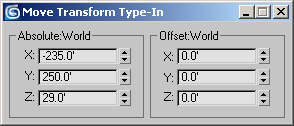
- Position
the target at –235,250,82.
- Move
the time slider to frame 2135.
- Position
the target at –235,250, 29.
This lowers
the target’s position along the Z axis to accommodate the drop in
the path just after the second tower.
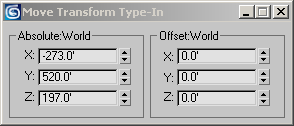
- Move
the time slider to frame 2534.
- Position
the target at –273,520,197.
- Press Shift and drag the key you just
created to frame 2963.
-
Click
Play to view the result in the TargetCam viewport.
The target
moves ahead of the camera to the points of interest along the way.
- Turn
off Auto Key.
- Right-click
in the Top viewport to make it active.
-
Click
Play.
Viewing the animation in the top viewport emphasizes
how the target moves to the points of interest ahead of the camera.
Summary
In this lesson, you created a camera walkthrough
animation by calculating the number of frames needed for the animation,
and you learned how to automate the creation of the camera and constrain
it to a path. Finally, you learned how to simulate natural motion
of the head viewing points of interest by animating the camera target.