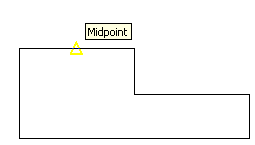
Use object snaps to specify precise locations on objects. For example, you can use an object snap to draw a line to the center of a circle or to the midpoint of a polyline segment.
You can specify an object snap whenever you are prompted for a point. By default, a marker and a tooltip are displayed when you move the cursor over an object snap location on an object. This feature, called AutoSnap™, provides a visual clue that indicates which object snaps are in effect.

For a list of object snaps, see OSNAP.
To specify an object snap at a prompt for a point, you can
When you specify an object snap at a prompt for a point, the object snap stays in effect only for the next point that you specify.
If you need to use one or more object snaps repeatedly, you can turn on running object snaps. For example, you might set Center as a running object snap if you need to connect the centers of a series of circles with a line.
You can specify one or more running object snaps on the Object Snaps tab in the Drafting Settings dialog box, which is accessible from the Tools menu. If several running object snaps are on, more than one object snap may be eligible at a given location. Press TAB to cycle through the possibilities before you specify the point.
Click the OSNAP button on the status bar or press F3 to turn running object snaps on and off.
By default, the Z-value of an object snap location is determined by the object's location in space. However, if you work with object snaps on the plan view of a building or the top view of a part, a constant Z-value is more useful.
If you turn on the OSNAPZ system variable, all object snaps are projected onto the XY plane of the current UCS or, if ELEV is set to a non-zero value, onto a plane parallel to XY plane at the specified elevation.