Previous Next


Getting Started > MenuLink Client Overview > Installing MenuLink Client

Installing MenuLink Client
This section shows you how to install and log into the MenuLink Client application and introduces you to the MenuLink Client Main Switchboard.
Instructions for removing the MenuLink Client application from your system are given at the end of this guide.
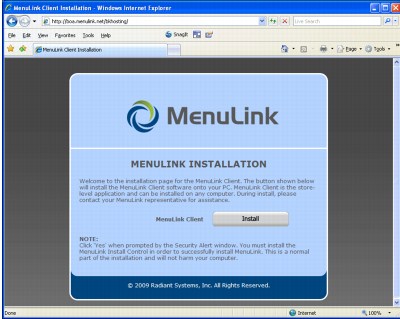
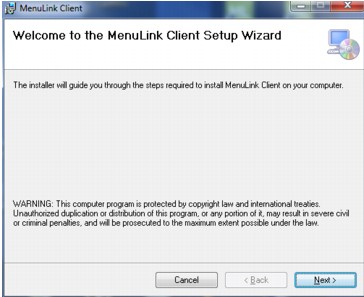
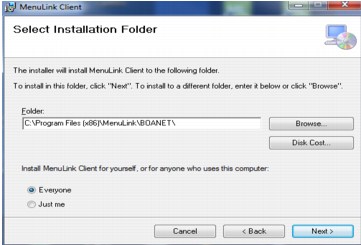
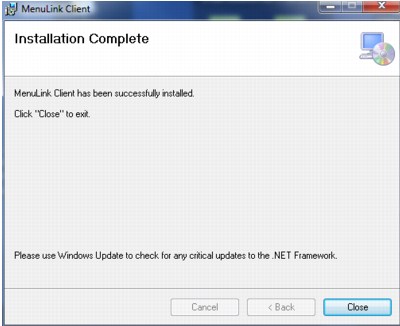
You install the MenuLink Client application over a network or the Internet. A local version is available for sites with slower internet connections. Contact your MenuLink Client Service Manager for more information. In addition, application updates, when available, are automatically installed. Each time you log in, the system automatically checks for and updates the program as necessary.
System requirements and important notes
The following are system requirements for the MenuLink Client application:
Operating System:
PC Platform:
Internet Access:
384K Symmetric (up/down) DSL Broadband connection
Http port 80 (default) with access to the MenuLink application server
Notes:
Installation program installs the .NET Framework, if it is not already installed, and Windows Installer.
You must have at least 800 Mb of disk space available on the computer that you are installing the MenuLink Client on to install the application and download updates.
Before you install the MenuLink Client, have the following information on hand, which was provided to you by your MenuLink Client Service Manager:
Internet location for the installation
Username and password
Installation Instructions
Your system administrator may have set up security options that require you to log into MS Windows with Administrator privileges, or to run Internet Explorer as an administrator, to install MenuLink Client. Check with your system administrator if you’re not sure.
To Install MenuLink Client:
1.
Exit all applications except Internet Explorer.
2.
Using Internet Explorer, point the browser to the installation location provided by your MenuLink Client Project Consultant.
The MenuLink Client Installation web page appears.
ML_InstallationPage
3.
Click Install MenuLink Client.
If this is the first time you’ve installed MenuLink Client on this computer, a Security Alert appears, prompting you to install and run the MenuLink Install Control. It is necessary to install this control to proceed with the installation.
4.
Click Yes to download the install control.
The Windows Installer starts up and prepares the system for installation. In a moment, the MenuLink Client Installation Wizard appears.
5.
Click Next. The License Agreement appears.
6.
Review the information, and select ‘I accept the license agreement,’ if you agree to the terms. Click Next to continue.
If you do not agree to the terms, select ‘I do not accept the license agreement,’ then click Cancel to exit the installer.
The MenuLink Client setup screen appears.
The Select Installation Folder screen appears. You can choose to keep the default program location or you can click the Browse button to install the application in a location that you choose.
There are also two options at the bottom of the screen. You must select one of them.
Everyone’ makes the MenuLink Client application available for all users who use this computer. To choose this option, you must have system administration rights.
Just me’ makes the MenuLink Client application available only when the current user is logged onto this computer.
7.
After making the desired entries and selection, click Next. The Ready to Install the Application screen appears.
 
8.
Click Next. The installer then updates the system with the application information. When the installer has successfully installed the application, the success screen appears.
9.
Click Finish to complete the installation. A new icon titled Shortcut to MenuLink appears on your computer desktop.
 

MenuLink Online Help
Copyright © 2012 Radiant Systems, Inc. All rights reserved.