Previous Next


Labor > Payroll > Shifts


Shifts
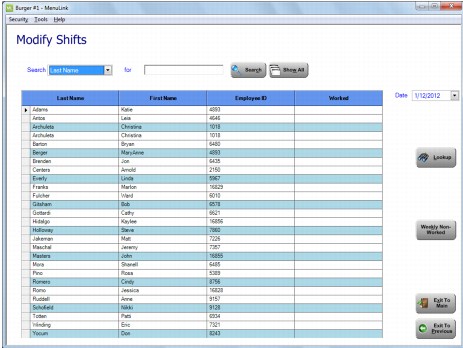
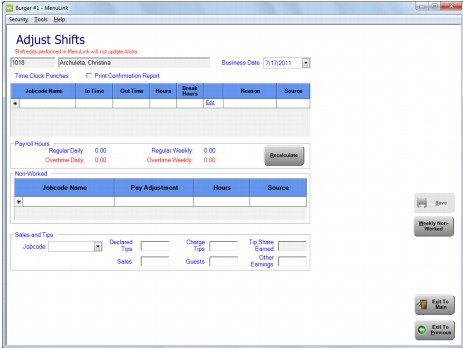
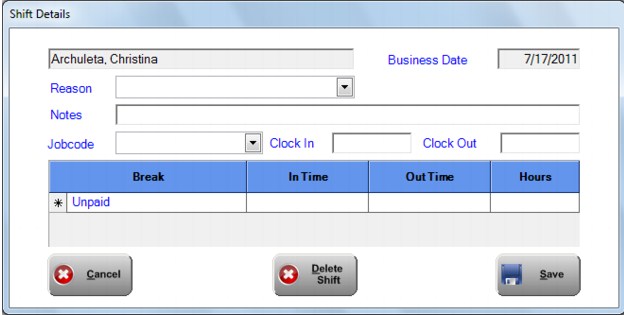
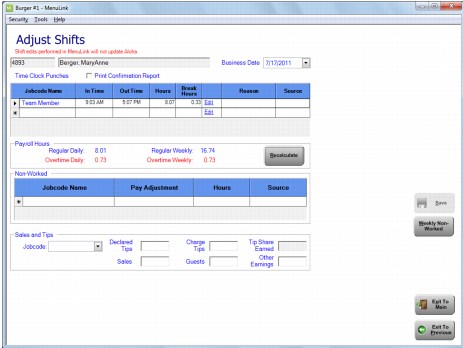
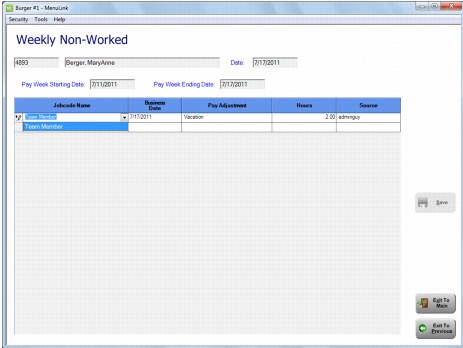
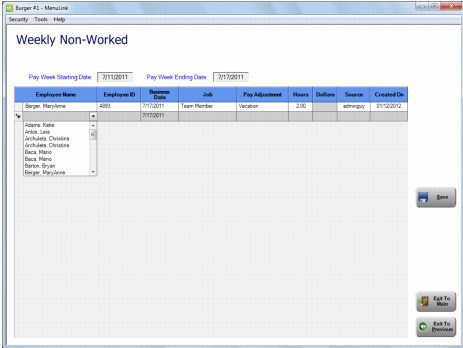
Use the Shifts feature to access an employee’s time clock information for a selected day. Shifts selected from previous pay periods are not editable, based on permissions. Time clock information comes directly from your POS System or a time and attendance device when an employee clocks in or clocks out for their shift.
Modify and Adjust Shifts Screens
1.
The Modify Shifts screen displays a list of employees:
2.
Select the date for the employee whose shift(s) you want to modify.
The Worked column indicates which employees worked on the selected day.
3.
This opens the Adjust Shifts screen:
 
4.
Best practices for managing shift edits are as follows:
Adding a New Shift
If an employee forgets to clock in and out in the POS, you may need to add a shift for this employee.
1.
In the Modify Shift screen, select the date for the shift(s) you want to add.
2.
Select the employee and click Lookup. This opens the Adjust Shifts screen:
3.
Verify that the Business Date field is correct. The date appearing here by default is the date selected in the Modify Shifts screen.
4.
Note: Use the Enter or Tab Key on your keyboard to move to the next field.
5.
Type the time the shift began in the In Time field. When entering the time using standard time, enter the time as a 4-digit entry and enter A or P to indicate AM or PM. For example 3:15 PM would be entered 0315 p.
Note: You can also enter the time in Military Time (00:00 (12:00 AM, midnight) – 23:59 (11:59 PM)).
6.
Enter the Out Time, using the same guidelines for In Time, above.
7.
The Hours field is auto-populated after the In and Out Times are entered.
8.
Select the Edit hyperlink. The Shift Details screen is displayed.
9.
 
Note: The Reason codes varies depending on how it is configured in your system.
10.
The Notes field is optional and can be used to enter comments.
11.
Note: The Jobcode field will display the Jobcode name entered from the Time Clock Punches section from the previous screen.
12.
Select the Break Type by clicking the drop-down arrow to view the selection box.
13.
Enter the In Time, using the same guidelines above.
14.
Enter the Out Time, using the same guidelines above.
15.
The Hours field is auto-populated after the In and Out Times are entered.
Note: The Break Hours column on the previous screen will auto-populate the total break hours entered from the Shift Details screen.
16.
Repeat the steps above to add additional break punches for the employee.
17.
Click Save to keep your changes and to go back to the Adjust Shift screen.
18.
Note: The break information entered will not be saved.
19.
Select a Reason for the edit.
Note: A reason may be required to save the adjustment. A reason will display if selected in the Shift Details screen.
20.
The Source field is auto-populated, based on the user log-in.
21.
Repeat the steps above to add additional time clock punches for the employee.
22.
If your site tracks Sales and Tips information, enter or adjust the information in the Sales and Tips section for the pay period, if the employee earns tips. This information populates as part of the POS import. Dimmed fields are not available for editing.
23.
24.
Click Save to keep your changes (and print the confirmation reports, if selected).
Modifying an Existing Shift
1.
From the Modify Shift screen, select the date for the shift(s) you want to modify
2.
Select the name of the employee and then click Lookup
3.
Adjust the information that needs to be changed by clicking a field and selecting or typing the correct data.
4.
If your site requires signed confirmation reports of payroll edits, select Print Confirmation Report. This may already be selected, if so configured by your MenuLink Administrator.
5.
Click Save to keep your changes (and print the confirmation reports, (if selected).
Non-Worked by Day
Non-Worked are hours or dollars that can be entered and are paid but are not included in the worked hours for overtime calculations. Some examples of non-worked hours are sick pay, jury duty leave, and vacation pay.
1.
From the Modify Shift screen, select the date for the shift(s) you want to enter.
2.
Select the employee and click Lookup.
3.
Select the Jobcode Name, Pay Adjustment, and type the Hours or Dollars in the Non-Worked Hours section. The Source field is auto-populated.
CL_Payroll_AdjustShifts3
4.
Click Save to keep your changes.
Note: Your MenuLink Administrator can set up rules regarding the number of hours that can be entered for a specific category of non-worked hours. They also set up rules regarding the number of hours that can be used in a specific day. If there is a rule violation regarding Non-Worked hours, the Non-Worked hours are Red. Contact your MenuLink Administrator for your company’s specific HR policies.
Non-Worked by Week
1.
From the Modify Shift screen, select the date for the shift(s) you want to enter.
2.
3.
Click Weekly Non-Worked.
On the Weekly Non-Worked screen you can enter the non-worked hours for each day of the week. Entries can only be made for dates that fall within the Pay Week Starting and Ending dates at the top of the screen.
4.
Select the Jobcode Name, Business Date, Pay Adjustment, and Hours or Dollars for the day. The Source field is auto-populated.
5.
Select the next line and repeat step 4 as many times as needed for the week.
6.
Click Save to keep your changes.
Non-Worked by Week (Multiple Employees)
1.
From the Modify Shift screen, click Weekly Non-Worked.
2.
In the Employee Name field, select an employee to enter non-worked hours for.
3.
Select a Job for the employee.
4.
Select a Pay Adjustments for the employee. Depending on the pay adjustment, you may need to enter a number of hours or a flat dollar amount.
5.
Add additional employees and pay adjustments as needed.
6.
Click Save to keep your changes.

MenuLink Online Help
Copyright © 2012 Radiant Systems, Inc. All rights reserved.