Audio
|
Scan QR codes with a mobile device to view online video tutorials. An Internet connection is required to view online content. |
Audio Basics
|
Clean up Audio Mistakes
|
Working with Music
|
 Online Videos Available


To access the audio options, click on the Audio tab.
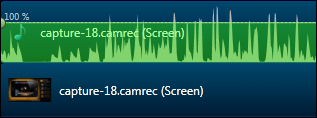
The Audio task page appears and all the audio on the timeline turns green. This lets you know you are in Audio Edit mode.
- To edit audio, select one or more clips on the timeline. When selected , the clips are highlighted in blue.
- To edit a selection of audio, select the clips, use the playhead to make the selection.
- TREC recordings by default are linked together with the microphone audio.

- To unlink a TREC's video and audio, right-click the TREC on the timeline and choose Separate video and audio from the context menu. The recording is split into separate clips on the timeline.
- A TREC's system audio is added to the timeline as a separate audio file.


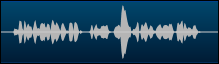
To change the look to the Camtasia Studio 7 "mirrored" style, choose Tools > Options > Program tab > Mirror waveform:
Access Audio Options
To access the audio options, click the Audio tab.


|
Enable Volume Leveling |
Adjust the volume of the audio clips to a standard level. Use this option when the recording level between audio clips varies greatly. This option acts as toggle on a per clip basis.
Volume leveling is applied to an entire audio clip and can be applied to:
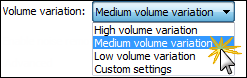
Volume Variation Select an option from the Volume variation dropdown menu that best describes the level of audio variation on the timeline.
If you choose Custom Settings, select from the following options.
|

|
Enable Noise Removal |
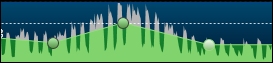
Enable noise removal to reduce background noise for the audio on the timeline. As soon as Noise Removal is enabled, the color of the audio waveform changes from green to orange while in the Audio tab: Noise removal is applied to an entire audio clip and can be applied to:
|

|
Advanced Option | Open additional noise removal options to manually set the noise removal, adjust the audible mouse clicks, and fix clipping. |

|
Adjust Sensitivity |
Use the Adjust sensitivity slider if the noise reduction process caused the audio quality to degrade. Degradation may occur if the noise removal occurred within a selection without true silence. |

|
Auto Noise Training |
Click the Auto noise training button to have Editor automatically remove noise from the audio clips. Editor detects noise in the audio by using a selection with silence. Once clicked, noise removal is immediately applied to the audio clips. |

|
Manual Noise Training on Selection |
Set the noise removal based on an area of silence you choose. Drag the playhead’s green In point or red Out point to make a selection of silence. Use the zoom slider to get a better view of the timeline, if necessary.
|

|
Remove Clipping |
Clipping results in an audible distortion in the audio. Enable this option to cut off the recorded audio when the audio volume reaches too high of a level. |

|
Remove Clicks |
Enable to remove recorded artifacts that sound like clicks. Use the Click Sensitivity slider to set the threshold for the filter. |

|
Adjust Volume Up or Down |
The volume of an audio can be applied to:
To adjust the audio:
Adjust Volume for Individual Clips The audio on individual audio clips can be adjusted by grabbing the bar in the middle of the wave form and dragging it up or down. |

|
Audio Fade In or Fade Out |
Audio fades can be applied to:
To fade in the audio, click the Fade In button. To fade out the audio, click the Fade Out button. To adjust a fade, grab the audio point and drag it. The waveform adjusts accordingly. |

|
Replace Audio with Silence |
Mute the audio selection on the timeline. Unlike the delete or cut options, this option does not remove any of the existing waveform.
Silence can be applied to:
To add silence to the audio, click the Silence button. |

|
Add or Remove Audio Points |
Edit an audio waveform by adding custom points of contact to drag to achieve the desired result.
To add an audio point:
To remove one audio point:
To remove all audio points from a clip:
|

|
Export Audio |
The Export audio as option combines all audio on the timeline into one audio file. Use this option to make a backup of the audio or to create a soundtrack to import into another application. To access this option, select Editor > File > Produce special > Export audio as > Choose MP3 or WAVE
|