
Edit Your Video
|
Scan QR codes with a mobile device to view online video tutorials. An Internet connection is required to view online content. |
Explore the Editor
|
Editing In-Depth
|
 Online Videos Available


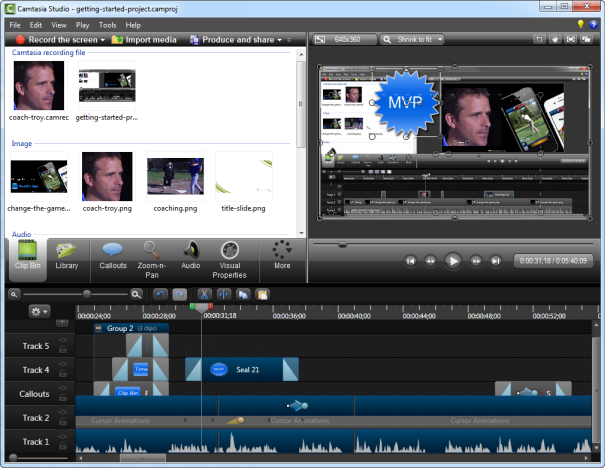
Use Editor to arrange and edit clips on the timeline to build your video. The timeline is the primary working area for editing your video. You can import images, recording files, video clips, and audio into Editor to include on the timeline.
There are several components within Editor including the Clip Bin, Library, Preview Window, timeline, and task tabs used to add and edit effects. Before you begin to use Editor, take a few minutes to familiarize yourself with these components. You’ll also want to learn how to create and manage video projects.
Crucial Steps for Success: Complete Your Video in this Order
For the best video editing, complete your edits in the following order. You may not include each of these steps in every video project you work on, but, to ensure success, the order below should still be followed.
For example, always import all the media and arrange it on the timeline before you begin to edit the audio.
Or, edit the audio on the timeline before you add a transition.
- Import images, recording files, video clips, and audio and arrange the clips on the timeline.
- Make basic edits to the clips on the timeline. Cut and split clips, move clips, add markers, etc.
- Record camera video (webcam)and add to timeline.
- Edit the audio.
- Add voice narration.
- Add title clips and transitions.
- Apply SmartFocus and add zoom, pan, and other animations to draw viewers’ attention to specific action in the video.
- Add other effects such as callouts, captions, quizzes or surveys.