Cursor Effects
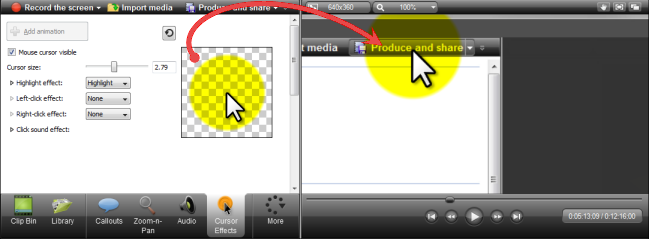
In Recorder, cursor data is collected and stored in the TREC recording file. In Editor, the cursor can be enhanced for better visibility using a highlight, spotlight, sound effect and more.
The cursor effects work by inserting animations: one to add the effect and one to change or remove the effect.
For example, if an animation is added at the beginning of the video, all of the cursor instances in the video are changed to match the cursor effects assigned to the animation.

Continue with
Add a Cursor Animation
- On the timeline, select the TREC video that will have animations added. The TREC turns blue when selected.
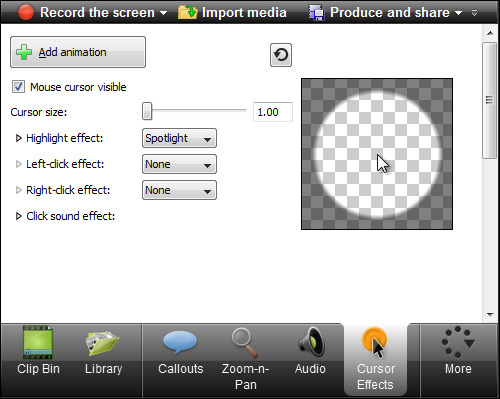
- Click the Cursor Effects tab. If it is not in view, click the More tab. From the list, select Cursor Effects. The Cursor Effects tab appears.
- Click the Add animations button.

A new animation appears on the TREC and the animation view is opened to show the cursor data captured during recording.
- Use the slider to set the cursor size. The cursor size updates on the canvas.
- Choose the highlight, click, and sound effects from the dropdown menus. Changes update on the canvas.

Cursor Effect Options


|
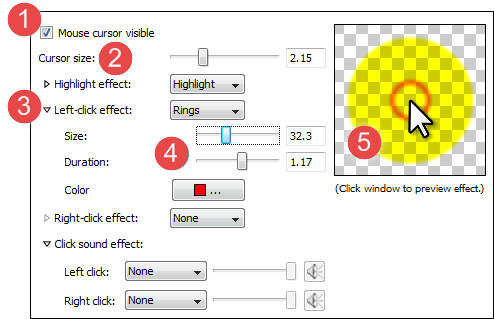
Mouse cursor visible | Hide the cursor from view. |

|
Cursor Size |
Slider to increase or decrease the cursor size. |

|
Cursor Effects |
Click the small triangle next to the effect title. This expands and collapses the properties. Choose from:
|

|
Properties | Each effect has their own properties. Choose from color, size, duration, etc. |

|
Cursor Preview Window |
As effects are added, the Preview Window is updated. To view animation effects such as rings, click on the Preview Window. |
Hide the Mouse Cursor
The Hide option hides the cursor from view in the final video. To show the cursor again, remove the cursor animation on the TREC recording.
- On the timeline, select the TREC video that will have animations added. The TREC turns blue when selected.
- Click the Cursor Effects tab. If it is not in view, click the More tab. From the list, select Cursor Effects. The Cursor Effects task page appears.
- Click the Add animations button.

A new animation appears on the TREC and the animation view is opened to show the cursor data captured during recording. - In the Cursor Effects tab, uncheck the Mouse cursor visible option.
Delete a Cursor Animation
- To delete a cursor animation, click an animation on the timeline and press the Delete key on the keyboard.
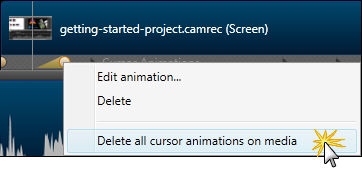
- To remove all cursor animations, right-click an animation select Delete all cursor animations on media.

