Selecting Text Object Properties from the Custom Text shortcut menu is one way to display the Text Object Properties dialog. Use the options in this dialog to anchor custom text (a custom text object) in a particular place in the current graph.
Note: The dialog title bar will display an object identifier number that can be referenced when using STATISTICA Visual Basic code to customize graph objects.
Options for compound graphs. Compound graphs are those that consist of more than one graph and/or graph type in a single display, such as:
Categorized plots (categorized by one or two variables)
Matrix plots, such as matrix scatterplots, line plots, etc.
Scatterplots with box-plots or Scatterplots with histograms
For these types of graphs, additional options exist to precisely control the location ("anchor point") where the extra graph object (text) is to be attached. Note that different types of dialogs will be displayed depending on the type of compound graph to which you are attaching an object. Refer to Extra Objects in Compound Graphs for additional details.
Coordinates. The options under Coordinates are used to anchor the text either dynamically to a particular plot, or to make the placement of the text independent of the scaling in the graph. See Anchoring Objects to Coordinates for details regarding the distinction between dynamic and non-dynamic (fixed) anchoring of objects in graphs.
Dynamic. Select the Dynamic check box to anchor the custom text dynamically to the plot selected in the Plot drop-down box (see Anchoring Objects to Coordinates).
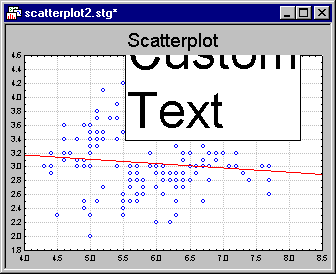
Anchor point. The area reserved for custom text can be thought of as a small sheet of paper. After deciding on the method of anchoring (placing) the piece of paper to the graph (dynamic or fixed; see above), you can select the specific point on that piece of paper that is to be anchored to the respective place in the graph using the options under Anchor point. Regardless of how much text is added to the respective text object, or how the text is formatted, the attachment point (of the "sheet of paper") to the graph remains constant. Here is an illustration:
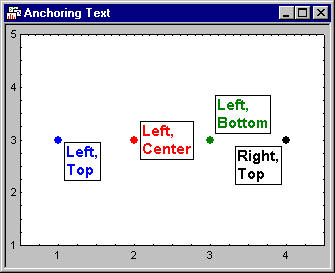
In this case the respective text was anchored to the plot point of the same color. Regardless of how much text you would add to each custom text, the respective corner or side of the text box would retain its relative position to the plot point; if the Dynamic (see above) attachment to the respective plot was chosen, then rescaling of the axes would not change the relative position to the points either.
When you click on (select) a text object, the anchor point will be shown as a black square.
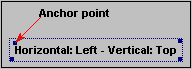
The other squares (in the other corners) identify the places you can "hook onto" with your mouse, to rotate (pivot) the text around the anchor point; see the Orientation topic below.
Orientation. Use the options under Orientation to select the orientation of the text.
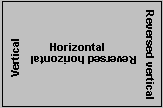
Angle. Select the Angle check box to enter a specific angle by which the respective text (object) will be pivoted around the anchor point as selected by the Anchor point options described above. Note that you can also interactively rotate custom text by selecting it in the graph and then dragging one of the object handles (small black squares) in the desired direction. However, for fine adjustments, the Angle field can be used to enter precise angles.
Frame line. Select the Frame line check box to draw a frame line around the text (as also shown in the illustration above). Click the Frame line button to display the standard Line Properties dialog to customize the color and line type for the frame line.
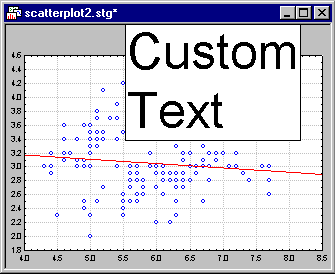
Fill area. Select the Fill area check box to fill the background area of the text object; this is useful when you have grid lines included in the graph and you don't want those lines to show behind and running through the custom text. Click the Fill area button to display the standard Area Properties dialog to customize the background for the text.
Scale font size in zoomed graph. Select this check box to specify that the custom text will be enlarged proportionally to the size of the graph.
Clip to graph frame. This option determines whether the respective extra graph object (e.g., line, text, etc.) will only be drawn inside the plot area of the graph, or whether it will also show outside the plot area, in the margins of the graph. If you select this check box, then the object will be "clipped" at the edges of the plot region for the graph, for example:
Clip to Graph Frame: OFF
Clip to Graph Frame: ON
OK. Click the OK button to close the dialog after you have made your selections.
Cancel. Click the Cancel button to close the dialog, ignoring any changes you have made.
Save as Default. Click the Save as Default button to save the current text object properties as the default properties applied to future custom text.
Styles. Click the Styles button to display the Graphics Styles dialog. In this dialog you can display and manage the attributes for the Styles for Custom text; see Graphics Styles for additional details.