 To create a new publication
One or more publications can be created from each user database on a publication server. Publications cannot span databases: each publication can contain articles from only one database.
Before you create publications, you must set the server replication options as described in Configuring Servers for Replication, earlier in this chapter.
 To create a new publication

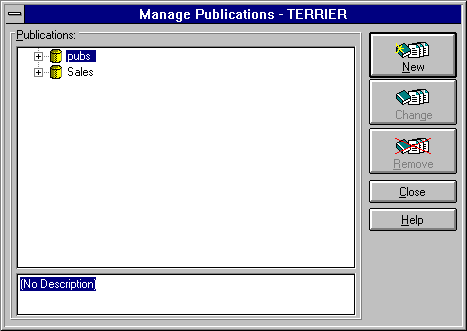
The Manage Publications dialog box appears.
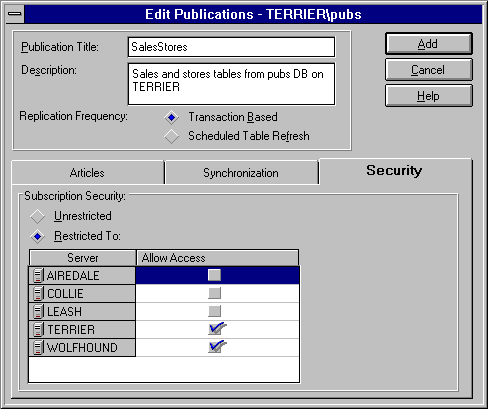
The Edit Publications dialog box appears.
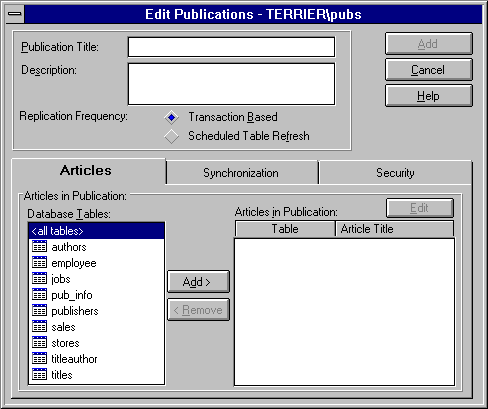
A publication name must be unique for this database and conform to the rules for identifiers.
A description can be up to 255 characters.
Replication frequency determines the basic method that will be used to replicate this publication.
The tables are added to the Articles in Publication list.
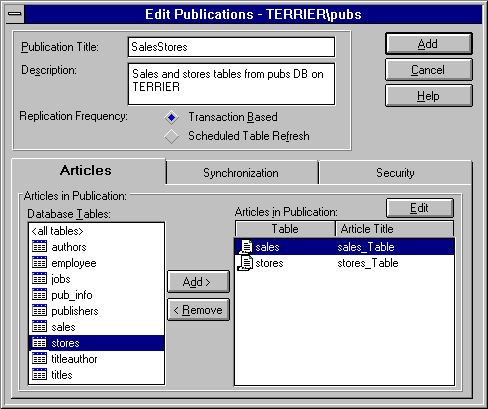
You have a number of options for customizing an article. For each article, you can set the article name, article description, and destination name; exclude rows and columns from those published (horizontal and vertical partitioning); customize the synchronization schema script; and customize the data replication mechanism. For more information, see Defining Articles, later in this chapter.
The Edit Publications dialog box returns.
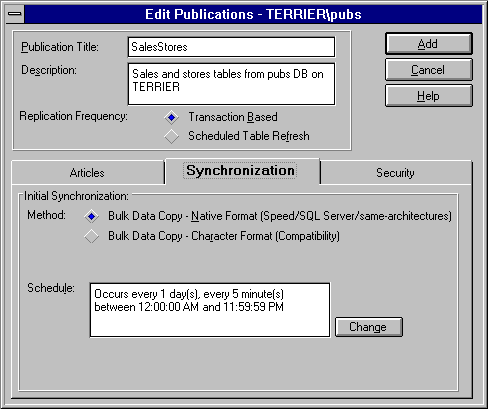
Initial synchronization determines the method by which the output data files are created for synchronization of the destination database. (This applies for both automatic and manual synchronization.) This can be bcp, native format (the default); or bcp, character format.
The schedule determines how frequently automatic synchronization will be performed for new subscriptions. Since automatic synchronization of databases or even individual tables requires a fairly high amount of system overhead, using automatic synchronization on a scheduled basis allows you to set an interval between the time a server subscribes to a publication and is synchronized to that publication. This allows synchronization to be scheduled for a low-activity period on the publication and subscription servers.
A publication marked unrestricted is visible to and can be subscribed to by any subscription server. A publication marked restricted is visible only to those subscription servers that have been marked for access.
The Manage Publications dialog box returns. The new publication and its articles are listed under the published database.
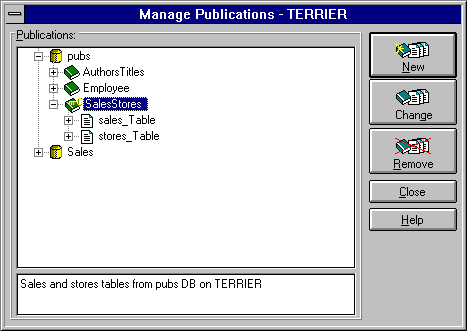
Note that restricted publications have a key added to their icons.