


Autodesk 3ds Max Tutorials > Modeling Tutorials > Modeling a Low-Poly Character > Making the Final Adjustments >
Adjusting Smoothing Groups
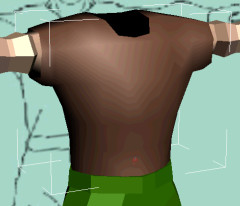
Apply a smooth modifier to parts of the body:
This forces all polygons on this shirt object to share a single smoothing group, eliminating any visible edges.
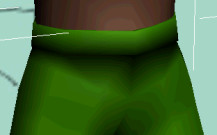
Again, this smoothes the polygon edges. In this case though, it might be slightly overdone, since you might want a stronger edge between the belt and the pants.

Merge the Head and Apply Smoothing Groups to its Sub-Objects
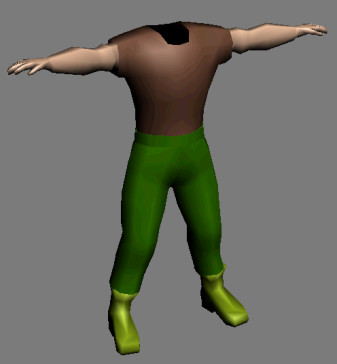
The last remaining step is to combine the soldier's head with its body, and use smoothing groups once more to help blend the polygons together. This time, though, you apply the smoothing groups to the head using selection sets at the sub-object level.
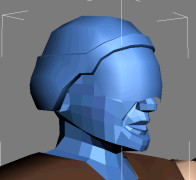
The soldier's head now rests on top of its body, except that it is still faceted.
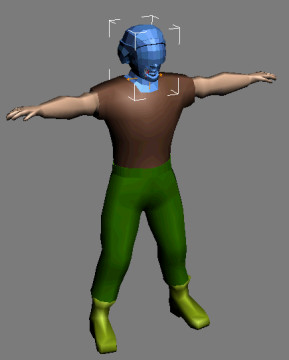
 Go into
Polygon sub-object level and turn on Show End Result to have a better
view.
Go into
Polygon sub-object level and turn on Show End Result to have a better
view.The list already contains a few selection sets associated with either the face or the helmet.
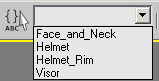
This selects all helmet polygons, excluding those that give the helmet its depth.

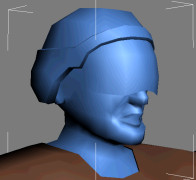
This smoothes the edges between the helmet polygons. Note the distinctive hard edge between the helmet and its rim.

The visor looks more believable with smoothing groups.
This tutorial has introduced you to several of the tools you can use to make a low-polygon model with editable poly functionality. These tools can be adapted to the task of modeling any low-polygon character.
A finished version of the file, soldier_completed.max, is provided.