


Autodesk 3ds Max Tutorials > Lighting and Rendering >
Rendering with mental ray: Sky Portal and
Exposure Control >
Time-of-Day Illumination
Despite having changed the wall panel material to glass, the scene is still fairly dim. In your latest render, notice how the light is cast almost directly downward, illuminating just the left-most fringe of the lounge floor. This is the result of two problems: it is high noon in Los Angeles and the architectural scene is not oriented correctly. In this lesson, you’ll change the scene so that the window is facing the proper direction: west. You’ll also reset the time of day to produce a late-afternoon ambience.
Display shadows:
To better visualize the late-day illumination, we will enable the viewports to display shadows. In versions of 3ds Max prior to 3ds Max 2008, you had to render a scene each time you wanted to view a change in shadow position. Now, you can set the viewports to update shadows dynamically as you make adjustments to your scene.
These settings instruct 3ds Max to use the DirectX capabilities of your graphics card to display your scene.
Adjust scene orientation and time of day:
 On the
toolbar, click Select And Rotate.
On the
toolbar, click Select And Rotate.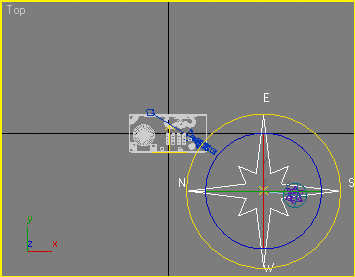
The western point of the compass rose should now point downward, so that the lounge window, where daylight illumination enters the lounge, faces west.
 On the
menu bar, click the Select Object button and select the Daylight
object).
On the
menu bar, click the Select Object button and select the Daylight
object). On the
Modify panel > Daylight Parameters rollout, click the Setup button.
On the
Modify panel > Daylight Parameters rollout, click the Setup button.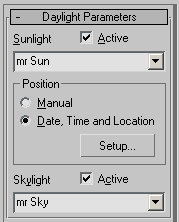
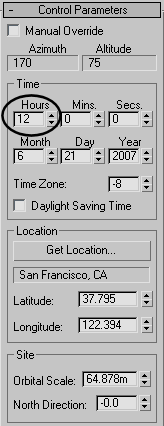
Note how the shadows in the lounge scene update as you change the time of day.

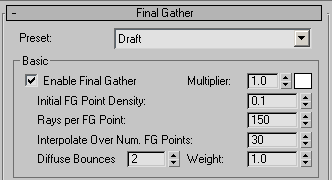
Add final gather:
Your scene is almost ready. All you need to do now is add final gather to better distribute light entering the lounge. Final gather generates a limited number of light bounces, but is effective when producing results for initial scene evaluation.

Your rendered scene should resemble this illustration.
Compare your result by opening the scene file LoungeBar_Tutorial_Final.max.