


Designing a Shirt, Part 1
Create the shirt pattern:
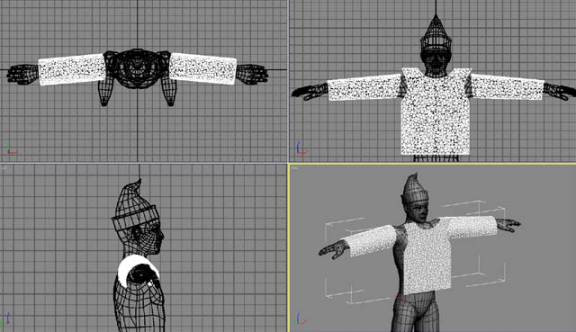
This scene contains a character for which you will make a shirt.
Garment Maker requires that you create patterns in the Top viewport. Rotating the character will allow you to use it temporarily for fitting while creating the pattern. When you've finished creating the patterns, you will rotate it back.
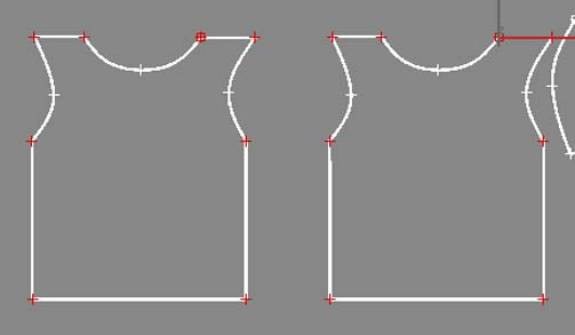
Next you'll start to make a pattern for a shirt. First you'll create the panels that will make up the front and back of the shirt.
Front of shirt in the Top viewport
Next you'll make the sleeve for the shirt. The sleeve is basically one long piece of fabric that wraps around the arm, with a seam at the bottom. The end of the sleeve that will attach to the shirt should be curved to better fit the shoulder area.
Sleeve in the Top viewport
Pattern panels copied and arranged
Next you'll combine all the pieces and set them up to be sewn together.
In order for Garment Maker to work, all of the panels that are created as part of a single piece of clothing must be part of the same object. That's why you attached all the splines. Next you'll break off different segments of the pattern so that these edges can be sewn together.
Vertices selected for breaking
This will give you four separate splines to select and sew together instead of having only one spline. When you work with Garment Maker, you need to make sure that your shape contains separated splines to use as the seam edges.
Vertices selected for breaking
Now that the pattern is ready, you'll apply the Garment Maker modifier to make this 2D spline pattern into a 3D mesh.
When you apply Garment Maker to the closed splines it fills them in with an irregular triangular mesh that is designed for cloth deformation.
Fit the shirt to the character model:
Now that you're done with the preliminary creation and sizing for the pattern, you'll rotate the Jester back into standing position.
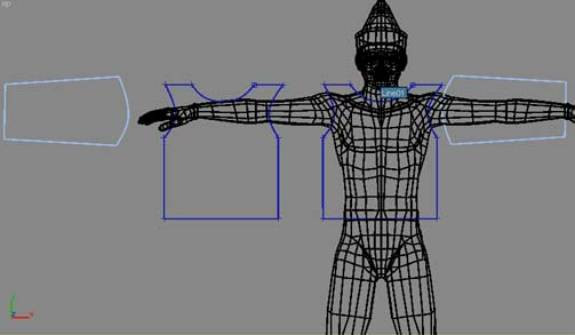
The next step is to position the panels of the pattern around the character.
You will need to rotate the panel 90 degrees in the X axis so it is vertical like the character. You will also need to move it forward so it is in front of the character. Refer to the following illustration.
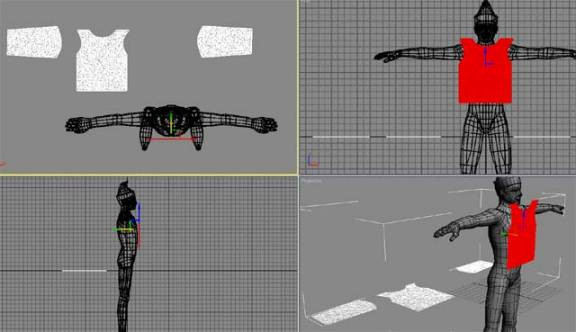
Positioning of the front shirt panel
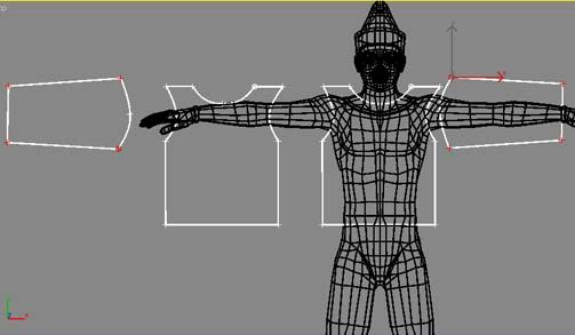
As with the front of the shirt, you need to rotate the back 90 degrees in the X axis so it is vertical. You also need to rotate it 180 degrees in the Z axis so it faces outward, away from the jester’s body.
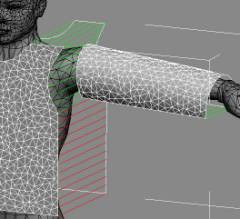
Positioning of the back and arm shirt panels
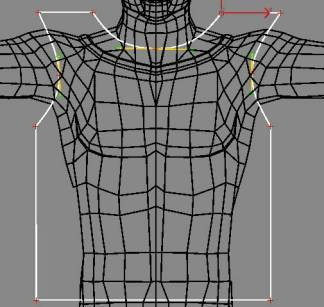
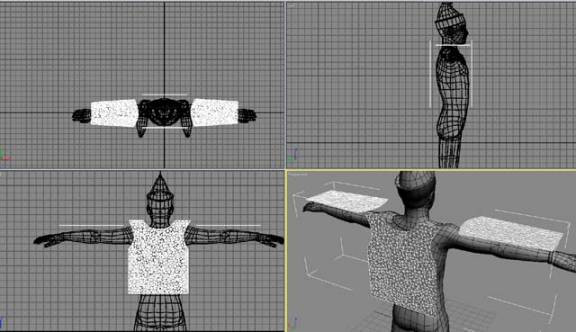
You'll adjust a few parameters of the panels before adding the seams to the shirt's panels.
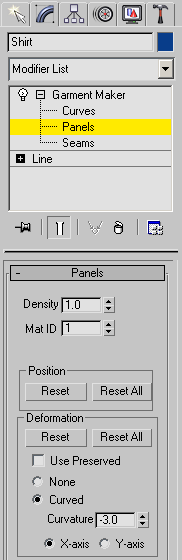
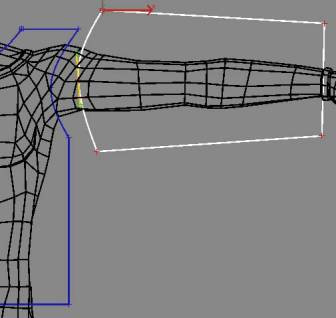
This causes the sleeve panel to bend around the arm.
If the sleeves are not wide enough to curve around the arm, go back to the Editable Spline level on the stack to make them a bit wider. To get Garment Maker to recognize this change, tweak the Density spinner up and down in the Garment Maker > Object rollout after editing the splines.
Sleeve panels with curvature
Make the shirt seams:
All the panels are in place, so next you'll make some seams for sewing them together. You can make seams at both the Curves and Seams sub-object levels. The Curves level is a good place to make seams quickly if you know exactly how they need to connect. However, this method can be a bit confusing at first. Therefore, you'll use the Seams level because it gives more visual feedback.
If a dialog box comes up that reads, “Seamed segments not within tolerance,” increase the value for the Seam tolerance on the Seams rollout. You might also get a twisted seam. If this happens, click Reverse Seam on the Seams rollout.
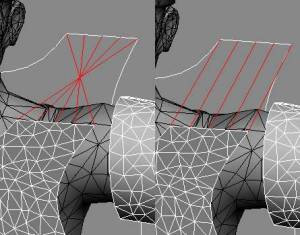
Left: Twisted seam
Right: Correctly aligned seam
Most of the seams for clothing can be made as easily as this: Select two edges and then click Make Seam.
The exception to this is creating the seam between the sleeves and the arm holes. There are three seams involved here instead of two: the front half of the arm hole, the back half of the arm hole, and the sleeve edge itself. You must first make the arm holes on the front and the back of the shirt into one segment. You will do this by making a "MultiSegment" seam.
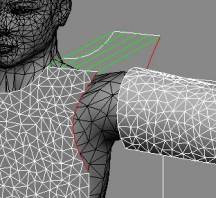
Segments selected for making MultiSegment
Now, if you deselect and select either the back or front segment, both will be selected or deselected because Garment Maker now considers them to be one segment.
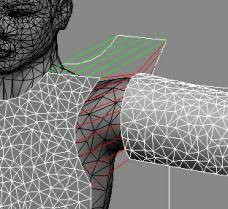
Seam attaching sleeve to body
Seams for left side of body
Remember to create the shoulder seam first and then make the MultiSegment seam. When dealing with MultiSegment seams, the order of creation is important. If you attempt to create seams in the wrong order, you might get a “Seamline topology is wrong” error, and the seams will not be created. When dealing with MultiSegment seams, create the minimum number of seams necessary to make the MultiSegment seam match the topology of the other piece to that you are going to connect. In this case, you have an arm seam that is open at the bottom, and a MultiSegment that is open at both the top and the bottom. By closing the top of this MultiSegment with a seam at the shoulder, you've created proper topology to make the MultiSegment seam.
To recap this first lesson, you created a pattern for a shirt from standard splines, applied Garment Maker, positioned them over the character and then created the seams that will be used to sew the panels together. In the next tutorial, you will see how to make the flat panels look more like a shirt.