


Adding Hair to the Helmet
Add the Hair And Fur modifier to the helmet:
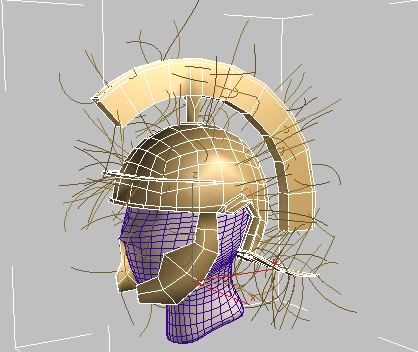
Hair emanates from the entire helmet.
 The
hair should grow only on selected portions of the helmet, so on the
Selection rollout, click Polygon to go to the Polygon sub-object
level.
The
hair should grow only on selected portions of the helmet, so on the
Selection rollout, click Polygon to go to the Polygon sub-object
level.
 This
is easiest to do in the Top viewport: use Arc Rotate to make sure you've
selected all these polygons. When the selection is complete, press Shift+Z to restore the original
Top view. (You might have to press Shift+Z more
than once.)
This
is easiest to do in the Top viewport: use Arc Rotate to make sure you've
selected all these polygons. When the selection is complete, press Shift+Z to restore the original
Top view. (You might have to press Shift+Z more
than once.)
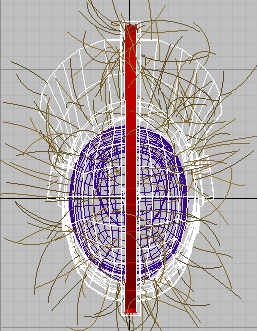
Selecting the crest polygons
 On the
Selection rollout, click Update Selection.
On the
Selection rollout, click Update Selection.The hairs now emanate only from the selected polygons.
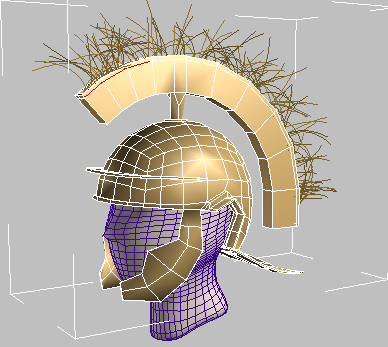
Hairs growing from the crest only.
Modify the Hair general parameters:
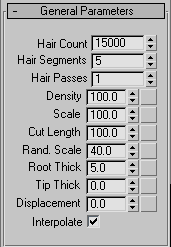
For this example, the helmet hair is all the same length, without any random scaling.
Next you'll change the frizz and material properties of the hair.
Modify the Frizz and Material Properties of the helmet crest:
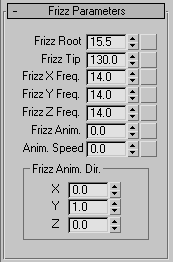
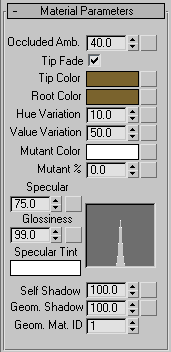
Because this is dyed hair, its color and texture are more uniform than natural hair. We want to add a bit of variety, but not much.
Mutant hairs are randomly selected and receive the color assigned. Mutant hairs are present in natural hair; as we age, we have more and more mutant gray or white hairs. However, the foot solder's helmet plume will not age (they used dyed horsehair), so you'll leave the mutant hairs out for now.
Render your scene to view the hair:
The Hair And Fur modifier requires at least one spotlight in the scene to render shadows.
Two omni lights for general lighting and one spotlight for the Hair And Fur modifier appear. The spotlight is set to render shadows.
A Hair And Fur render effect is necessary to render hair, but this is added automatically when you first apply the Hair And Fur modifier to an object in the scene. Also, by default the render effect is set to automatically use all spotlights in the scene to illuminate the hair, so no don't need to take further action to adjust the lighting.
You can now render your scene.
Your centurion helmet should look something like this:
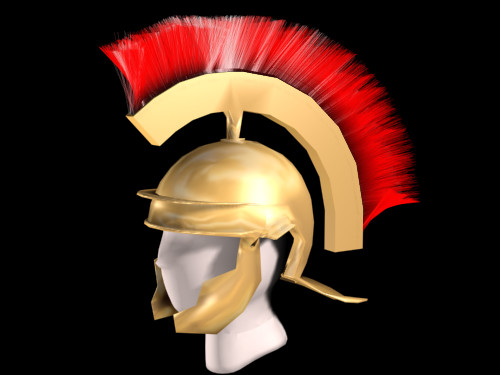
Rendered image of the helmet