Using photons requires a certain degree of expertise, which you'll gain in this lesson. In many cases, final gather and final gather multibounce will suffice and be easier to control, with good performance.
Using photons without final gather rarely gives better results or performance. Combining final gather with photons can give a speedup of up to five times (see below).
Use photons to distribute energy rapidly in a scene. Photons can easily perform many bounces.
When shouldn't you use photons? Photons don't like to jump through a keyholes. Imagine a dark room that is lit only through a keyhole.
Use photons when a room is rather evenly lit, in which case the photons can replace FG multibounces. Set Diffuse Bounces to 1, and combine it with photons.
Preconditions for using photons
It is very important to use "physically correct" lights with photons. If the photons shot by the lights do not match the "direct light" shot by the lights, images will not look good.
In 3ds Max, all lights in the Photometric category do this automatically, whereas the standard lights are not guaranteed to perform in the same way, automatically. This is another reason for recommending that you mostly use FG. It works with any light, no matter how "unphysical,” since it is concerned only with the transport of light from surface to surface, not the transport of light from the light to the surface.
Also note that the mental ray Sky light does not shoot photons, which explains why the following renderings will be darker compared with FG. Until it does, you can use blue tinted photometric area lights in windows as a substitute, although we will not do that here. Also, the color tint is different, as blue light from the sky is missing, and most light (photons) from the sun hit the wooden floor first, which adds a tint.
Regarding interior renderings with lights other than sun/sky: If you plan to use photons, stick to the photometric lights. If you plan to use only FG multibounce, any light will work.
Photons in mental ray simulate real-world photons. They're reflected by mirrors, refracted through glass, and scattered on diffuse and glossy surfaces. The tutorial scene uses mostly diffuse surfaces; the walls in the scene have a heavily diffuse material. The sunlight that directly hits the wooden floor scatters into the room, and photons continue to bounce from wall to wall, due to the bright materials.
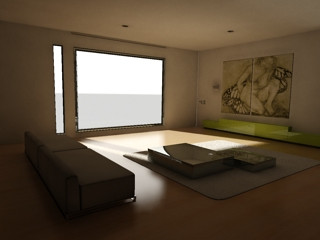
The following steps explain the usage of photons in mental ray. First we show that we indeed have individual photons, and then later we show how to get a smooth image.
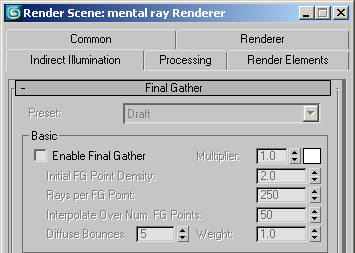
Enable Final Gather is off.
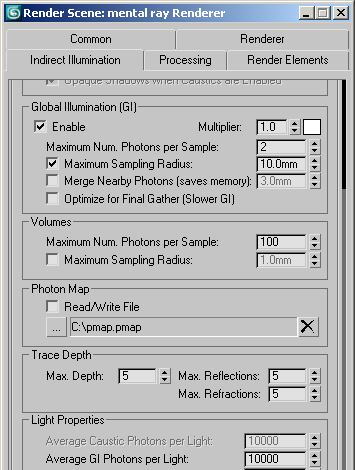
Global Illumination (photons) is on.
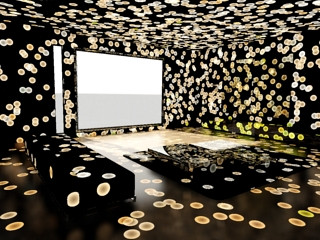
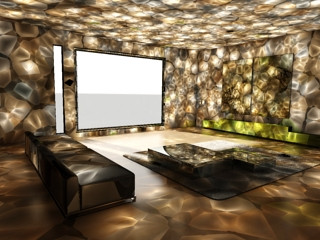
This image shows the photons. In nature, areas that have a higher density of photons are brighter. The major advantage of photons in mental ray is that they simulate this natural phenomenon, including reflections from metal and refraction through glass.
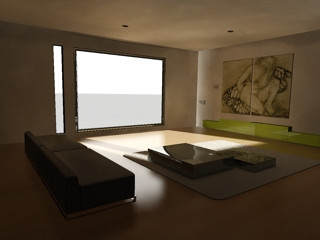
To get from individual photons to a smooth image, increase the radius and the number of photons looked up.

The image isn't smooth yet, but we have brightness nearly everywhere.
|
Maximum Sampling Radius=200.0mm (0.2m) |
Maximum Sampling Radius=500.0mm (0.5m) |
Even with larger Radius settings (see preceding illustrations), the image is nearly identical. Why? Because we need more photons in the lookup. So far we've looked for only two photons, but a medium-quality image needs around 100 photons in the lookup. A high-quality image starts at 1,000 photons in the lookup. The following renderings increase the number of photons looked up, keeping the radius at 0.5 meter.
100 (max.) photons per sample
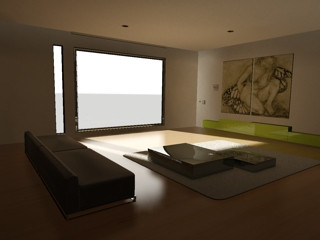
This image shows something to watch out for with photons: a light leak. Because mental ray is looking up photons in a large radius (0.5 meters), it might actually pick up some photons that have struck an object on the other side of the wall! This is what causes the bright streak in the far corner.
Otherwise, this image is already quite good, and rendering time is fast. The next step is to further increase the number of photons.

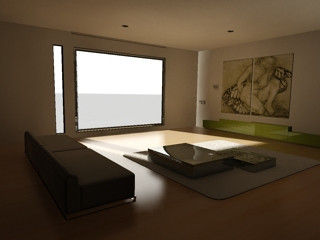
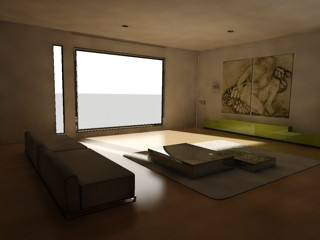
1,000 (max.) photons per sample
The image is now smooth, but looks washed out.
Further increasing the number of photons to be looked up will not increase image quality. We have a total of only 10,000 photons in the whole scene. We simply do not find more than 1,000 photons inside a radius of 0.5m. We could ask for a million, but we will not find more. To find more one could increase the radius, to catch more photons.
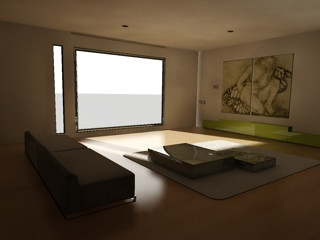
The image with a radius of 0.5m and 1,000 photons to be looked up is smooth, but lacks detail. How to add it?
We can suggest 2 1/2 strategies: The first is to shoot more photons into the scene. This lets you reduce the radius again, resulting in increasingly greater detail. We will describe this shortly with regard to the following three images, with the intent to increase your understanding of photon density versus image quality. The second strategy is to add final gather, which is often the best solution. The additional “1/2” strategy is to use photons for the overall light distribution, and ambient occlusion for the detail.
The silver rule for photons is: Shoot four times more photons from the light to decrease the radius by 2. This keeps roughly the same number of photons inside the area covered by the radius.
|
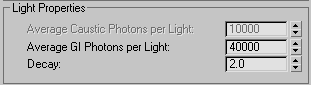
radius 0.25m, 40k photons |
radius 0.125m, 160k photons |
|
radius 0.07m, 640k photons |
As the radius gets smaller, the light leak in the rear corner on the right wall shrinks, and, in general, detail returns. However, some low-frequency noise is visible.
This happens primarily because when the radius is smaller we see more detail, including more noise. This leads us to the golden rule for photons: To reduce the radius by 2, shoot 4 x 1.4 times the number of photons, and increase the number in the lookup by 1.4.
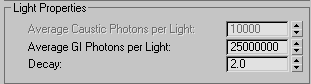
You can save and reuse the photon map independent of geometry and image size; doing so can dramatically speed up rendering for a camera walkthrough. Here we save it to try different lookup options to resolve the low-frequency noise. We run once with 2.5 million photons shot from the light source and store it in the photon map file.
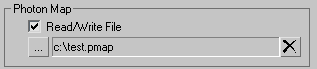
You can use a saved photon map arbitrarily, even with a completely different scene for artistic purposes. The photon-emission phase takes place instantaneously with a saved photon map. When tuning lookup with a large number of photons, using a photon map can save a great deal of time.
To remove the low-frequency noise you can increase the number of photons in the lookup; for example, to 10000. If the rendering time doesn't go up, it means that there are not more photons inside a 125mm radius. You then need to increase the radius a bit, to get to a point where mental ray finds more photons again.
In this image the low-frequency noise is gone, but the light leak remains.

Maximum Sampling Radius=70.0mm
Here the light leak is gone, but noise is visible.
Maximum Sampling Radius=30.0mm
How to resolve this? To remove the noise you could increase the radius, but this also causes the light leak. An easy fix would be to place a black object on the outside of the building so photons don't get stored there. If this isn't suitable, you need more photons in the lookup. A frequent misunderstanding is simply to increase the lookup, for example to 20,000 instead of 10,000. This helps only if mental ray indeed finds enough photons inside the radius. If not, you need to shoot more from the light source.
The limit to quality with photon maps is memory. For small radii, mental ray needs many photons. Most 32-bit versions of Windows can access up to two gigabytes of memory, while the extended version allows up to three gigabytes. If you export an MI file to the standalone version of mental ray, you can eliminate the application's (3ds Max) memory footprint, thus making additional memory available to the renderer.
Photon merging is a new feature in mental ray 3.5 that lets you create an optimized photon map, which enables bringing more photons to dark areas of a scene. Photons inside a given radius are merged, and thus consume less memory. Especially bright areas have many photons close to each other, consuming a lot of memory. Using merging in bright areas reduces memory requirements. You can shoot many more photons before hitting memory limits. Typical values can be 10 million to 50 million photons.
Use photon merging only when a larger number of photons is required. This feature is intended primarily for advanced users. The procedure is:
Using a merge radius larger than 5 percent typically does not help. Shooting more photons from light sources is a must. Merging alone solves memory. Shooting more photons improves quality.
Merge radius=1.0mm
The result shows how you can achieve a new level of quality with merging. As a bonus, you can save the merged photon map just like any other photon map.
The conclusion for photons is that they are useful for distributing energy within a scene. Even a small number of photons can provide beneficial overall illumination. However, the Draft preset for final gather often does the same job more easily. Photon maps can increase memory use and lookup time when details are required.
A better alternative to get details is to combine photons and final gather.