


Managing Multiple Lights
Interior architectural models typically have a large number of light objects. This lesson demonstrates some ways to manage lights, both when they are instanced and when they aren't.
Managing Instanced Light Objects
In architectural modeling, it's common to use instanced lights. Instancing allows you to control the properties of all lights of a particular type by editing the properties of just one of them. However, you sometimes want to control lights individually. This section shows you how.
Set up the scene:
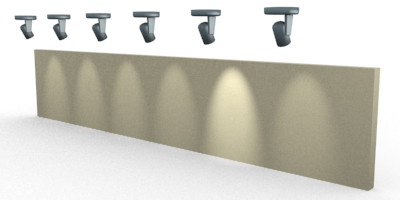
The scene shows a row of six light fixtures and standard free spotlights, aimed at a wall. The lights are instanced.
Render the scene:
 On the main toolbar, click Quick
Render.
On the main toolbar, click Quick
Render.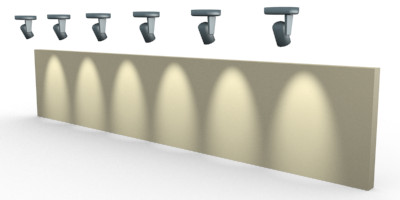
Wall illuminated by instanced light objects
Turn off one light:

 Click
to select the leftmost light (Fspot01), and
then go to the Modify panel. On the General Parameters rollout,
in the Light Type group, click the On toggle to turn it off.
Click Quick Render.
Click
to select the leftmost light (Fspot01), and
then go to the Modify panel. On the General Parameters rollout,
in the Light Type group, click the On toggle to turn it off.
Click Quick Render.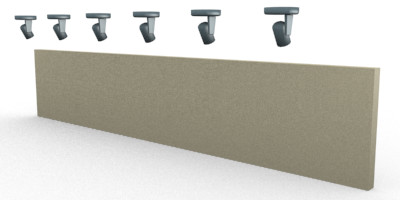
Turning off an instance
Because the lights are instanced, turning off a single light turns off all of them at once.
Hide some lights:
 On the
main toolbar, click Window/Crossing to choose window selection,
and then in the Camera01 viewport, drag a selection window to select
the leftmost three lights and their fixtures.
On the
main toolbar, click Window/Crossing to choose window selection,
and then in the Camera01 viewport, drag a selection window to select
the leftmost three lights and their fixtures.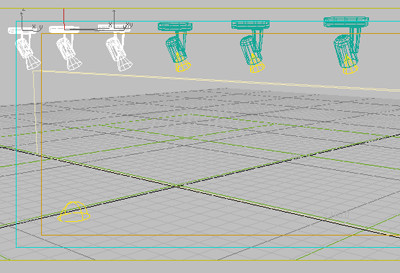
Lights and fixtures selected
The lights are now hidden.
Click Quick Render.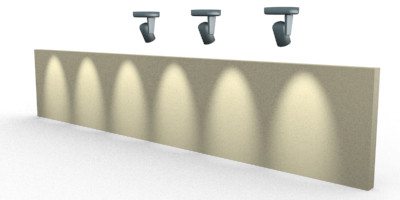
Rendering hidden lights
Although the lights are hidden, they still illuminate the wall. Hiding a light has no effect on its light-casting properties.
Turn off some lights by making them nonrenderable:

Light objects selected, but not their fixtures
The Object Properties dialog is displayed.

Lights turned off using the Renderable property
Now you have the desired result. The Renderable toggle can control whether an instanced light casts light in the scene.
Save your work:
The Light Lister tool is a sort of master dialog for lights in the scene. For individual lights, it is a shortcut to controls on the Modify panel. (Its General settings also include settings on the Environment panel.)
Set up the scene:
The scene is the same as in the previous section, but in this case, the lights are independent objects, not instances.
Use the Light Lister to dim some lights:
The Light Lister dialog is displayed. There is an entry for each unique light in the scene (instances don't appear on this dialog).
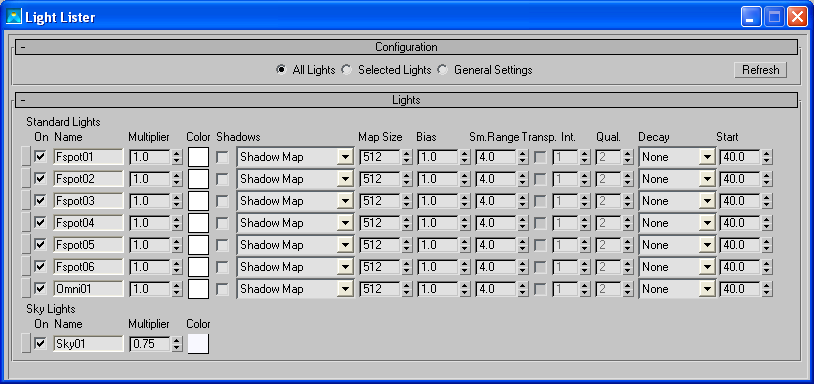
You might have to expand the dialog vertically to see all the rows. As the dialog shows, the scene contains six free spotlight objects, one omni light, and one skylight.
Only the fifth light casts a full-strength beam.
Use the Light Lister to change light colors:
The Color Selector is displayed.
A Copy Or Swap Colors dialog is displayed.
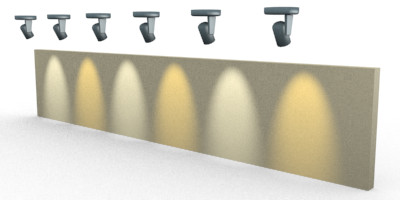
Now alternating lights have alternating color.
Save your work: