


Lighting a Close-Up of a Head
To light a subject, such as a talking head or a still life, it helps to think in terms of how you would light the same subject if you were working on a stage set or in a photo studio. In other words, you can place the lights wherever you want, adjust their intensity, tint their color, and so on. There are some widely used guidelines to lighting this way, and this section introduces them briefly.
Set up the scene:
The scene has a camera that is set up to render a head shot of the 3D cartoon character named Pito.
Look at the default lighting:
 On the
main toolbar, click Quick Render.
On the
main toolbar, click Quick Render.3ds Max renders the camera view.
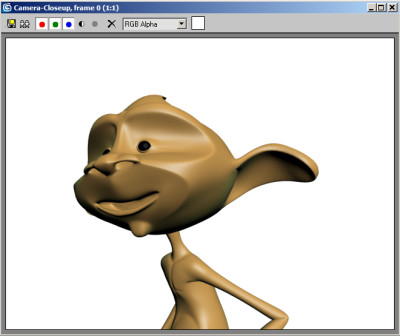
Default lighting of Pito
This is not a bad rendering of Pito, but we can do better.
Add a light:

 On the
Create panel, turn on Lights, and then click Target Spot to turn
it on.
On the
Create panel, turn on Lights, and then click Target Spot to turn
it on. 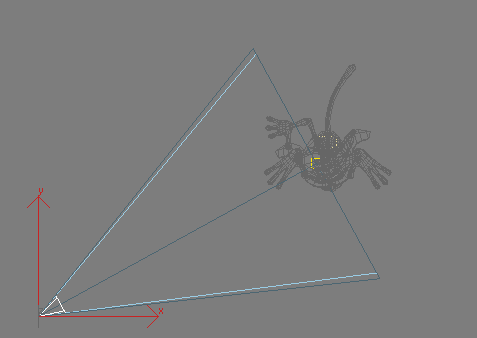
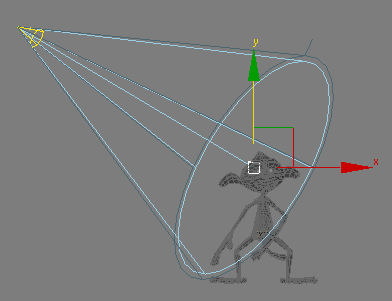
Aiming a target spot light at Pito
3ds Max creates the light. However, it is at ground level.
Light is created initially at ground level.
 In the
Front viewport, use the Move tool to move the spotlight so that
it is slightly higher than Pito’s head.
In the
Front viewport, use the Move tool to move the spotlight so that
it is slightly higher than Pito’s head. 
 Go to
the Modify panel, and on the General Parameters rollout, turn on Shadows.
(The default method of Shadow Map will work fine.)
Go to
the Modify panel, and on the General Parameters rollout, turn on Shadows.
(The default method of Shadow Map will work fine.) 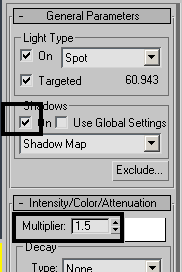
Right-click
the Camera view to make it current, and then click Quick Render. 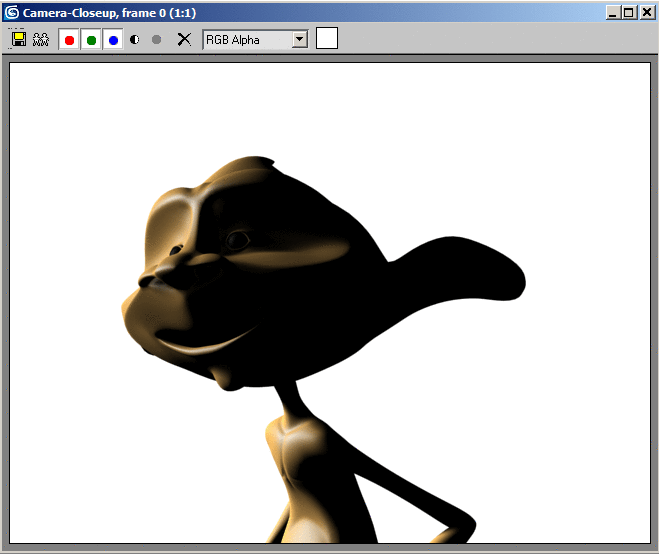
We can see that Pito is illuminated on one side, but the shadow areas are too dark. In general, faces look better and more interesting if they are lit at an angle, but one has to compensate with a fill light to get rid of the dark areas. This is why flash photos usually don't look as good as studio portraits.
Add a fill light:
On the
Create panel, turn on Lights, and then click Target Spot to turn
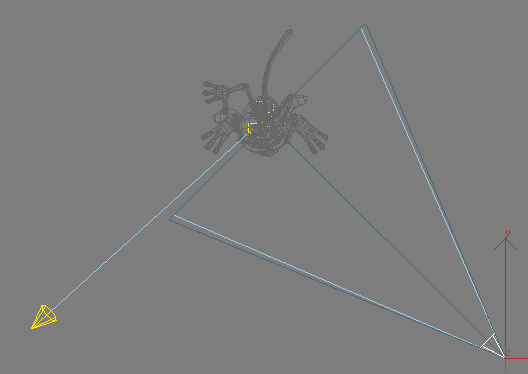
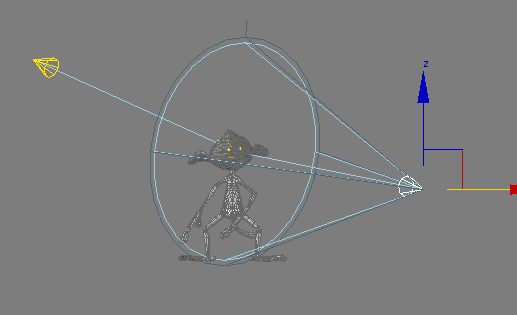
it on.In the Top viewport, click and drag to create a target spot on the right side aiming at Pito. The two lights can form about a 90-degree angle with Pito's face.
On the
Modify panel, set the Fill light’s multiplier value to about 0.6.
A fill light is usually less intense than a main light as its purpose
is to simulate global illumination (bouncing light). Activate
the Camera viewport, then click Quick Render. 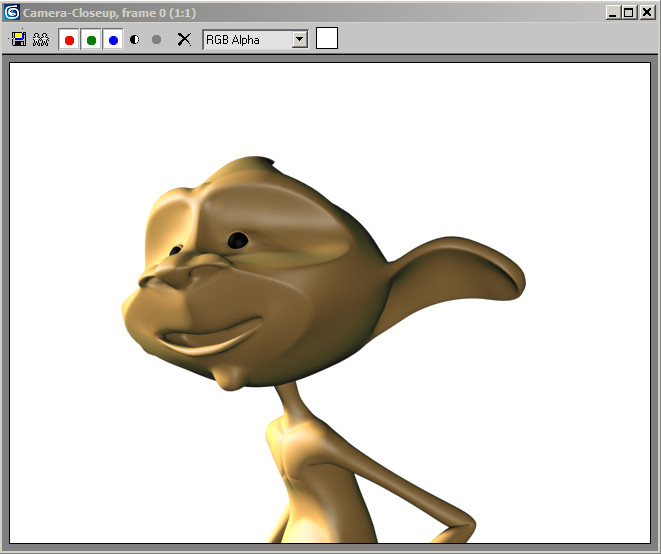
Here is a good, balanced portrait of Pito. Compared to the default light, it is brighter and you can see more detail, but there are shadows enough to make Pito look three dimensional.
Add a Back Light
A back light’s sole purpose is to separate the character from the background. It is a light you place behind the character to emphasize the silhouette against the background. This can be especially useful when shooting a dark-haired character against a dark environment.
On the
Create panel, click the Lights button and then click Target Spot.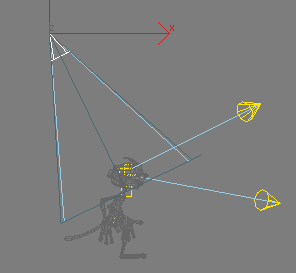
Activate
the Camera viewport, then click Quick Render. 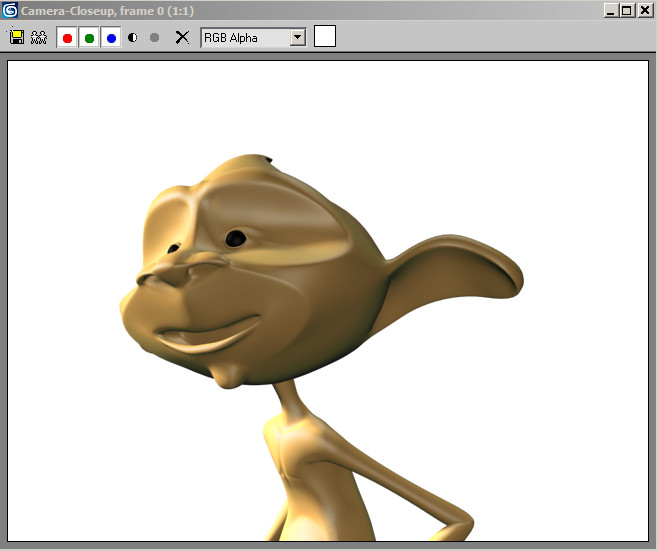
The brighter light, which you created first, is known as the key light. The dimmer light, which you added next, is known as the fill light. For most subjects, you want to have a single key light only, but you can add additional fill lights to illuminate the background or other hard-to-see places to simulate global illumination. You can also vary the position of the key light, to make the image clearer or more dramatic. Finally, you added a backlight to separate your character from the background.
Experiment:
The best way to understand how an individual light is affecting your scene is to turn off all other lights that are present. Try this:
Select
the Main light (the first light you created) and on the Modify panel,
turn the light off.
With
the Camera view current, click Quick Render.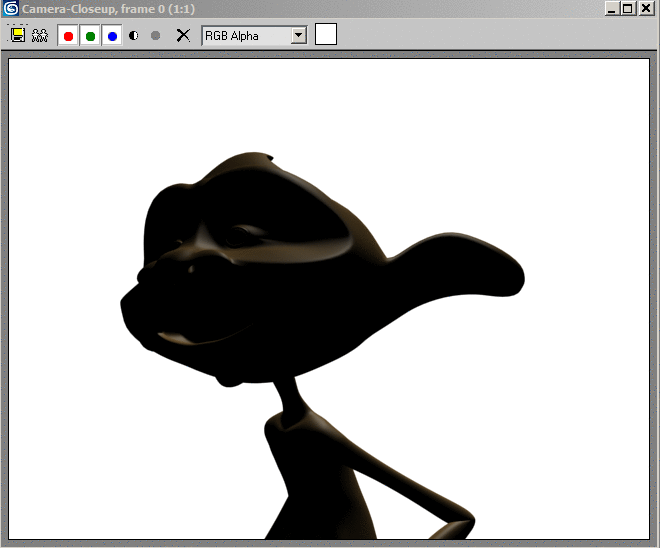
You can now see the individual effect on the back light in the scene.
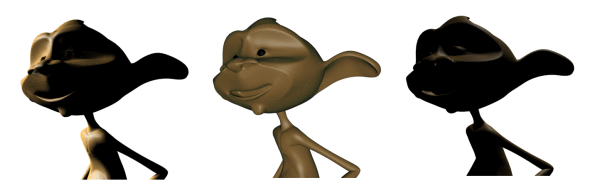
The effects of the individual lights on Pito: the Main light (Left), Fill Light (Center) and Back light (Right).
Save your work:
If you are lighting a single subject such as a head, use a single key light and one or more fill lights. The key light is the brightest; the fill lights have a lower intensity.
You can get different effects by changing the angle of the light. Avoid lighting a subject directly from the front.