


Setting Up Viewport Backgrounds
You can load images or drawings in viewport backgrounds to use as patterns for building your airplane. Each viewport can have its own background, so you can load a corresponding image in the Front, Side, and Top viewports to guide you as you build your model.
In general, when modeling something you've previously visualized or seen, it's best to start with sketches from several different viewpoints, such as top, side, and front. Also, the drawings should all be to the same scale, if possible. In this lesson, you'll use three drawings of a P-38 Lightning taken from WWII plane-spotting cards.
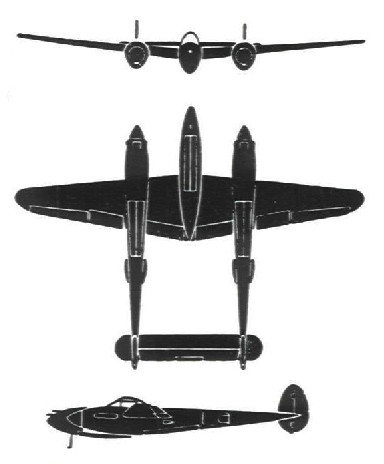
Three views of the P-38 Lightning from a set of plane-spotting cards
Set up viewport backgrounds:
A sketch of the top view of the fighter is visible in the Top viewport and the Viewport Background dialog closes.
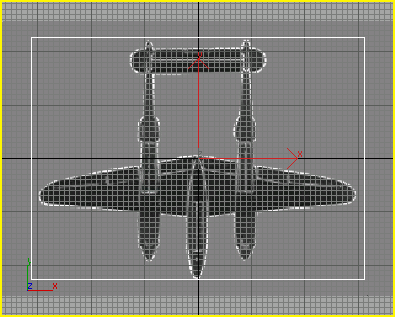
Top viewport displays the Top view background image.
The Left viewport becomes active.
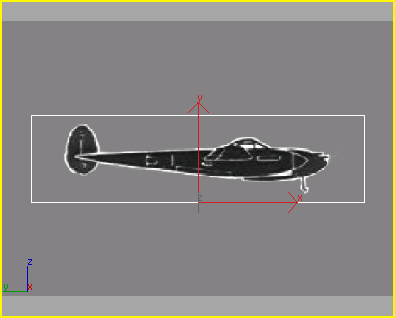
Left viewport with its corresponding background image.
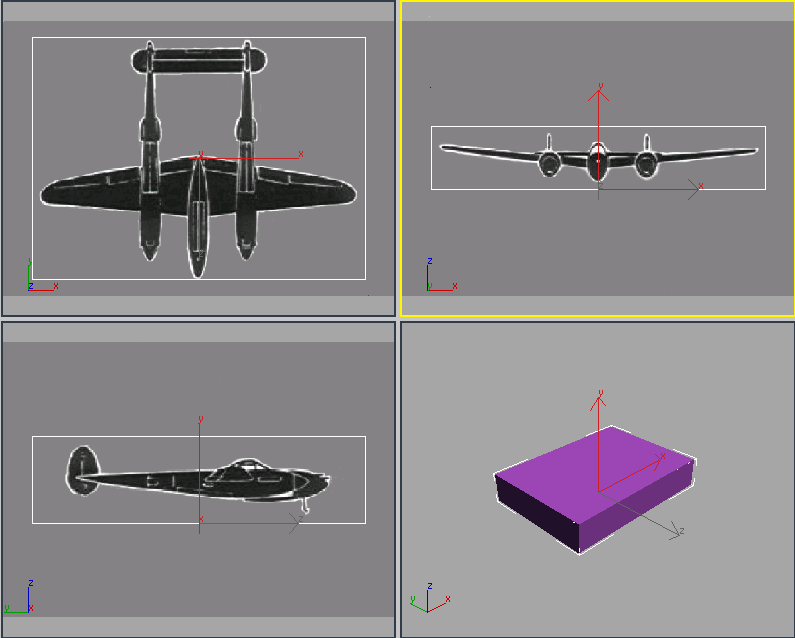
The three images are displayed in their appropriate viewports.
Next you will zoom and pan each view to more closely match the background images to the calibration box to make sure the three viewports are in the same scale. Each image is currently centered within the calibration box.
Calibrate the viewports:
 In the viewport navigation
controls, at the lower right, click Zoom. Zoom the Top viewport
until the width of the box matches the width of the wings. Match
the wingspan as closely as you can.
In the viewport navigation
controls, at the lower right, click Zoom. Zoom the Top viewport
until the width of the box matches the width of the wings. Match
the wingspan as closely as you can. Click Pan in the viewport
controls, and then pan the viewport to center the box over the bitmap
vertically. It won't be perfect, the two rudders will extend slightly
beyond the calibration box.
Click Pan in the viewport
controls, and then pan the viewport to center the box over the bitmap
vertically. It won't be perfect, the two rudders will extend slightly
beyond the calibration box.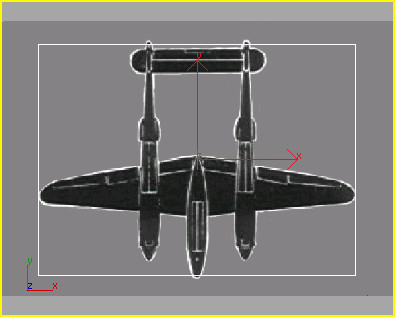
Top viewport aligned with calibration box
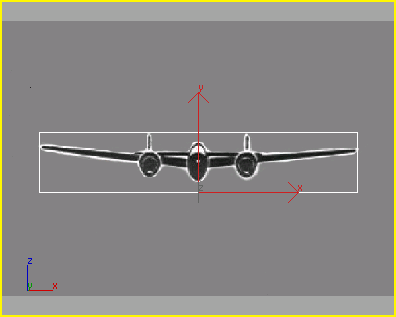
Front viewport aligned with the calibration box.
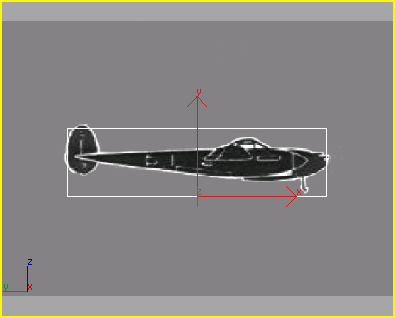
Left viewport aligned with calibration box
All three viewports are now calibrated so the picture in the viewport represents the approximate dimensions of the P-38.
You can zoom and pan the background images in the viewport if you want to center or enlarge them. To zoom or pan the background images do the following:
Zoom the background images and calibration box:
Turning on Lock Zoom/Pan locks the background image and objects together, so if you use the zoom or pan buttons from the viewport navigation controls, you can zoom in on the background image and objects or shift them horizontally or vertically.
This is very handy if you have a detailed background sketch and know you will be zooming in to work on objects.
You will notice the background image shifts when you close the Viewport Background dialog.
If you open a saved file or notice the background image has shifted, do one of the following:
Use the viewport navigation
Zoom and Pan buttons to make the background images the correct size
and position in the viewports. Turn off Lock Zoom/Pan, and then
use the same navigation tools to align the geometry with the bitmaps.
You can use Ctrl+Alt+B to
toggle Lock Zoom Pan. You
can also move the objects in the scene to match the background image.
Then, if you use Zoom Extents, the image will be centered with the
geometry.
You
can also move the objects in the scene to match the background image.
Then, if you use Zoom Extents, the image will be centered with the
geometry.Hide the calibration box:
You can always unhide the calibration box and repeat the above procedure to re-calibrate. To unhide the box, go to the Display panel and choose Unhide By Name, then in the dialog, select the box.