Completing the Apple

Modeling an Apple

Creating a Realistic Hourglass

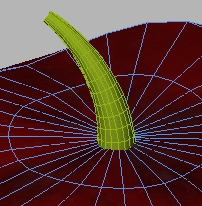
Adding a Stem to the Apple
In this lesson, you add some more visual
interest to the apple. To create the stem of the apple, you make
a cylinder using the AutoGrid feature to build the stem on the surface
of the apple. You then add a Bend modifier to finish the stem.
Create
the stem:
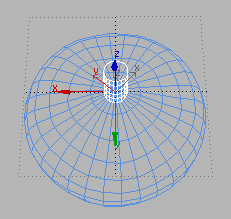
When you build an object in a viewport, the
object is constructed on a grid. Up until now, you have been using
the home grid to build the apple. Now you'll try using the AutoGrid
feature. This uses a roving grid that is automatically created off
a surface using face normals.
- On
the Create Menu, choose Standard Primitives > Cylinder.
The Cylinder button highlights on the Create panel.
- On
the Create panel > Object Type rollout, turn on AutoGrid. This
is a small check box directly under the Object Type rollout.
- In
the Top viewport, move the cursor over the apple.
A tripod follows the cursor showing where the
cylinder will be created. Try to locate the center of the top of
the apple.
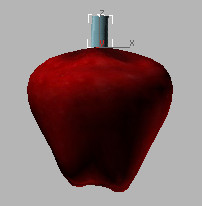
- Add
a cylinder on top of the apple. First drag and release to draw the
base of the cylinder, and then move the mouse to set its height.
Click to finish.
- In
the Name And Color rollout, change the color of the cylinder to
green and name it stem.
- On
the Parameters rollout for the stem, set the following:
- On
the Object Type rollout, turn off AutoGrid.
- On
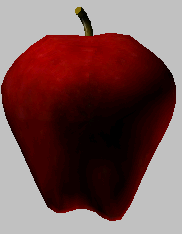
the Modifiers list, choose Object-Space Modifiers > Bend.
This applies a zero-degree Bend to the cylinder.
- On
the Parameters rollout for the Bend modifier, adjust the Angle setting
to bend the stem. Plus or minus 60 is about
right. Experiment with the Direction parameter, although you can
leave it at 0 if you want.
- Right
click in the Perspective viewport to active it, and press F9 to render last.
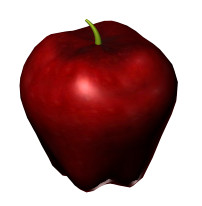
If you want your stem to be similar to the one
in the bottom illustration, apply a very slight Taper modifier below
the Bend.
- Highlight
the Cylinder in the stack display.
- Add
the Taper modifier at this point, it will then taper the cylinder
before it is bent.
WarningApplying
the Taper modifier after the Bend will produce entirely different
results.
After Adjusting the Taper modifier, highlight
Bend to reactivate it.
Save
your work:
- Choose
File > Save As. Save your work as my_apple01.max in
your appropriate local folder.
NoteA completed
file, tut_apple_complete.max is
also available in the
tutorials\intro_to_modeling
directory.
Summary
In this tutorial, you learned how to start with
a primitive and shape the object using the Editable Mesh tools.
You also learned how you can use displacement mapping to make an
object appear more organic.