Improving the Shape of the Apple

Modeling an Apple

Adding a Stem to the Apple

Completing the Apple
This lesson continues from the previous one.
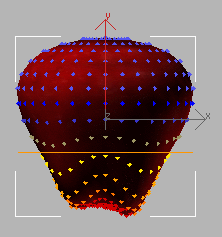
You are working at Vertex level with Soft Selection active. The
bottom half of the apple is selected.
Apply
a displacement modifier to your apple:
Here you apply a Displace modifier to move only
the currently selected vertices on the bottom of the apple. You
use a bitmap to control this movement, or displacement.
- Make
sure the Vertex sub-object selection is active (yellow) in the modifier
stack and the vertices are visible in the viewport. Then, click the
Modifier List drop-down arrow. From the Object-Space category in
the drop-down list, choose Displace.
This applies the Displace modifier. You won’t
see much change until you adjust its parameters.
- Adjust
the Strength spinner in the Displacement group. You should see the
effect happening only on the lower half of the apple.
- On
the Parameters rollout > Image group, click the Bitmap button
labeled None.
- In
the Select Displacement Image dialog, choose appledis.jpg.
The preview window at the bottom of the dialog
shows the bitmap you’re applying.
The bitmap is a black square with four fuzzy
white blobs. The white areas will displace more than the black,
producing the characteristic four bumps on the bottom of the apple.
The fuzziness of the bitmap image creates a smooth transition.
- Click
Open to apply the bitmap.
- In
the Parameters rollout > Displacement group, drag the Strength
spinner (the small arrows next to parameter fields) upward and then
downward to increase and decrease the Strength parameter a little. Again
watch the effect in the viewport.
Because the mapping is planar, and the selection
is on the bottom of the apple, positive Strength values push the
bitmap image into the mesh, and negative values draw the image out,
producing bumps. Try a value of -5.0. You can
change this later if you need to.
Complete
the top of the apple:
To complete the apple shape, you'll add an Edit
Mesh modifier to create a second soft selection, and then copy the
Displace modifier to the top half of the apple.
NoteEven though the apple is an editable mesh,
it already has a sub-object selection that the Displace modifier
is acting upon. Although the mesh can have multiple named sub-object
selections, only one can be active at a time. By adding an Edit
Mesh modifier, you can create a new, additional sub-object selection
to be affected by a separate modifier; in this case, another Displace modifier.
This takes advantage of the flexible modifier stack structure inherent
in 3ds Max, which gives you an editable history of your modeling
actions; you can go back at any time and modify one part of the
history without affecting the rest of it. So, for example, after
you create the second displacement at the top of the apple, you
could go back to the first Displace modifier and adjust the strength, replace
the bitmap with a different image, or alter any other parameter
without changing the effect of the second displacement.
- On
the Modify panel, choose Modifier List > Object-Space Modifiers
> Edit Mesh.
-
 In the
Selection rollout, choose Vertex.
In the
Selection rollout, choose Vertex.WarningYou
want the Vertex sub-object level of the new (top) Edit Mesh modifier.
Not the Vertex level of the (bottom) Editable Mesh.
You are now working at the Vertex sub-object level.
- Region-select
the vertices on the top two or three rows of the sphere. Name the
selection top of apple.
TipYou
might notice that the original Soft Selection vertices are still displayed.
Once you select the vertices at the top of the apple and turn on Soft
Selection, the newly selected vertices should display correctly.
- Open
the Soft Selection rollout. Turn on Use Soft Selection, and adjust
Falloff to about 8.0.
The modifier stack display shows you all the
changes you’ve made to your object. The sphere is now shown at the
bottom as an editable mesh. The successive modifiers that you applied
to this sphere are above it.
- In
the stack display, right-click Displace and choose Copy.
- At
the top of the stack display, right-click over Edit Mesh and choose
Paste to add the duplicate Displace modifier to the stack.
WarningDo not highlight Edit Mesh in the stack
display; that would turn off the sub-object selection. Instead,
just right-click over the Edit Mesh entry.
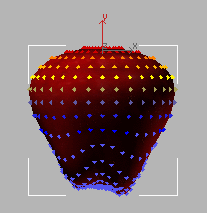
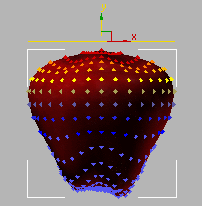
A copy of the Displace modifier appears above
the Edit Mesh modifier in the stack, and its effect has been applied
to the top of the apple selection.
- In
the Parameters rollout > Displacement group, set Strength to 2.0.
- Right-click
in a viewport and choose Sub-Objects > Gizmo from the Tools1
quadrant of the quad menu.
In the stack display, the Displace entry turns
yellow to show that you're working at its sub-object level.
The gizmo is a control for the modifier and
defines where and how the effect will take place. By placing the
gizmo just above the apple, you can get the effect you want.
- Move
the gizmo so that it’s floating above the top of the apple.
- On
the Parameters rollout for Displace, set the Decay parameter 1.5 to
model the top surface into a characteristic apple shape. Again adjust
the Strength parameter to fine–tune your effect.
- In
the stack display, click the Displace entry to exit the sub-object
level and turn off the yellow highlighting.


 In the
Selection rollout, choose Vertex.
