Modeling a Chess Set

Modeling a Chess Set

Modeling a Rook

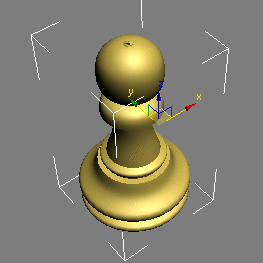
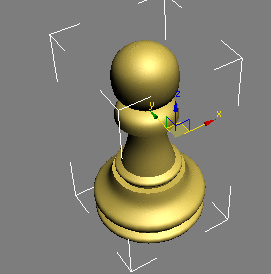
Modeling a Pawn
In this lesson, you will model a pawn for a set
of chessmen. In a wooden chess set of standard design, pawns are
turned on a lathe. You will use 3ds Max to do something similar:
draw the pawn's outline, and then use a Lathe modifier to fill out
its geometry. The Lathe modifier revolves the outline around a central
point to create a shape, not unlike the way wood is turned on a
machine lathe.
Features and techniques covered in this lesson:
- Using
spline shapes to draw the outline of an object.
This lesson also briefly introduces you to spline
editing.
A spline is a type of curve that is interpolated
between two endpoints and two or more tangent vectors. The term
dates from 1756, and derives from a thin wood or metal strip used
for drafting curves in architecture and ship design.
- Editing
the shape vertices and edges to better control spline drawing.
- Using
the Lathe modifier to turn a 2D outline into a 3D model.
Tutorial Files:
Tutorial files for this lesson can be found
in the \tutorials\intro_to_modeling folder.
Skill Level: Beginner
Time to complete: 15 minutes
Set
up the lesson:
Set
up the viewport background:
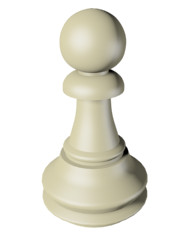
To create the profile of the pawn (and other
chess pieces), you need to load a reference image into the viewport
so you can trace over it.
- Right-click
the Front viewport to make it current.
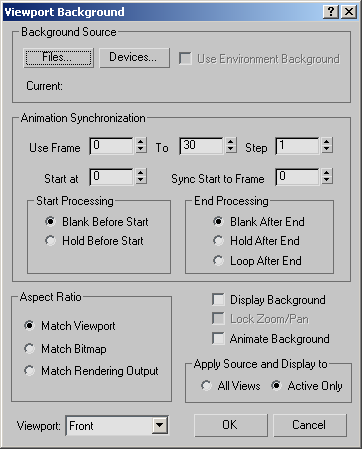
- From
the Views menu, select Viewport Background. The Viewport Background
dialog appears.
- Click
the Files button. Open the \tutorials\intro_to_modeling folder,
and then double-click ref-chess.jpg to
load it.
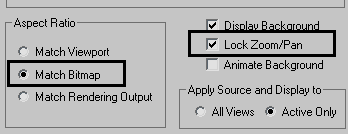
- In
the Aspect Ratio group, choose Match Bitmap. This ensures the image
in the viewport does not get distorted.
- To
the right of the dialog, turn on Lock Zoom/Pan. This ensures the
background image reacts to zooms and pans you may use for viewport navigation.
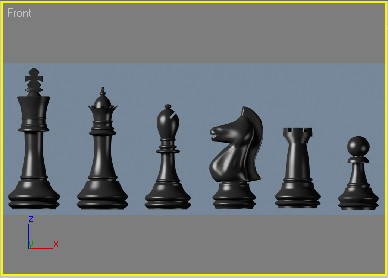
- Click
OK to exit the dialog. A bitmap now appears in the Front view. Press G to disable the grid, as you won’t need
it for this exercise.
Now you are ready to begin drawing.
Start
the pawn's outline:
You will draw the pawn's outline beginning with
the “knob” on top.
- Zoom
in on the pawn reference in the Front view.
- On
the Create panel, click Shapes, and then click Line.
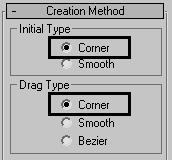
- On
the Creation Method rollout, set both Initial Type and Drag Type
to Corner. This ensures all line segments will be linear.
- In
the Front viewport, click a point near the top center. Press and hold
the Shift key to
constrain the line to the vertical axis and then click a second
point at the base of the pawn.
- With
the Shift key still
pressed, click a point in the bottom-right edge of the base.
- From
this position, click a few points on the right contour of the reference
image to create a rough profile, going up the side of the image. You
do not need to be very precise at this time as you will be able
to edit the profile later. To close the spline and end the command,
click on the first point.
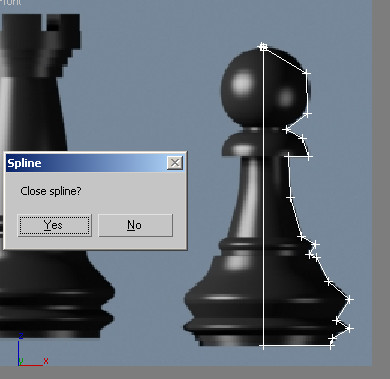
- When
prompted, click Yes to close the spline.
Edit
the pawn's outline:
-
 With
the spline still selected, go to the Modify panel.
 -
 On the
Selection rollout, click the Vertex button.
 - In
the Front viewport, zoom in on the bottom part of the profile you
created.
-
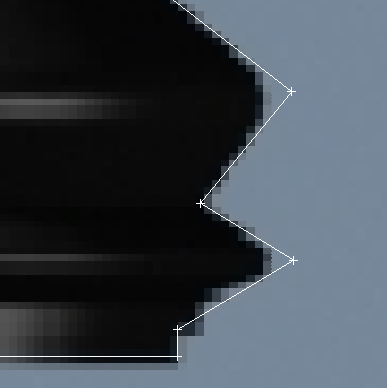
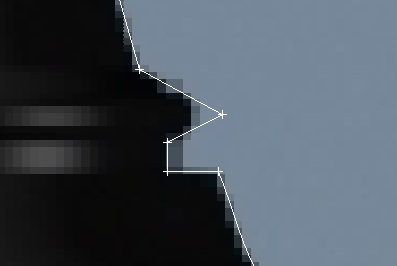
 Use
the Select And Move tool to adjust the vertices as shown in the
following illustration.
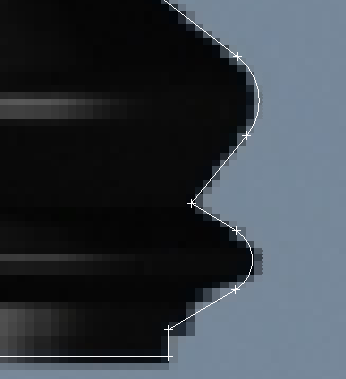
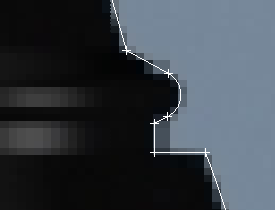
- Select
the two right-most vertices and then activate the Fillet button
on the Modify panel.
- With
the Fillet command active, place the cursor on one of the selected
vertices and then click and drag to round off the two corners, as shown
below.
- Pan
up to work on the middle section of the profile.
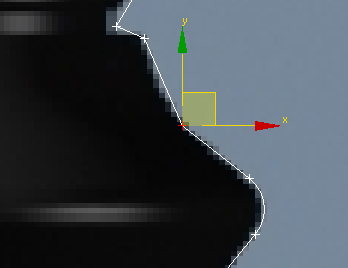
- Select
the vertex above the rounded corner you just created. If necessary,
move it to a better position, based on the reference image.
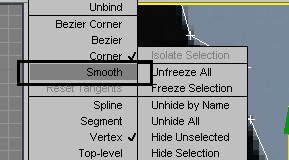
- With
the vertex selected, right-click in the viewport and from the quad
menu that appears, choose Smooth.
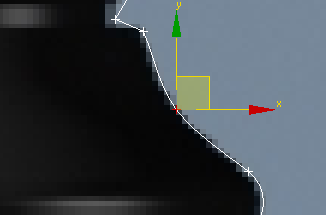
- Adjust
the vertex position to match the reference image.
- Pan
up to the next set of vertices.
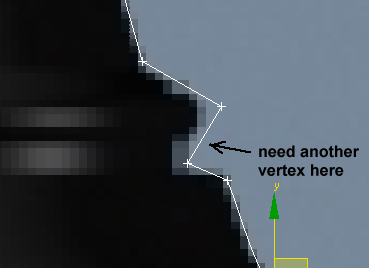
In some situations, you might need to add a
vertex.
- On
the Modify panel > Geometry rollout, choose Refine.
- Click
the line where you need to insert the vertex.
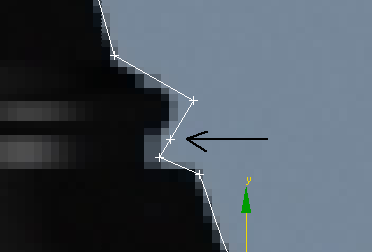
A new vertex is added to the spline.
- Using
the Move tool, adjust the position of vertices as shown in the following
illustration.
- Select
the vertex sticking out to the right and fillet it to create a curve,
as you did earlier.
- Pan
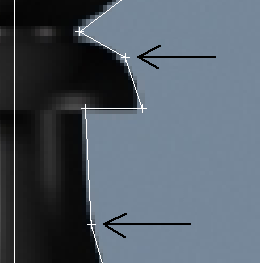
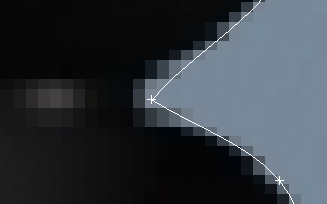
up the profile. Select the two vertices shown in the following illustration.
- Using
the quad menu, convert the two selected vertices to Smooth vertices,
as you did earlier. Move them to fine-tune their positions.
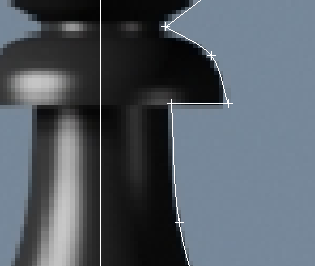
- Pan
up to the top part of the profile. Select the two vertices to the
right of the knob and make them Smooth vertices. Again, use the Select
And Move tool to fine-tune their positions.
- Zoom
in to the base of the knob.
- If
you have only one vertex at the base of the knob, use the Refine
tool as you did earlier to add another vertex.
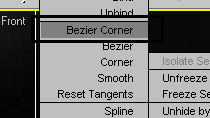
- Select
both vertices and right-click to access the quad menu.
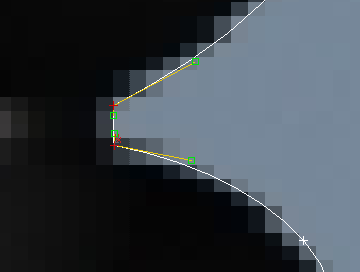
- Use
the quad menu to convert both vertices to Bezier Corner.
- Use
Select And Move to adjust the positions of the vertices and their
handles to get the proper curvatures around the base of the knob.
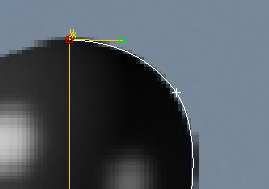
- Select
the first vertex you created, at the very top of the profile. Use
the quad menu to convert it to Bezier Corner.
- Adjust
the handles to match the curvature on the reference image.
- Continue
refining your profile, adjusting vertex positions and types to match
the reference image.
-
 When
you are done, click the vertex button in the Selection rollout of
the Modify panel to exit the sub-object level.
Lathe
the outline:
At this point, you can continue with the file
you created in the previous steps, or you can open the file pawn_outline_edited.max,
and continue from there.
- Select
the pawn and click Modifier List above the modifier stack display.
This is a drop-down list of various modifiers.
- From
the list, choose Lathe.
The pawn model might not look as you expected,
but that’s only because the axis of revolution, by default, is based
on the spline’s pivot point rather than the left side of the profile.
You will fix that in the next step.
- On
the Parameters rollout of the Lathe modifier, find the Align group
and click Min.
The pawn now looks better, albeit a bit “choppy.”
- On
the Parameters rollout of the Lathe modifier, increase the Segments
value to 32.
The pawn is now smoother, as you can see if
you render the Perspective viewport, but the center seems a bit
pinched.
- On
the Parameters rollout of the Lathe modifier, turn on Weld Core.
This combines all the vertices at the center of the model into one.
In the Introduction to Materials and Mapping
tutorials, you'll provide the chess pieces with more-convincing
color and texture and create a shiny, reflective wood-grain chessboard.
Summary
In this lesson you learned spline creation and
editing. You also learned to create 3D geometry using the Lathe
modifier.

 With
the spline still selected, go to the Modify panel.
 On the
Selection rollout, click the Vertex button.
 Use
the Select And Move tool to adjust the vertices as shown in the
following illustration.

 When
you are done, click the vertex button in the Selection rollout of
the Modify panel to exit the sub-object level.