


Autodesk 3ds Max Tutorials > Character Animation Tutorials > Biped Beyond the Basics > Interacting with Objects >
Making a Hand Follow an Object
In this lesson, you'll make a biped’s hand follow an animated object.
When a biped’s hand must interact with an object, there are two methods you can use to create the animation:
The second method has some practical advantages, which are illustrated with this lesson.
Set up for this lesson:
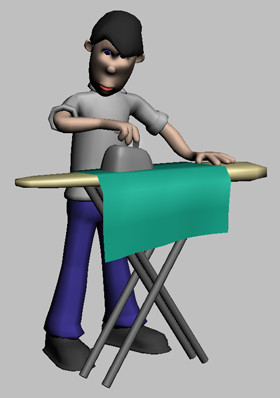
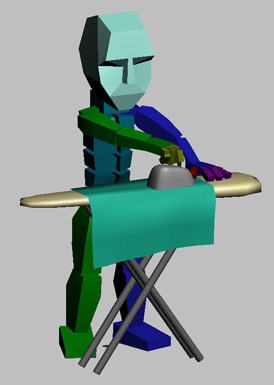
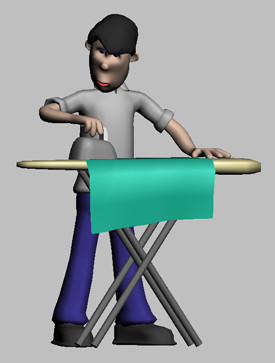
This file features a character named Wilson standing in front of an ironing board.
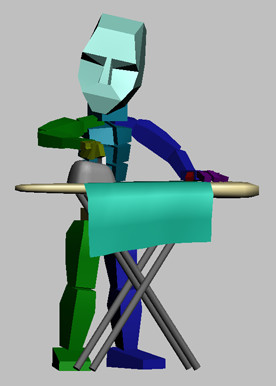
This character already has a biped with Physique applied to it. To work with the character, you'll hide the mesh and unhide the biped.
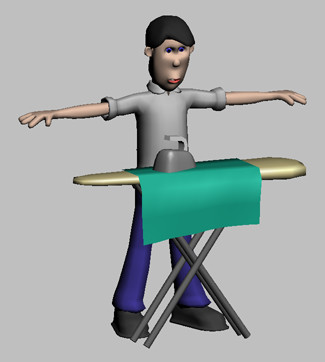
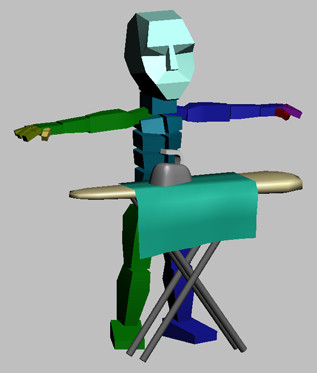
The biped appears in the scene.
This leaves the biped in the scene without the character mesh.
Pose the hands:
 Go to
the Motion panel.
Go to
the Motion panel.
 Using
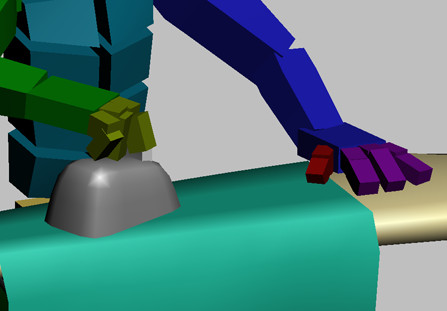
Select And Move and Select And Rotate, pose the right hand to hold
the iron handle. Look at the hand from different angles to ensure
it is gripping the handle. Don't be concerned if the fingers pass
through the handle slightly.
Using
Select And Move and Select And Rotate, pose the right hand to hold
the iron handle. Look at the hand from different angles to ensure
it is gripping the handle. Don't be concerned if the fingers pass
through the handle slightly.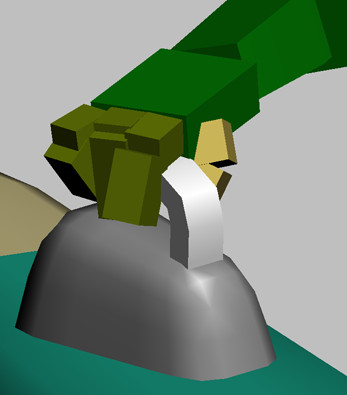
If you have difficulty with this step, open the file ironing_handpose.max. This file contains the biped already posed with its right hand on the iron.
Link the right hand to the iron:
 Click
Select IK Object, and click the iron.
Click
Select IK Object, and click the iron.The object name Steam Iron appears to the left of the Select IK Object button.
You could have created a similar animation by linking the iron to the hand with Select And Link, then animating the hand. However, this type of animation is limited. For example, if you later bent the biped’s spine so he could get a closer look at his ironing, the hand would move with the spine and sink into the ironing board. With IK linking, the hands will stay put when you rotate the spine.
Right now, if you bent the spine, the right hand would stay on the iron but the left hand would move. You can keep the left hand from moving by anchoring it to the ironing board.
Link the left hand to the ironing board:
Click
Select IK Object, and click the ironing board.The object name Ironing Board appears to the left of the Select IK Object button.
Bend the biped over:
 In the
Key Info rollout, click Set Key.
In the
Key Info rollout, click Set Key.
The biped’s hands stay in place when the biped bends forward.
Unhide the character:
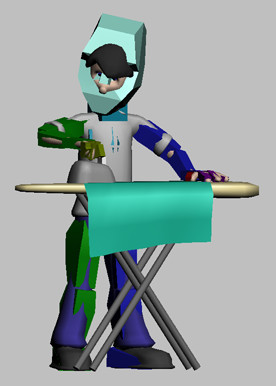
The biped is hidden, leaving only the character mesh.
You can find a completed version of this animation in the file ironing_complete.max.