Modifying Footsteps
In this lesson, you’ll learn how to copy and paste biped footsteps to extend an animation. You'll also learn how to adjust and bend the steps, and to produce the effect of walking on uneven terrain. You'll also make the biped take a jump.
Set up for this lesson:
Extend the walk:
 On the
Motion panel, in the Biped rollout, turn on Footstep Mode.
On the
Motion panel, in the Biped rollout, turn on Footstep Mode. The Footsteps sub-object level is activated, and only the footsteps can be selected.
 On the
Footstep Operations rollout, click Copy Footsteps to place the selected
footsteps into the footstep buffer.
On the
Footstep Operations rollout, click Copy Footsteps to place the selected
footsteps into the footstep buffer. Click
Paste Footsteps to paste the selected footsteps into the viewport.
Click
Paste Footsteps to paste the selected footsteps into the viewport.The new footsteps appear next to the biped's current footsteps.
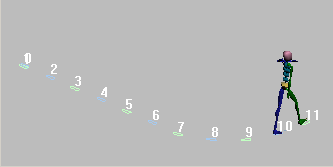
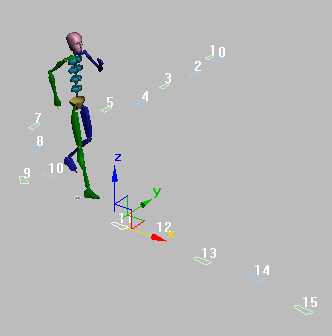
Pasted footsteps appear.
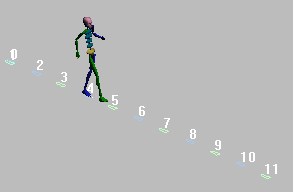
Footsteps from the original motion are inserted. Now there are 11 footsteps visible.
Pasted footsteps extend the motion.
Since you are still in Footstep mode, the Motion panel is available. This is a good time to save your mywalk_pasted.bip file, using Save File on the Biped rollout.
Scale the walk:
 Make
sure Footstep mode is active.
Make
sure Footstep mode is active. The biped walks with legs apart.
If you hadn't previously doubled this parameter, a setting of 0.5 would have scaled the width by 50%.
Now the biped puts one foot in front of the next.
Scale the width between the steps.
The biped walks as if on a tightrope.
Bend the walk:
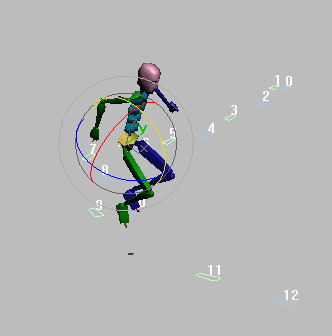
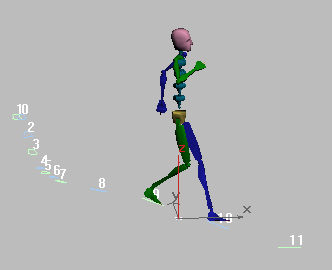
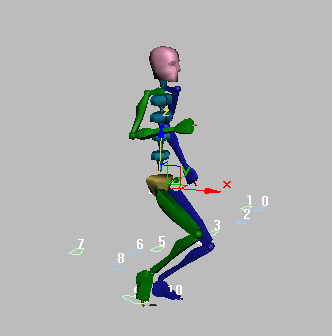
The footsteps bend to the left, beginning at footstep 7.
Walk on uneven terrain:
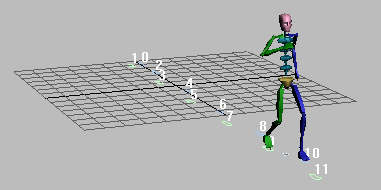
You can raise and rotate the footsteps to create the illusion of walking on uneven terrain.
The biped's feet follow the footstep placement.
Add a jump:
If there is a period of time during a footstep animation when neither foot is on the ground, the software interprets this period as a jump. There are several different ways to create a jumping animation. In this set of procedures, you’ll move footstep keys in Track View to make the jump.
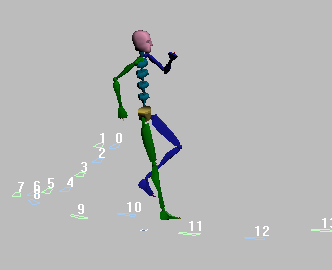
This is a slightly longer version of the same file you’ve been working on. It has 15 footsteps instead of 11.
Move footstep keys in Track View:
Track View is displayed.
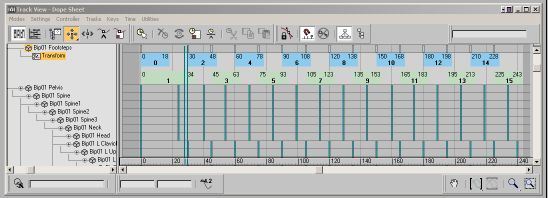
Dope Sheet shows special footstep keys.
In Dope Sheet display of footsteps, each blue block represents a left footstep, and each green block represents a right footstep. The length of the blocks is the period of time that the foot is in contact with the ground during the footstep. The spaces between the blue and green blocks represent periods in which the biped is not supported by the left or right foot.
In Track View, notice that footstep number 11 starts at frame 165.
 On the
Track View toolbar, click the Slide Keys button.
On the
Track View toolbar, click the Slide Keys button.This creates a gap between step 10 and 11. The keys in the other biped tracks adjust to the change in the footstep track.

The keys shifted to the right to create a gap
By creating an area in the footstep track where neither foot is supporting the biped, you have changed a walking step into a jumping step
The gap between footsteps creates a jump.
More gap for the jump
Now, if you shorten the duration of footstep 10, you can accentuate the jump.
 On the
Track View toolbar, click Move Key.
On the
Track View toolbar, click Move Key.A white dot appears only on the right side of the key to show it's selected.
Shorten the duration of footstep 10.
Make the biped crouch before the jump:
The preparation for the jump, between footsteps 9 and 10, looks a little stiff because the biped is not crouching enough before jumping. Resetting a vertical key will fix this.
 On the
Motion panel, in the Track Selection rollout, click Body Vertical.
On the
Motion panel, in the Track Selection rollout, click Body Vertical. Move
the center of mass down approximately –5 units. Then
on the Key Info rollout, click Set Key.
Move
the center of mass down approximately –5 units. Then
on the Key Info rollout, click Set Key.If the biped jumps back to its original position, click Set Key and try again. Click Set Key when you have a crouching position as illustrated here.
Lower the center-of-mass object using the Body Vertical track.
There appears to be a glitch in the motion. There are two Body Vertical keys next to each other that are causing this problem.
 In the Key Info rollout,
click the Next Key arrow to move to the next key at frame 154. Then
click Delete Key to remove this second key.
In the Key Info rollout,
click the Next Key arrow to move to the next key at frame 154. Then
click Delete Key to remove this second key. On the
Key Info rollout, click Set Free Key to hold the bent knee position.
Set additional keys on the foot if it hyperextends before it hits
the ground, or if it goes through the ground at takeoff.
On the
Key Info rollout, click Set Free Key to hold the bent knee position.
Set additional keys on the foot if it hyperextends before it hits
the ground, or if it goes through the ground at takeoff.
The jump looks more natural now. The result should be similar to the jump in footstep_jump_final.bip.