Now that the simulation is working correctly, it's time to create the animation. Since you don't want to see the bone objects and the constraints in your animation, the first thing you'll do is hide them.
Open the sample file:
Hide the bones of the character:
 Press H and on the Select Objects dialog,
choose the skin, the floor, and all
16 steps, and then click Select.
Press H and on the Select Objects dialog,
choose the skin, the floor, and all
16 steps, and then click Select. On the
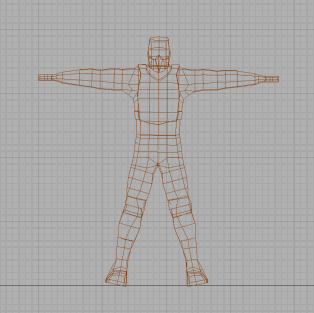
Display panel > Hide rollout, click Hide Unselected.
On the
Display panel > Hide rollout, click Hide Unselected.Now you should only be able to see the skin of your rag doll.
Create and play the animation:
 On the
Utility panel > reactor > Preview & Animation rollout,
click Create Animation.
On the
Utility panel > reactor > Preview & Animation rollout,
click Create Animation. Once
the animation calculations have completed, click on the viewport
of your choice and click Play.
Once
the animation calculations have completed, click on the viewport
of your choice and click Play.And that's a wrap! It's up to you now to tweak the various parameters on the rag doll to alter its behavior as it tumbles down the stairs. You may find some joints are too loose or tight: reduce or increase the limits accordingly. You can give both halves of the rag doll's body different settings to encourage it to fall in a given direction. Try changing its initial position and orientation or add some obstacles on the stairs.
You can see the final result of this tutorial by opening characterEnd.max from the \tutorials\reactor\ragdoll directory.
You can use the reactor constraints to hold a character together, and control how it behaves during falls, collisions, and other physical encounters.


