In the previous lesson, you finished joining up the simpler bones in the body. Now it's time to think about how to simulate joints such as the hips or shoulders. These joints are more complex than the knees or elbow, as they need to allow for rotation and they have a range of motion of greater freedom than the hinge constraint provides. To tackle these types of joints you will use Rag Doll constraints.
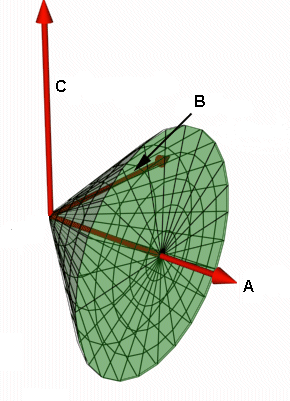
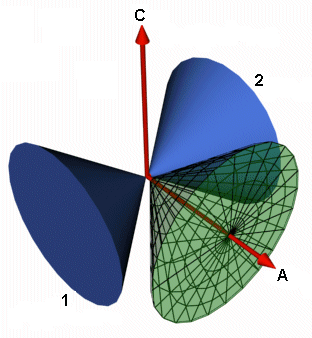
These are fairly complex, so this lesson will serve as a brief overview. The following is a picture of two objects connected by a Rag Doll constraint:
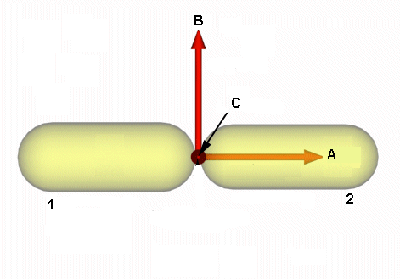
A. Twist Axis
B. Plane Axis
C. Twist x Plane Axis (outward)
1. Parent Body
2. Child Body
The Rag Doll constraint provides three axes of importance: the Twist Axis, the Plane Axis, and the Twist x Plane Axis. The twist axis is probably the easiest to visualize and you can do so by simply stretching out your arm and rotating it so that your thumb changes from pointing upwards to downwards. Your movement is just a series of rotations along the twist axis of the shoulder and elbow. In general, the twist axis should follow the length of the child body in a joint. In reactor you can specify how far on either side of neutral the constraint can twist; this need not be symmetric.
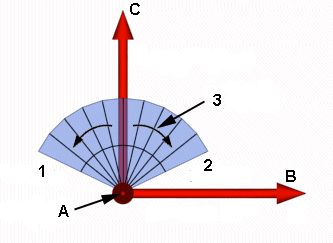
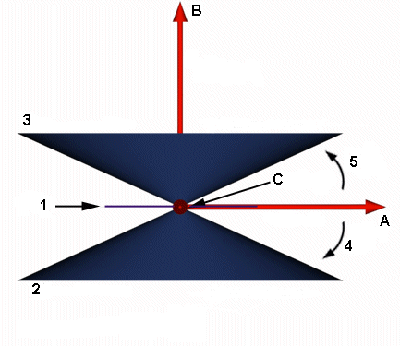
A. Twist Axis
B. Plane Axis
C. Twist x Plane Axis (outward)
1. Twist Min.
2. Twist Max.
3. Twist Range
A. Twist Axis
B. Plane Axis
C. Twist x Plane Axis (outward)
1. Twist Range
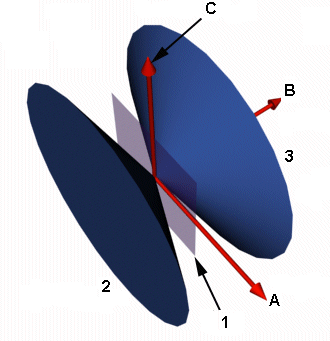
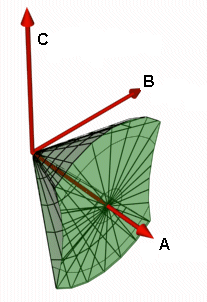
The other two axes are interlinked and together the control the allowed volume that the child body can occupy. So first you'll have a look at the cone angles that allow you to specify the volume that the child may move through:
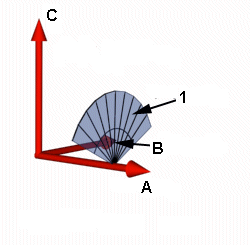
A. Twist Axis
B. Plane Axis
C. Twist x Plane Axis (outward)
1. Cone Min.
2. Cone Max.
A. Twist Axis
B. Plane Axis
C. Twist x Plane Axis (outward)
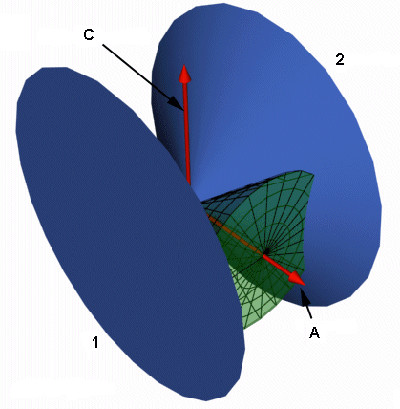
If you imagine the constraint representing your shoulder, the green volume is the range of allowed positions that your upper arm may occupy. However, you can refine the allowed volume further by using the plane axis to enforce plane limits. These limits are used to generate two further cones:
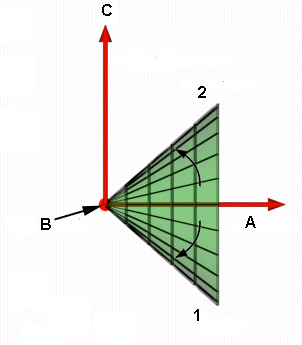
A. Twist Axis
B. Plane Axis
C. Twist x Plane Axis (outward)
1. Plane
2. Plane Min. Cone
3. Plane Max. Cone
4. Plane Min.
5. Plane Max.
A. Twist Axis
B. Plane Axis
C. Twist x Plane Axis (outward)
1. Plane
2. Plane Min. Cone
3. Plane Max. Cone
This allows you to create two different scenarios; one where the cones generated by the plane limits intersect with cone produced by the cone angles and the one where they do not:
A. Twist Axis
C. Twist x Plane Axis
1. Plane Min. Cone
2. Plane Max. Cone
A. Twist Axis
C. Twist x Plane Axis
1. Plane Min. Cone
2. Plane Max. Cone
If the volumes do not intersect, the plane limits do not have any effect in the constraint; however, by allowing the cones to intersect, and deeming the overlapping volume as invalid body positions, you can limit the allowed positions for the child body further still.
A. Twist Axis
B. Plane Axis
C. Twist x Plane Axis
These are the parameters that you will be adjusting in reactor to tweak the behavior of the character. Hopefully this brief overview will help clarify Rag Doll constraints a little for you.


