


Adding a Flare Effect
Using Video Post, you can add events that occur in a finished video. In this case, you are using Video Post to add a flare effect that simulates a bright star behind the earth sphere to give the animation more of an outer space look.
![]()
Create a dummy object:
You'll first need to create a dummy object that will serve as the “placeholder” for the flare effect.
 On the
Create panel, click Helpers > Dummy.
On the
Create panel, click Helpers > Dummy.Add a flare effect:
You'll now use Video Post to easily create an effect that will add interest to your animation.
The Video Post dialog appears.
 From
the Video Post toolbar, click Add Scene Event. In the View group,
name the Label Camera01. Click OK.
From
the Video Post toolbar, click Add Scene Event. In the View group,
name the Label Camera01. Click OK.The animation will be created using the Camera01 viewport.
 Click
Add Image Filter Event. Select Lens Effects Flare from
the drop-down list. Click OK.
Click
Add Image Filter Event. Select Lens Effects Flare from
the drop-down list. Click OK.For the Label, enter Flare Effect
 Click
Add Image Output Event. Enter wwdesigns with flare effect.
Click the Files button. For the output file name, enter wwdesigns0000.tga.
In the Targa Image Control dialog turn on 24 bit in the Bits-per-pixel
option.
Click
Add Image Output Event. Enter wwdesigns with flare effect.
Click the Files button. For the output file name, enter wwdesigns0000.tga.
In the Targa Image Control dialog turn on 24 bit in the Bits-per-pixel
option.By naming the file with four zeros at the end of the name, the program knows that you want to render an ordered sequence. Setting up your work this way will let you render a high resolution still image sequence.
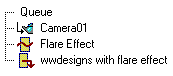
The Video Post now lists all the events you just created in a queue.
You'll now set some settings in the Lens Effects Flare dialog that will create a bright star with rays behind the earth.
A generic preview window displays a flare effect.
You can change this to display your scene.
Now that the dummy object is set as the source, you can now make changes to some settings.

You'll change a few settings to make the distant star a little more noticeable.
Click Update to see the changes.
If you cannot see any effects, move the Flare dummy object in the viewport and then click Update in the preview window again until the rays are in the desired location.
Turn on Random. Click Update.
![]()
You're now ready to render your animation. Click OK to exit the dialog.
 On the
Video Post toolbar, click Execute Sequence.
On the
Video Post toolbar, click Execute Sequence.Video Post now renders every other frames of your animation and adds the effects you created in a post-production video. Since you've selected every second frame, the rendering will go faster and the animation will play more quickly.
Depending on the speed of your computer, the rendering may take some time. While you wait, you can watch the animation progress in the frame buffer window and in the Video Post rendering progress dialog.
The RAM player lets you load high resolution still image sequences into memory and play them back.
![]()
The files load into the RAM Player.
Once the files are loaded into the RAM player, you can save them out as a movie file. Choose Save Channel A, and then select the file type and file name you want.
In this tutorial, you have created a flying logo. You have created a globe using primitive objects and texture maps. You have created and animated text to develop the logo treatment, and added gold metal material and spotlights for dramatic effect. You have added atmospheric and volume light effects, as well as a lens flare using Video Post. Finally you have rendered your animation to a still image sequence and assembled it into a movie using the RAM player.