Adding Streaks with Radial Blur


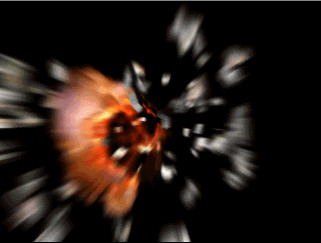
You can get a nice streaking effect using the Blur render effect. Adding a blur is just like adding a lens effect.

Add a blur effect:

  1. In the Camera01 viewport, select the PArray gizmo, right-click it, and choose Object Properties from the quad menu.
  2. In the G-Buffer group, use the spinner to set the Object ID to 2. Click OK.
  3. Choose Rendering menu > Effects.
  4. Click the Add button, choose Blur, and click OK.

Set up the blur effect:

  1. In the Blur Type panel, choose Radial.
  2. On the Pixel Selections panel, turn off Whole Image, and turn on Object ID.
  3. In the Object ID controls, use the spinner to change the ID to 2, then click the Add button.

    The number 2 appears in the Object ID list.

  4. Activate the Camera01 viewport and drag the time slider to frame 33.
  5. In the Effects rollout, click Update Scene to preview the result.

    The radial blur is added to the image.

Animate the blur effect:

Finally, you will keyframe the values and interpolation of the Blur Radial Pixel radius, so the particles fade out as they slow down toward the end of the animation.

  1. Open the Dope Sheet Editor again and in the Controller window, navigate to the Render Effects > Blur entry. Expand its tracks, and click to highlight Blur Radial Pixel Radius.
  2. Turn on Add Keys on the Track View toolbar. In the Key window, click to add keys at frames 0 and 11.
  3. Right-click a Blur Radial Pixel Radius key. Give both these keys a value of 0.0, and use stairstep interpolation between them.
  4. Click to create a key at frame 18. Give it a value of 7.0,. Leave the interpolation set to the default of Bezier.
  5. Set another key at frame 100 with a value of 1.0.
  6. Save your scene as myexplosion5.max. You can open exploding_asteroid_final.max for comparison

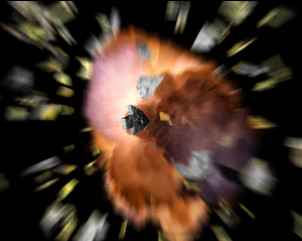
Render the animation:

  1. On the Rendering menu, choose Render. Make sure the Common tab is displayed, click it if it isn't.
  2. On the Common Parameters rollout, in the Time Output group, turn on Active Time Segment: 0 to 100.
  3. In the Render Output group, click the Files button. Name the output file of the finished explosion myexplosion2.avi, and press Enter.
  4. In the Video Compression dialog, click OK.
  5. Then click Render at the bottom of the Render Scene dialog.

    Or you can just play the provided movie exploding_asteroid_final.avi.

    TipWhen doing high-quality work, render to a still image sequence of TGA files. Then you can use the Ram Player or other methods to turn these files into a movie sequence such as AVI or MOV.

Summary

In this tutorial, you created an exploding asteroid and learned how to combine the use of many tools to create this effect. You learned how to use material effects IDs with glows, and created explosion planes with animated opacity mapping. You've created exploding fragments using PArray objects, and learned how to set visibility keys. Finally you've used Render effects and motion blur to complete the shot.